- Error code: 0x81000019 indicates that a fictitious copy cannot be created in Windows 10.
- The error message may look like this: “The specified object was not found.
- Please check the application event logs `VSS` and `SPP` for more information” If you have encountered this problem, you can read this post from Techquack to solve this problem.
In the realm of digital troubleshooting, Windows 10 users often encounter a perplexing obstacle when attempting to backup their valuable data. Dubbed as error 0x81000019, this article dives into the depths of this issue, unraveling effective solutions to conquer the backup dilemma.
Check the Status of VSS and SPP Services
To check the status of VSS and SPP services, follow these steps:
1. Press the Windows key and type “services.msc” in the search bar.
2. Open the Services app from the search results.
3. Scroll down and locate the Volume Shadow Copy service (VSS) and the Software Protection Platform service (SPP).
4. Right-click on each service and select “Properties.”
5. In the General tab, check if the service is running. If it is not, click on the “Start” button.
6. Set the Startup type to “Automatic” to ensure the services start automatically with Windows.
7. Click “Apply” and then “OK” to save the changes.
By checking the status of VSS and SPP services, you can ensure that your Windows 10 backup error 0x81000019 is resolved.
Check Storage Space on External Drive or Computer
To check the storage space on an external drive or computer, follow these steps:
1. Open File Explorer by pressing Windows key + E.
2. Locate the external drive or computer partition you want to check.
3. Right-click on it and select “Properties”.
4. In the General tab, you will see the total size and available space of the drive or partition.
If you encounter the Windows 10 backup error 0x81000019, it could be due to issues with the Volume Shadow Copy service or driver versions. To resolve this error, you can try the following solutions:
1. Update your drivers: Use a reliable driver updating tool like Outbyte Driver Updater to ensure your drivers are up to date.
2. Check the event logs: Open the Event Viewer by pressing Windows key + X, then select “Event Viewer”. Look for any relevant error messages in the Application or System event logs.
3. Run system file checker: Open Command Prompt as an administrator and type “sfc /scannow” to scan and repair any corrupted system files.
By following these steps and implementing the suggested solutions, you can fix the Windows 10 backup error 0x81000019 and ensure smooth backup operations.
Disable Third-party Security Software
To fix the Windows 10 backup error 0x81000019, it may be necessary to disable third-party security software. These programs can sometimes interfere with the backup process. Here’s how to do it:
1. Press the Windows key + R to open the Run dialog box.
2. Type “msconfig” and hit Enter to open the System Configuration window.
3. Go to the Services tab and check the “Hide all Microsoft services” box.
4. Click on “Disable all” to disable all non-Microsoft services.
5. Go to the Startup tab and click on “Open Task Manager.”
6. In the Task Manager window, disable any third-party security software by right-clicking on it and selecting “Disable.”
7. Close the Task Manager and System Configuration windows.
8. Restart your computer.
By disabling third-party security software, you can eliminate any potential conflicts that may be causing the backup error. Remember to enable the software after troubleshooting.
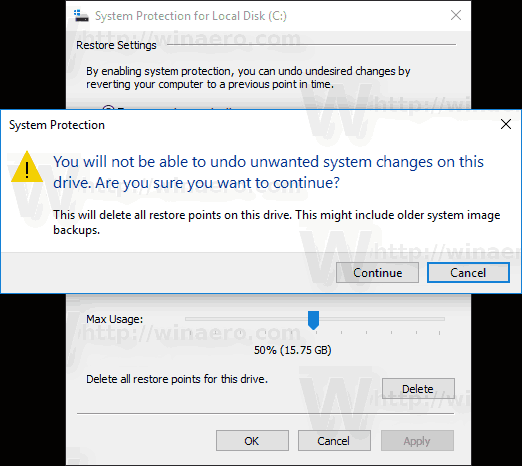
Delete Restore Points
- Open the Control Panel by pressing the Windows key and typing “Control Panel”.
- Click on the Control Panel result to open it.
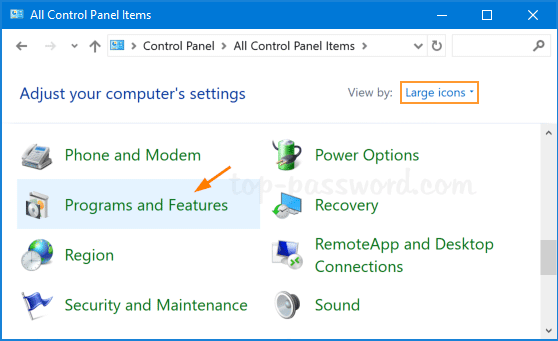
- Select the System category.
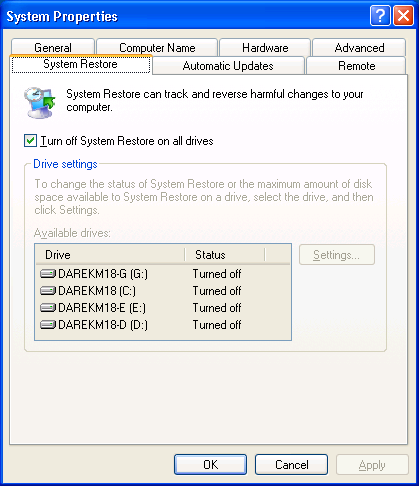
- Click on the System Protection link.
- In the System Properties window, click on the Configure button.
- Under the Disk Space Usage section, click on the Delete button.
- A new window will appear showing you a list of available restore points.
- Select the restore point you want to delete by clicking on it.
- Click the Delete button to remove the selected restore point.
- Confirm the deletion by clicking Continue.
- Repeat steps 8-10 for any additional restore points you want to delete.
- Once you have finished deleting the restore points, click OK.
- Close the System Properties window.
- Restart your computer to apply the changes.
Expand the System Reserved Partition
To expand the System Reserved Partition and fix Windows 10 Backup Error 0x81000019, follow these steps:
1. Open the Start menu and search for “Disk Management.” Click on the “Create and format hard disk partitions” option.
2. Locate the System Reserved Partition in the Disk Management window. Right-click on it and select “Shrink Volume.”
3. Enter the amount of space you want to allocate to the partition and click “Shrink.”
4. Right-click on the unallocated space that was created and select “New Simple Volume.” Follow the prompts to create a new partition.
5. Once the new partition is created, right-click on the System Reserved Partition and select “Extend Volume.”
6. Choose the newly created partition to extend the System Reserved Partition into it.
7. Follow the on-screen instructions to complete the process.
By expanding the System Reserved Partition, you can resolve the Windows 10 Backup Error 0x81000019. Remember to back up your data before making any changes to your partitions.
Run DISM and SFC Scans
To fix the Windows 10 Backup Error 0x81000019, you can run DISM and SFC scans. These scans can help identify and resolve issues with system files and components.
Here’s how to do it:
1. Press the Windows key + X and select “Command Prompt (Admin)”.
2. In the command prompt window, type “DISM /Online /Cleanup-Image /RestoreHealth” and press Enter. This will run the DISM scan and repair any corrupted files.
3. Once the DISM scan is complete, type “sfc /scannow” and press Enter. This will run the SFC scan and fix any system file issues.
4. Wait for both scans to finish and then restart your computer.
These scans can help resolve the 0x81000019 error code and ensure the stability of your Windows OS. If the issue persists, you may need to try other repair strategies or seek further assistance.

Mark Ginter is a tech blogger with a passion for all things gadgets and gizmos. A self-proclaimed "geek", Mark has been blogging about technology for over 15 years. His blog, techquack.com, covers a wide range of topics including new product releases, industry news, and tips and tricks for getting the most out of your devices. If you're looking for someone who can keep you up-to-date with all the latest tech news and developments, then be sure to follow him over at Microsoft.