- Error code 0x8024001e is a Windows update error that limits the installation of system updates and application updates.
- This problem seems to occur in both Windows 8 and Windows 10.
- It is possible that Windows XP, 7 and Vista are also affected.
- The error can be caused by malware, which in turn causes incorrect Windows settings.
- If you don’t want Windows to repair itself, you can fix it using the methods below.
Unveiling Solutions: Decoding Windows Update Error 0x8024001E
Understanding error code 0x8024001e in Microsoft Windows Update
Error code 0x8024001E in Microsoft Windows Update
If you’re encountering error code 0x8024001E while trying to update your Windows operating system, follow these steps to fix the issue:
1. Start by running a system scan to identify any errors or issues that may be causing the update problem. Open the command prompt by pressing Windows key + R, then type “cmd” and press Enter. In the command prompt, type “sfc /scannow” and press Enter to initiate the system scan.
2. If the scan detects any corrupted files, use the System File Checker (SFC) tool to repair them. In the command prompt, type “dism /online /cleanup-image /restorehealth” and press Enter. Wait for the process to complete, then restart your computer.
3. Check your internet connection to ensure you have stable and uninterrupted access. Poor connectivity can interfere with the update process. Restart your modem/router or try connecting to a different network.
4. Disable any third-party antivirus software temporarily, as they can sometimes interfere with Windows updates. Check the software’s documentation for instructions on how to disable it, or contact the software vendor for assistance.
5. Clear the Windows Update cache to resolve any conflicts or issues. Open the command prompt as administrator, then type “net stop wuauserv” followed by “net stop cryptSvc” and “net stop bits“. Press Enter after each command. Next, navigate to the “C:\Windows\SoftwareDistribution” folder and delete its contents. Finally, restart the Windows Update services by typing “net start wuauserv“, “net start cryptSvc“, and “net start bits” in the command prompt.
Solutions to fix error code 0x8024001e in Windows Update
- Press Win + R to open the Run dialog box.
- Type services.msc and press Enter to open the Services window.
- Scroll down and locate the Windows Update service.
- Right-click on Windows Update and select Restart.
- Wait for the service to restart and then check if the error is resolved.
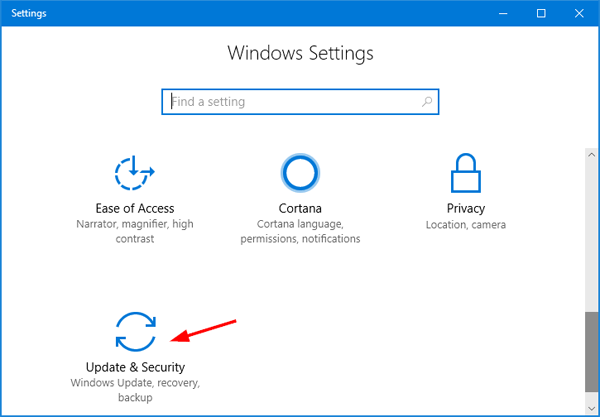
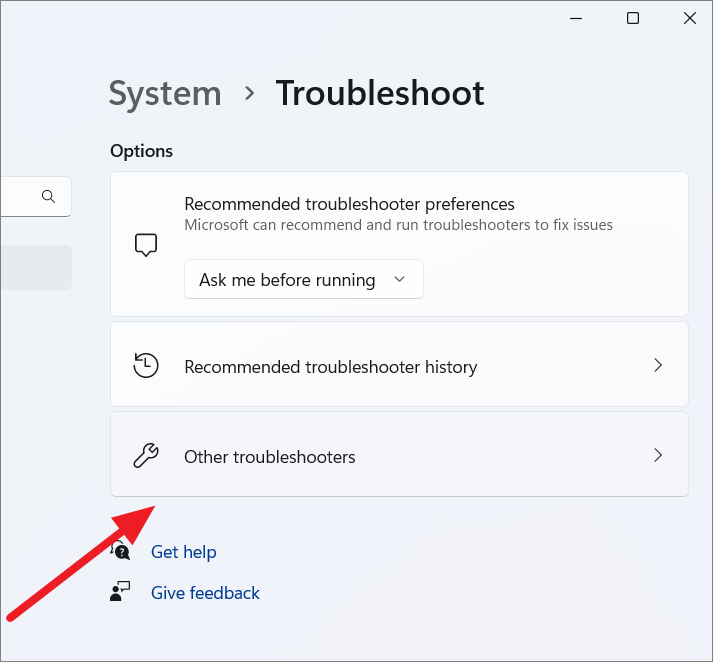
Solution 2: Run Windows Update Troubleshooter
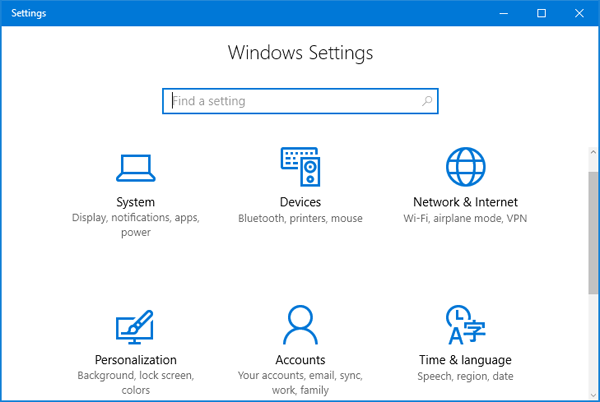
- Press Win + I to open the Settings window.
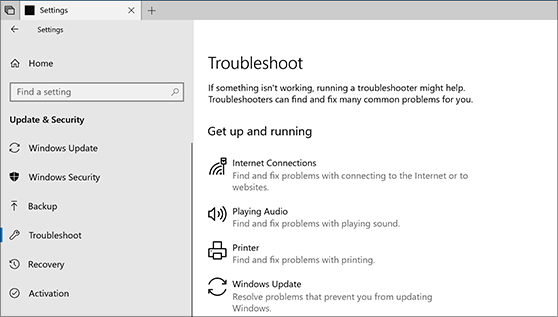
- Click on Update & Security.
- In the left pane, click on Troubleshoot.
- Scroll down and click on Windows Update.
- Click on Run the troubleshooter and follow the on-screen instructions.
- After the troubleshooter finishes, check if the error is resolved.
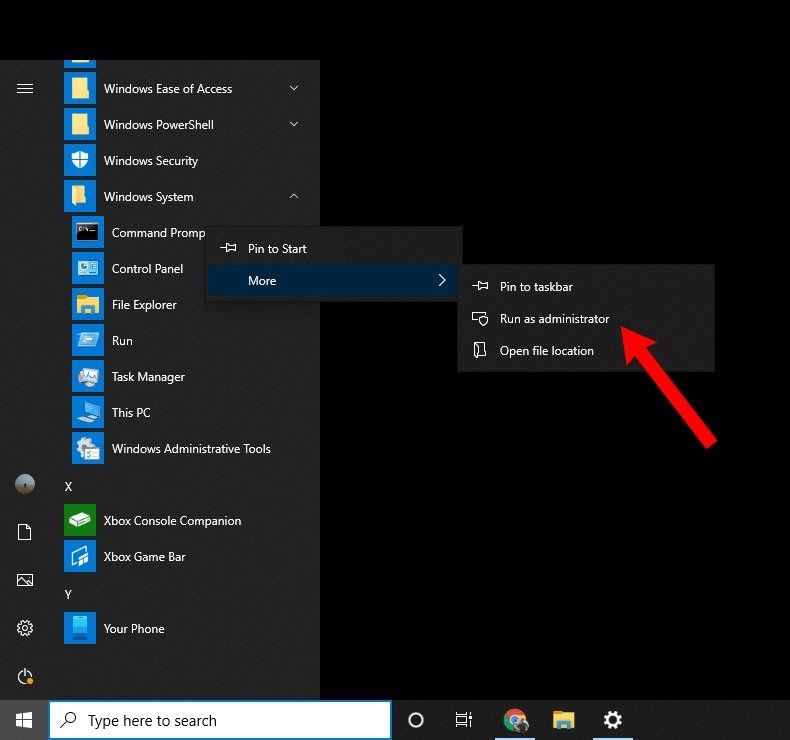
Solution 3: Reset Windows Update Components
- Open Command Prompt as an administrator.
- Type the following commands one by one and press Enter after each:
- net stop wuauserv
- net stop cryptSvc
- net stop bits
- net stop msiserver
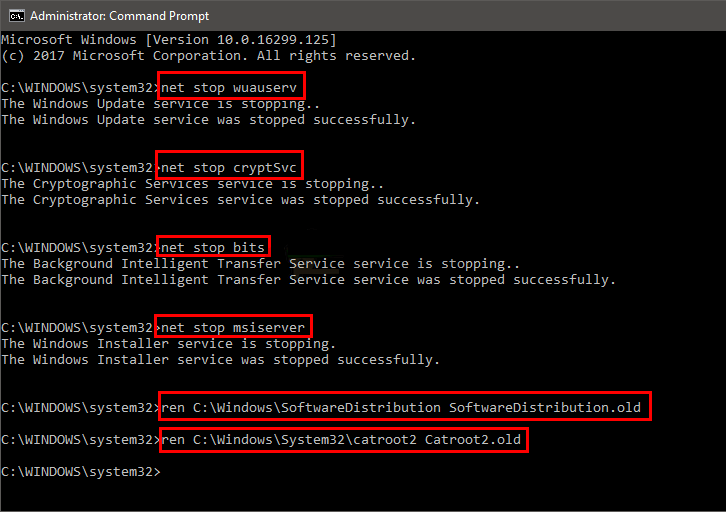
- Type the following commands one by one and press Enter after each:
- ren C:\Windows\SoftwareDistribution SoftwareDistribution.old
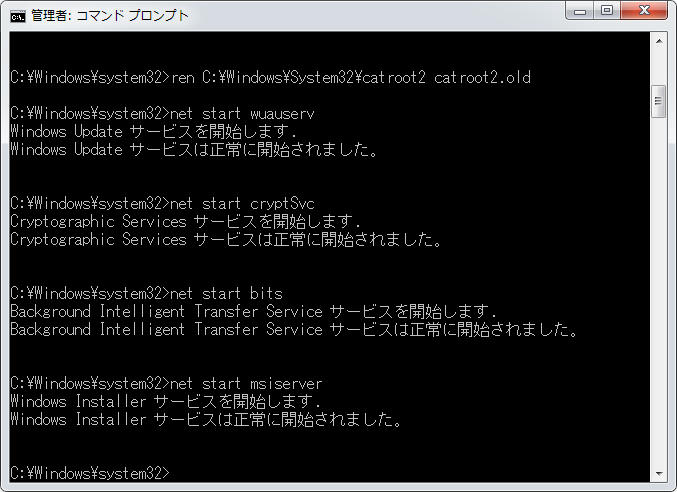
- ren C:\Windows\System32\catroot2 catroot2.old
- Type the following commands one by one and press Enter after each:
- net start wuauserv
- net start cryptSvc
- net start bits
- net start msiserver
- Close the Command Prompt and check if the error is resolved.
Fixing missing DLL files to resolve error code 0x8024001e
To fix the error code 0x8024001E related to missing DLL files in Windows Update, follow these steps:
1. Run the System File Checker tool:
a. Press the Windows key + X and select “Command Prompt (Admin).”
b. In the command prompt, type “sfc /scannow” and press Enter.
c. Wait for the scan to complete and follow any instructions given.
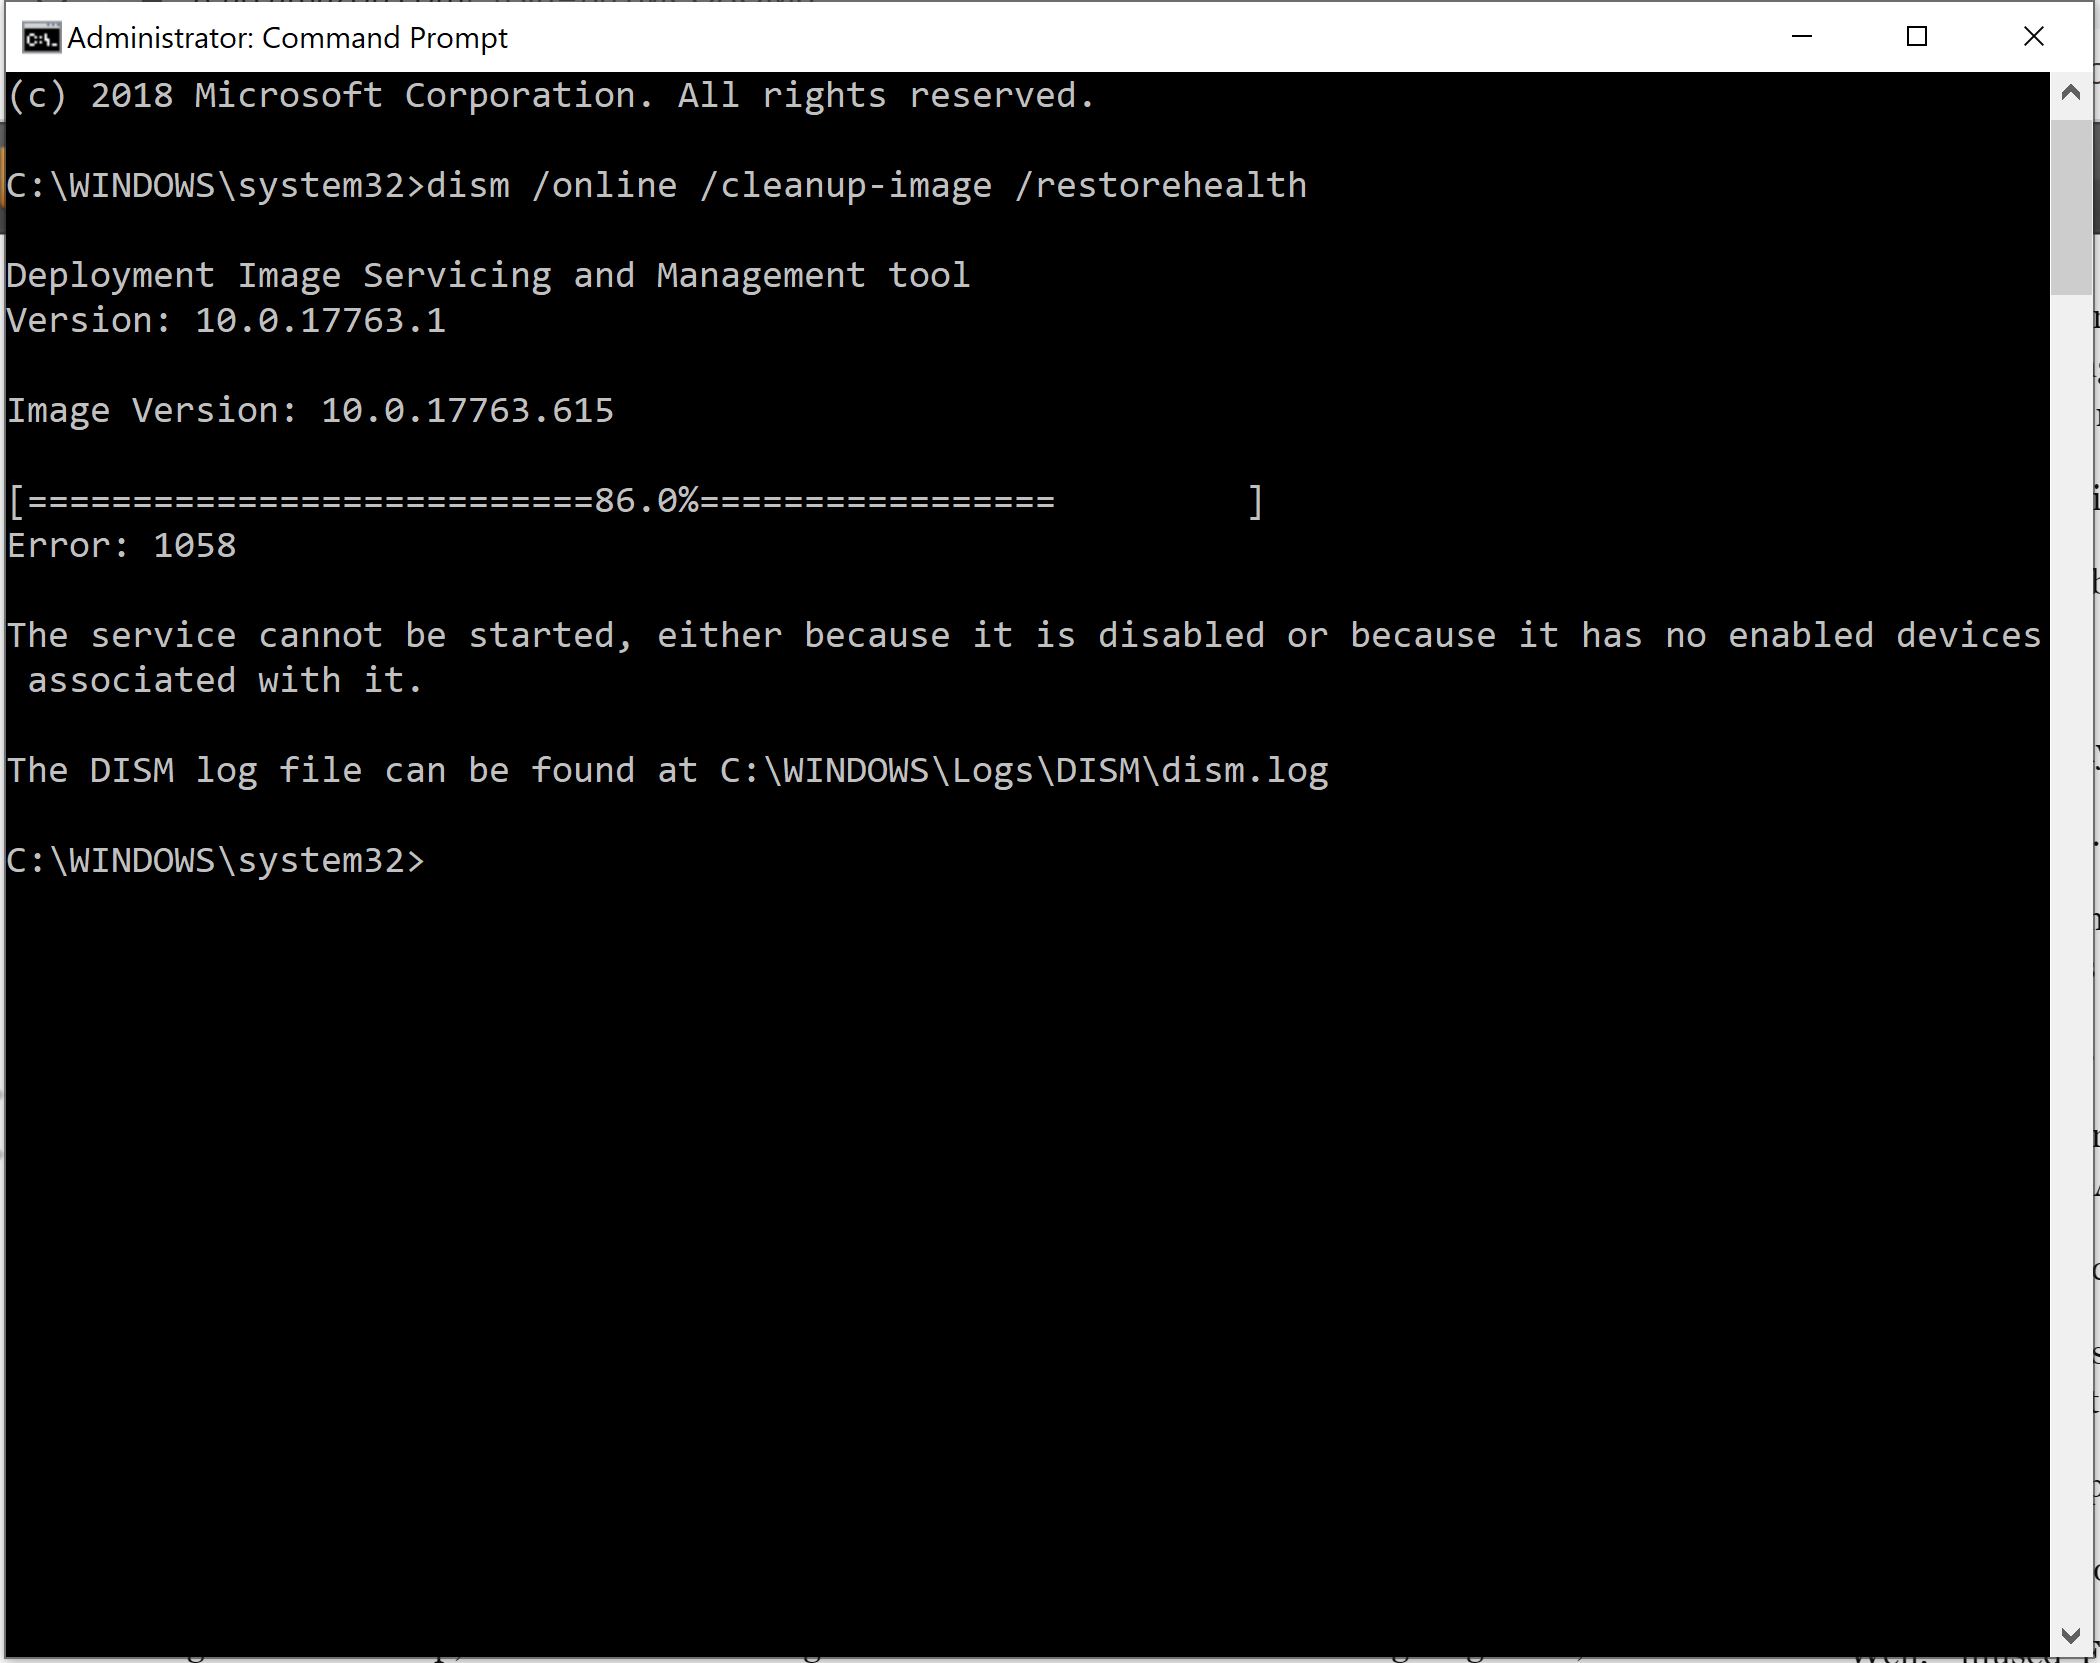
2. Use the DISM tool:
a. Open Command Prompt (Admin) as in step 1.
b. Type “Dism /Online /Cleanup-Image /RestoreHealth” and press Enter.
c. Wait for the process to finish and restart your computer.
3. Reset Windows Update components:
a. Open Command Prompt (Admin) as in step 1.
b. Type “net stop wuauserv” and press Enter.
c. Type “net stop cryptSvc” and press Enter.
d. Type “net stop bits” and press Enter.
e. Type “net stop msiserver” and press Enter.
f. Type “ren C:\Windows\SoftwareDistribution SoftwareDistribution.old” and press Enter.
g. Type “ren C:\Windows\System32\catroot2 catroot2.old” and press Enter.
h. Type “net start wuauserv” and press Enter.
i. Type “net start cryptSvc” and press Enter.
j. Type “net start bits” and press Enter.
k. Type “net start msiserver” and press Enter.
If the error persists, you may need to seek further assistance from Microsoft Support or consult the Windows Update Troubleshooter.
powershell

# Stop Windows Update Services

Stop-Service -Name wuauserv, bits -Force
# Clear Windows Update cache
Remove-Item -Path C:\Windows\SoftwareDistribution\* -Recurse -Force
# Reset Windows Update components
$WindowsUpdateComponents = @(
"net stop bits",
"net stop wuauserv",
"net stop appidsvc",
"net stop cryptsvc",
"ren %systemroot%\SoftwareDistribution SoftwareDistribution.bak",
"ren %systemroot%\system32\catroot2 catroot2.bak",
"net start bits",
"net start wuauserv",
"net start appidsvc",
"net start cryptsvc"
)
Invoke-Expression -Command $WindowsUpdateComponents
# Run Windows Update troubleshooter
$TroubleshooterPath = "C:\Windows\diagnostics\system\WindowsUpdate"
Start-Process -FilePath $TroubleshooterPath -ArgumentList "/auto" -Wait
# Restart Windows Update Services
Start-Service -Name wuauserv, bits
Write-Host "Windows Update troubleshooting completed."
Please note that this is just a sample code that performs some common troubleshooting steps for fixing Windows update errors. It stops Windows Update services, clears the update cache, resets Windows Update components, runs the built-in Windows Update troubleshooter, and restarts the services.
You can save the above code in a PowerShell script file (e.g., `fix-windows-update.ps1`), and then run it as an administrator to execute the troubleshooting steps. Keep in mind that this script may not fix all instances of the 0x8024001e error, as the cause of the error can vary.
Restarting Windows Update service and replacing SoftwareDistribution folder
To fix Windows Update Error 0x8024001E, you can try restarting the Windows Update service and replacing the SoftwareDistribution folder. Here’s how:
1. Press the Windows key + R on your keyboard to open the Run dialog box.
2. Type “services.msc” and press Enter to open the Services window.
3. Scroll down and locate the “Windows Update” service.
4. Right-click on it and select “Stop” to stop the service.
5. Open File Explorer and navigate to the C:\Windows\SoftwareDistribution folder.
6. Rename the SoftwareDistribution folder to “SoftwareDistribution.old“.
7. Go back to the Services window, right-click on the “Windows Update” service, and select “Start” to restart the service.
8. Retry the Windows Update process.
These steps can help resolve Windows Update Error 0x8024001E by restarting the Windows Update service and replacing the SoftwareDistribution folder. If the issue persists, you may need to consider using other troubleshooting methods or seeking further assistance from Microsoft support.
Using the Update Assistant tool for fixing error code 0x8024001e
To fix Windows Update Error 0x8024001E, you can use the Update Assistant tool. Here’s how:
1. Download the Update Assistant tool from the official Microsoft website.
2. Run the downloaded file to start the installation process.
3. Follow the on-screen instructions to complete the installation.
4. Once installed, open the Update Assistant tool.
5. Click on “Check for updates” to scan for any available updates for your system.
6. If updates are found, click on “Install updates” to start the update process.
7. Wait for the updates to download and install.
8. Restart your computer after the updates are installed.
9. Check if the error code 0x8024001E is resolved.
If the error persists, you may need to consider additional troubleshooting steps or seek further assistance from Microsoft support.
Performing a clean boot before updating the operating system
1. Press the Windows key + R on your keyboard to open the Run dialog box.
2. Type “msconfig” and press Enter to open the System Configuration window.
3. In the General tab, select “Selective startup” and uncheck the box next to “Load startup items.”
4. Go to the Services tab, check the box next to “Hide all Microsoft services,” and click “Disable all.”
5. Navigate to the Startup tab and click “Open Task Manager.”
6. In the Task Manager window, disable all startup items by right-clicking on each item and selecting “Disable.”
7. Close the Task Manager window and go back to the System Configuration window. Click “OK” and restart your computer.
Performing a clean boot will help eliminate any software conflicts that may be causing the update error. After the clean boot, you can proceed with updating your operating system.
Conducting a virus scan to address error code 0x8024001e
To fix the Windows Update Error 0x8024001E, conducting a virus scan is crucial. Viruses and malware can interfere with system updates and cause this error. Follow these steps to address the issue:
1. Open your antivirus software and ensure it is up to date.
2. Initiate a full system scan to detect any malicious files or programs.
3. Quarantine or remove any detected threats.
4. After completing the virus scan, restart your computer.
5. Attempt to update Windows again.
If the error persists, consider using the Windows System Repair Tool. This tool can fix common issues that may be causing the error. Additionally, ensure you have a stable internet connection and that there are no interruptions during the update process.
Remember to keep your antivirus software updated and perform regular scans to prevent future issues.
Identifying causes of Windows Update error code 0x8024001e
-
Restart Windows Update services:
- Press Windows Key + R to open the Run dialog box.
- Type services.msc and press Enter to open the Services window.
- Scroll down and locate the Windows Update service.
- Right-click on Windows Update and select Restart.
- After the service restarts, try running Windows Update again.
-
Clear Windows Update cache:
- Open Command Prompt as an administrator.
- Type the following commands one by one and press Enter after each:
- net stop wuauserv
- net stop cryptSvc
- net stop bits
- net stop msiserver
- Next, navigate to the C:\Windows\SoftwareDistribution folder.
- Delete all the files and folders within the SoftwareDistribution folder.
- Go back to the Command Prompt and type the following commands to start the services again:
- net start wuauserv
- net start cryptSvc
- net start bits
- net start msiserver
- Try running Windows Update after clearing the cache.
-
Run Windows Update Troubleshooter:
- Press Windows Key + I to open the Settings app.
- Click on Update & Security.
- Select Troubleshoot from the left-hand menu.
- Click on Additional troubleshooters.
- Scroll down and click on Windows Update.
- Click on the Run the troubleshooter button.
- Follow the on-screen instructions to complete the troubleshooting process.
-
Disable third-party antivirus software:
- Open the antivirus software installed on your computer.
- Look for an option to disable or temporarily turn off the antivirus protection.
- Disable the antivirus software or set it to a temporary pause.
- Try running Windows Update again.
- Remember to re-enable the antivirus software after completing the update.
-
Perform a clean boot:
- Press Windows Key + R to open the Run dialog box.
- Type msconfig and press Enter to open the System Configuration window.
- Go to the Services tab and check the box that says Hide all Microsoft services.
- Click on Disable all to disable all non-Microsoft services.
- Go to the Startup tab and click on Open Task Manager.
- In the Task Manager, disable all the startup items by right-clicking on each and selecting Disable.
- Close the Task Manager and go back to the System Configuration window.
- Click on OK and then Restart when prompted.
- After the computer restarts, try running Windows Update again.
Troubleshooting Windows Store apps to resolve error code 0x8024001e
If you’re experiencing error code 0x8024001e when trying to update Windows, there are a few troubleshooting steps you can try to resolve the issue.
First, make sure you have a stable internet connection and enough disk space available for the update. If these are not the issue, try the following steps:
1. Run the Windows Store Apps troubleshooter:
– Press the Windows key + R to open the Run dialog box.
– Type “ms-settings:troubleshoot” and press Enter.
– Select “Windows Store Apps” from the list and click on “Run the troubleshooter”.
– Follow the on-screen instructions to complete the troubleshooting process.
2. Reset the Windows Store cache:
– Press the Windows key + R to open the Run dialog box.
– Type “wsreset.exe” and press Enter.
– Wait for the command to execute, then try updating Windows again.
3. Reset the Windows Update components:
– Press the Windows key + X and select “Command Prompt (Admin)”.
– Type “net stop wuauserv” and press Enter.
– Type “net stop cryptSvc” and press Enter.
– Type “net stop bits” and press Enter.
– Type “net stop msiserver” and press Enter.
– Type “ren C:\Windows\SoftwareDistribution SoftwareDistribution.old” and press Enter.
– Type “ren C:\Windows\System32\catroot2 catroot2.old” and press Enter.
– Type “net start wuauserv” and press Enter.
– Type “net start cryptSvc” and press Enter.
– Type “net start bits” and press Enter.
– Type “net start msiserver” and press Enter.
– Close the Command Prompt and try updating Windows again.
If none of these steps resolve the error code 0x8024001e, you may need to seek further assistance from Microsoft Support or a qualified technician.
Deleting the Software Distribution folder and restarting Windows Update services to fix error code 0x8024001e
To fix error code 0x8024001E, you can try deleting the Software Distribution folder and restarting Windows Update services. Follow these steps:
1. Press the Windows key + R to open the Run dialog box.
2. Type “services.msc” and hit Enter.
3. In the Services window, locate and right-click on the “Windows Update” service, then select “Stop”.
4. Open File Explorer and navigate to the following location: “C:\Windows\SoftwareDistribution“.
5. Delete all the contents inside the Software Distribution folder.
6. Go back to the Services window and right-click on the “Windows Update” service, then select “Start”.
7. Close the Services window and try running Windows Update again.
This method can help resolve the error code 0x8024001E by clearing any corrupted files in the Software Distribution folder and restarting the Windows Update service.

Mark Ginter is a tech blogger with a passion for all things gadgets and gizmos. A self-proclaimed "geek", Mark has been blogging about technology for over 15 years. His blog, techquack.com, covers a wide range of topics including new product releases, industry news, and tips and tricks for getting the most out of your devices. If you're looking for someone who can keep you up-to-date with all the latest tech news and developments, then be sure to follow him over at Microsoft.