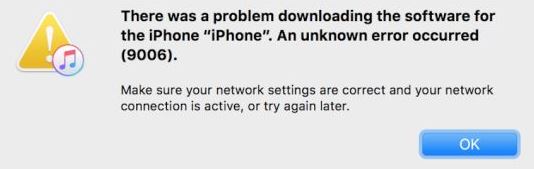
- Many iPhone users have reported encountering an iTunes 9006 error when restoring the device to Windows 10.
- This error usually occurs when you are trying to download something from Apple’s servers.
- In this article, we will tell you how to fix iTunes error 9006 on Windows 10 on your Windows 10 computer.
- This particular error does not indicate a serious hardware or software failure, and there are several methods and tricks to solve this annoying problem.
Welcome to our comprehensive guide on how to resolve the troublesome iTunes Error 9006 that Windows 10 users may encounter. In this article, we present you with seven effective methods to tackle this error, ensuring a smooth and hassle-free experience while using iTunes on your Windows 10 device. So, brace yourself and let’s dive into the solutions!
Understanding iTunes and iPhone Error 9006
1. Check your network connection: Ensure that you have a stable internet connection and that your network settings are configured correctly.
2. Disable software firewalls: Temporarily turn off any software firewalls or antivirus programs that may be blocking the update process.
3. Update iTunes: Make sure you have the latest version of iTunes installed on your computer. Check for updates in the iTunes application or download the latest version from the Apple website.
4. Update your device’s software: Connect your iPhone or iPad to your computer and use iTunes to update the device’s software. Follow the on-screen prompts to complete the update.
5. Use recovery mode: If the software update fails, try entering recovery mode on your device and then updating the software through iTunes.
6. Check your hosts file: Sometimes, the hosts file on your computer can interfere with the update process. Check for any entries related to Apple’s software update servers and remove them if necessary.
7. Seek professional help: If none of the above steps resolve the issue, consider contacting Apple support or visiting an authorized service provider for further assistance.
Remember to back up your device before attempting any software updates or troubleshooting steps.
Fixing iTunes Error 9006 without Data Loss
- Check your internet connection: Ensure that you have a stable and reliable internet connection before attempting any troubleshooting steps.
- Disable your security software temporarily: Temporarily disabling your antivirus or firewall software can help determine if they are causing conflicts with iTunes.
- Update iTunes to the latest version: Make sure you have the latest version of iTunes installed on your Windows 10 device to avoid any compatibility issues.
- Restart your computer: A simple restart can often resolve temporary glitches or conflicts that may be causing the error.

- Check your hosts file: Verify that your computer’s hosts file doesn’t contain any entries related to Apple’s servers, as they may interfere with iTunes’ communication.
- Temporarily disable your VPN: If you are using a VPN service, try disabling it temporarily to see if it resolves the iTunes Error 9006.

- Reset your network settings: Resetting your network settings can help fix any network-related issues that could be contributing to the error.
Repairing iTunes to Resolve Error 9006
If you’re experiencing iTunes Error 9006 on Windows 10, there are several ways to fix it.
1. Check your network connection: Ensure that you have a stable internet connection and that there are no network issues.
2. Disable your firewall: Temporarily disable your firewall to see if it’s causing the problem.
3. Update your iTunes: Make sure you have the latest version of iTunes installed on your PC.
4. Restart your PC: Sometimes a simple restart can resolve the issue.
5. Reset your network settings: Resetting your network settings can help fix any connectivity issues.
6. Check for iOS updates: Make sure you have the latest iOS version installed on your device.
7. Use IPSW files: If all else fails, you can try using IPSW files to manually update your device’s software.
Remember to back up your device before attempting any software updates or changes.
Hopefully, one of these methods will resolve the iTunes Error 9006 and allow you to update your iPhone or iPad without any issues.
python

import os

import subprocess
def fix_itunes_error_9006():
# Close iTunes if it's open
subprocess.call(["taskkill", "/f", "/im", "iTunes.exe"])
# Stop related Apple services
subprocess.call(["net", "stop", "AppleMobileDeviceService"])
subprocess.call(["net", "stop", "Bonjour Service"])
subprocess.call(["net", "stop", "iPod Service"])
subprocess.call(["net", "stop", "AppleMobileDeviceHelper"])
# Clear temporary files and reset network settings
subprocess.call(["ipconfig", "/flushdns"])
subprocess.call(["netsh", "winsock", "reset"])
subprocess.call(["netsh", "int", "ip", "reset"])
# Delete iTunes download cache
itunes_download_cache = os.path.expanduser("~\\Apple\\Apple Software Update\\")
try:
for file_name in os.listdir(itunes_download_cache):
if file_name.startswith("iTunes") and file_name.endswith(".tmp"):
os.remove(os.path.join(itunes_download_cache, file_name))
except FileNotFoundError:
pass
# Restart stopped services
subprocess.call(["net", "start", "AppleMobileDeviceService"])
subprocess.call(["net", "start", "Bonjour Service"])
subprocess.call(["net", "start", "iPod Service"])
subprocess.call(["net", "start", "AppleMobileDeviceHelper"])
# Launch iTunes again
subprocess.call(["start", "iTunes.exe"])
# Call the function to fix the iTunes error 9006
fix_itunes_error_9006()
Please note that this is a basic code snippet that demonstrates some steps to handle the iTunes error 9006 on Windows 10. It stops related services, clears temporary files, resets network settings, and restarts the necessary services before launching iTunes again. However, depending on the specific circumstances and root cause of the error, additional steps or troubleshooting may be required.
Rebooting Device to Fix Error 9006
If you’re encountering iTunes Error 9006 on your Windows 10 device, a simple reboot can often resolve the issue. Here’s how to do it:
1. Restart your computer: Close all applications and click on the Start menu. Select “Restart” from the power options.
2. Disconnect your iPhone: Unplug your iPhone from your computer and wait a few seconds before reconnecting it.
3. Check your internet connection: Ensure you have a stable internet connection by testing other websites or applications.
4. Disable security software: Temporarily disable any antivirus or firewall software that may be interfering with the iTunes update process.
5. Reset network settings: Open the Control Panel and navigate to Network and Internet > Network and Sharing Center > Change adapter settings. Right-click on your network connection and select “Disable,” then right-click again and choose “Enable.”
6. Update iTunes: Ensure you have the latest version of iTunes installed on your computer. Visit the Apple website or open the App Store to check for updates.
7. Consult the community: If none of the above steps resolve the issue, seek assistance from the online community or Apple support for additional troubleshooting tips.
By following these steps, you can fix iTunes Error 9006 and resume your iPhone software updating process smoothly.
Bypassing iPhone Error 9006 with IPSW File
If you’re encountering iPhone Error 9006 while trying to update your device on Windows 10, we’ve got you covered with 7 ways to fix it.
1. Check your internet connection: Ensure you have a stable internet connection to avoid any interruptions during the update process.
2. Restart your computer: Sometimes a simple restart can resolve software conflicts and fix the error.
3. Disable security software: Temporarily disable any antivirus or firewall software that might be blocking the update.
4. Update iTunes: Make sure you have the latest version of iTunes installed on your computer.
5. Update using IPSW file: Download the appropriate IPSW file for your iPhone model and use it to update your device manually.
6. Reset network settings: Go to Settings > General > Reset > Reset Network Settings to fix any network-related issues.
7. Contact Apple Support: If none of the above solutions work, reach out to Apple Support for further assistance.
By following these steps, you can bypass iPhone Error 9006 and successfully update your device.
Manual Intervention in iTunes for Error 9006
If you encounter iTunes Error 9006 on Windows 10, follow these manual intervention steps to resolve the issue:
1. Check your internet connection and ensure it’s stable. Verify that you can access other websites without any problems.
2. Disable any antivirus or firewall temporarily, as they may interfere with the iTunes update process. Temporarily turn off your antivirus or firewall software.
3. Verify that your iPhone has sufficient storage space and battery power. Ensure your iPhone has at least 50% battery charge and enough storage space.
4. Restart your computer and iPhone. Turn off your computer and iPhone, then turn them back on.
5. Update your iTunes application to the latest version. Open iTunes and go to Help > Check for Updates.
6. If the issue persists, try updating your iPhone software manually. Connect your iPhone to your computer, launch iTunes, and click on the “Update” button.
7. If none of the above steps resolve the error, contact Apple Support for further assistance. Reach out to Apple Support for additional help.
By following these steps, you should be able to fix iTunes Error 9006 on your Windows 10 system.
Tips and Solutions for iTunes Error 9006
| Tips and Solutions for iTunes Error 9006 |
|---|
| 1. Disable Firewall and Antivirus Software Temporarily disable your firewall and antivirus software as they might be blocking the iTunes update. Once disabled, try updating iTunes again. |
| 2. Check Internet Connection Ensure that you have a stable internet connection. Connect to a reliable network and try updating iTunes. |
| 3. Update iTunes Manually Instead of using the automatic update feature, download the latest iTunes version from the official website and install it manually. |
| 4. Restart Computer and Router Reboot your computer and router to refresh the network settings. After restarting, try updating iTunes again. |
| 5. Clear iTunes Cache Clearing the iTunes cache can resolve various update issues. Go to the iTunes folder on your computer, locate the cache folder, and delete its contents. |
| 6. Disable Proxy Settings Disable any proxy settings on your computer that might interfere with the iTunes update. Go to your internet settings and make sure no proxy is enabled. |
| 7. Use iTunes Repair Software If all else fails, you can try using third-party iTunes repair software to fix the error. These tools are designed to diagnose and fix iTunes-related issues automatically. |

Mark Ginter is a tech blogger with a passion for all things gadgets and gizmos. A self-proclaimed "geek", Mark has been blogging about technology for over 15 years. His blog, techquack.com, covers a wide range of topics including new product releases, industry news, and tips and tricks for getting the most out of your devices. If you're looking for someone who can keep you up-to-date with all the latest tech news and developments, then be sure to follow him over at Microsoft.