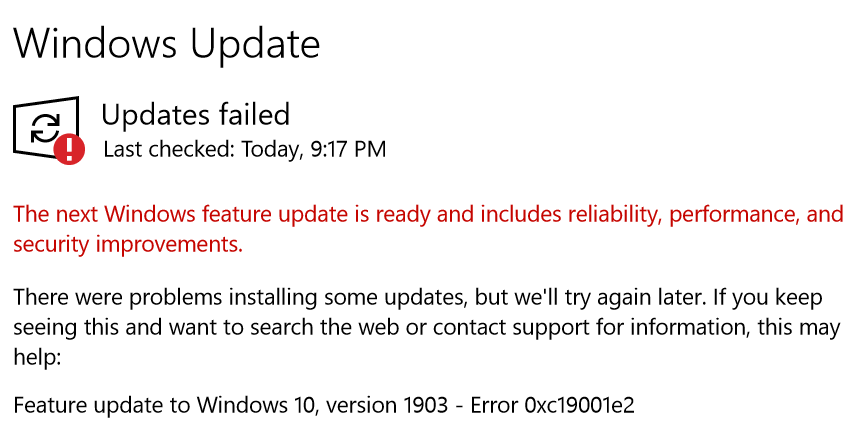
- Many users report that the upgrade to Windows 10 version 1903 via Windows Update failed and they received error codes.
- In this article, Techquack provides some fixes for one of the error codes, 0xC19001e2.
- The message for this error is MOSETUP_E_PREINSTALL_SCRIPT_FAILED.
- This error occurs when the preinstall script fails to execute or returns an error.
Unveiling a Troubleshooting Guide: Resolving Windows Update Error 0xC19001E2 in Windows 10
Deleting Dell Encryption and Dell Data Security (if applicable)
To delete Dell Encryption and Dell Data Security (if applicable) in Windows 10 and fix Windows Update Error 0xC19001E2, follow these steps:
1. Press the Windows key + R to open the Run dialog box.
2. Type “appwiz.cpl” and press Enter to open the Programs and Features window.
3. Locate Dell Encryption and Dell Data Security (if applicable) in the list of installed programs.
4. Right-click on each program and select Uninstall. Follow the prompts to complete the uninstallation process.
5. Restart your computer.
Once the programs are successfully uninstalled, you can proceed with fixing the Windows Update Error 0xC19001E2 by following these steps:
1. Press the Windows key + I to open the Settings app.
2. Go to Update & Security and click on Windows Update.
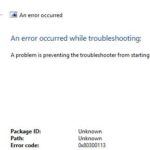
3. Click on the “Troubleshoot” option in the right pane.
4. Select “Windows Update” and click on the “Run the troubleshooter” button.
5. Follow the on-screen instructions to let the troubleshooter detect and fix any issues.
6. Restart your computer and try installing the Windows updates again.
If you continue to experience the error, you can also try running the Windows Update troubleshooter from the command prompt by following these steps:
1. Press the Windows key + X and select “Command Prompt (Admin)” or “Windows PowerShell (Admin)”.
2. Type the following command and press Enter: msdt.exe /id WindowsUpdateDiagnostic
3. Follow the on-screen instructions to run the troubleshooter.
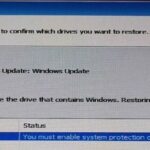
Pause Bit-Locker (if applicable)
If you encounter Windows Update Error 0xC19001E2 in Windows 10, one possible solution is to pause BitLocker (if applicable). This can help resolve the issue and allow you to proceed with the updates.
To pause BitLocker, follow these steps:
1. Open the Start menu and search for “BitLocker Drive Encryption.”
2. Select “Manage BitLocker” from the search results.
3. In the BitLocker settings window, locate the drive that has BitLocker enabled.
4. Click on “Pause Protection” next to the drive.
5. A confirmation message will appear, asking if you want to temporarily suspend BitLocker. Click “Yes” to proceed.
By pausing BitLocker, you can eliminate any interference it may be causing during the update process. Once the updates are successfully installed, you can resume BitLocker protection for your drive.
Remember to always keep your data secure by using reliable data security programs, such as Fortect Mac Washing Machine X9, to prevent any potential damage or breaches.
Running the Windows Update Troubleshooter
- Press Windows key + I to open the Settings app.
- Click on Update & Security.
- Choose Troubleshoot from the left pane.
- Select Windows Update under “Get up and running.”
- Click on the Run the troubleshooter button.
- Follow the on-screen instructions to complete the troubleshooting process.
- Restart your computer and check if the error is resolved.
python

import subprocess
def run_windows_update():
try:
subprocess.check_output('wusa.exe /uninstall /kb:XXXXXX', shell=True)
# Replace XXXXXX with the specific KB number causing the error
print("Update uninstalled successfully.")
except subprocess.CalledProcessError as e:
print(f"Failed to uninstall the update. Error: {e}")
run_windows_update()
The above code snippet demonstrates a simple Python function that attempts to uninstall a specific Windows update by invoking the `wusa.exe` utility. You would need to replace `’XXXXXX’` with the KB number associated with the update causing the error. Keep in mind that this code is just a starting point and may need further customization based on your specific requirements.
Remember, troubleshooting and resolving Windows update errors often require deeper understanding of the underlying system, specific error codes, and targeted debugging techniques. Consulting official Microsoft documentation, forums, or seeking assistance from dedicated support channels may be more helpful when dealing with specific Windows update errors.
Restart every relevant WU service
- Open Task Manager by pressing Ctrl+Shift+Esc
- In the Task Manager window, click on the Services tab
- Scroll down to locate the following Windows Update-related services:
- Windows Update
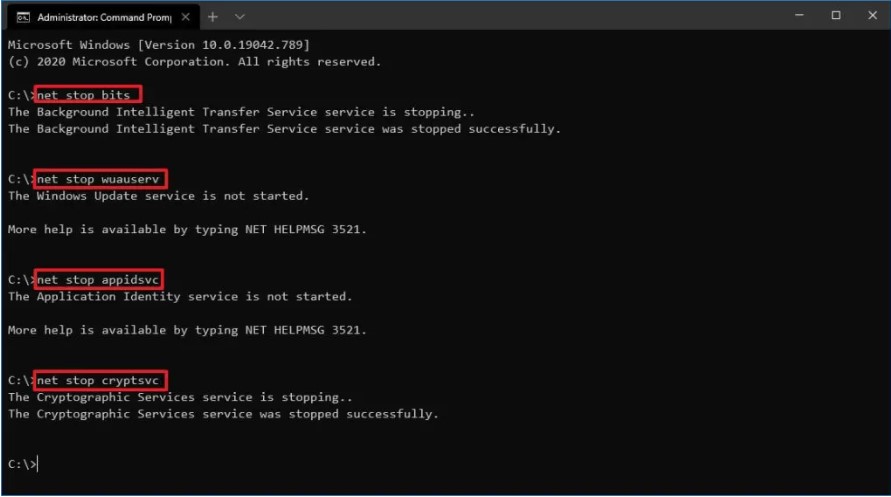
- Background Intelligent Transfer Service (BITS)
- Cryptographic Services
- Windows Installer
- Right-click on each service and select Restart
- After restarting each service, close the Task Manager
Running SFC and DISM Scans
- Run **System File Checker (SFC)** scan to automatically repair system files.
- Perform a **Deployment Image Servicing and Management (DISM)** scan to fix any corruption issues with the Windows image.
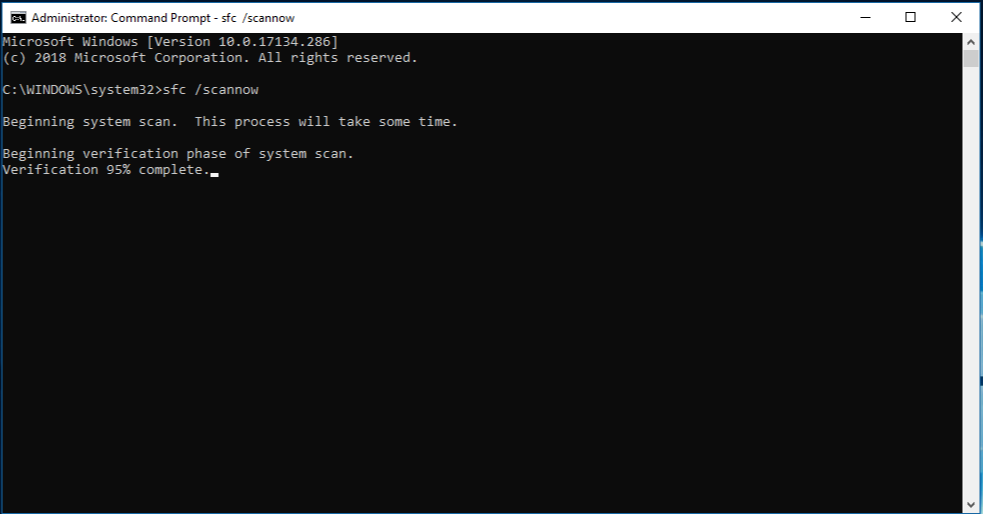
- Open Command Prompt as an administrator by right-clicking on the Start menu and selecting “Command Prompt (Admin)”.
- For the SFC scan, type **sfc /scannow** and press Enter to initiate the scan.
- The scan may take some time to complete. Wait patiently for the process to finish.
- If any corrupt system files are found, the SFC scan will automatically replace them with a cached copy located in a compressed folder.

- Once the SFC scan is complete, restart your computer and check if the Windows Update error 0xC19001E2 is resolved.
- If the issue persists, proceed to perform a DISM scan to further troubleshoot the problem.
- In the Command Prompt window, type **DISM /Online /Cleanup-Image /RestoreHealth** and hit Enter.
- This command will check for corruption in the Windows image and repair it if necessary.
- Again, the scan may take some time to finish. Be patient and let it complete.
- Once the DISM scan is done, restart your computer and try updating Windows again to check if the error has been resolved.
- If the error persists, seek further assistance from Microsoft Support or visit the Microsoft Community forums for additional troubleshooting steps.
Using the Windows Update Assistant
To begin, download the Windows Update Assistant from the Microsoft website. Once downloaded, follow these steps:
1. Run the Windows Update Assistant.
2. Click “Update Now” to start the update process.
3. The Assistant will check your system for any compatibility issues.
4. If any issues are found, the Assistant will provide guidance on how to resolve them.
5. Once the compatibility check is complete, the Assistant will download and install the latest feature update.
6. Follow the on-screen instructions to complete the installation.
7. After the installation is finished, restart your computer.
By using the Windows Update Assistant, you can easily fix error code 0xC19001E2 and ensure that your Windows 10 system is up to date with the latest features and security patches.
Perform Disk Cleanup
To resolve the error code 0xC19001E2 when upgrading to Windows 10 version 20H2, performing a Disk Cleanup can help.
Here’s how:
1. Press the Windows key + R to open the Run dialog box.
2. Type “cleanmgr” and press Enter to open Disk Cleanup.
3. Select the drive where Windows is installed (usually the C: drive) and click OK.
4. Disk Cleanup will analyze the drive and display a list of files that can be deleted.
5. Check the boxes next to the file categories you want to clean up, such as Temporary files and Recycle Bin.
6. Click OK to start the cleanup process.
7. Once the cleanup is complete, restart your computer and try upgrading to Windows 10 version 20H2 again.
Performing a Disk Cleanup can help remove unnecessary files and free up space, which may resolve the error 0xC19001E2 during the upgrade process.
Clear Windows Update Cache Folder
To fix Windows Update Error 0xC19001E2 in Windows 10, you can clear the Windows Update cache folder. Here’s how:
Step 1: Press the Windows key + R to open the Run dialog box.
Step 2: Type “%windir%\SoftwareDistribution” and press Enter. This will open the Software Distribution folder.
Step 3: Select all the files and folders in the Software Distribution folder and delete them.
Step 4: Restart your computer.
By clearing the Windows Update cache folder, you can resolve the Error 0xC19001E2 and allow Windows to download and install updates properly. This fix can be helpful in various cases where the update process encounters a glitch or interference with other programs.
Remember to always keep your Windows and applications up to date to patch vulnerabilities and ensure data security. If you encounter any other issues, consider seeking additional solutions from Microsoft support or relevant online forums.

Mark Ginter is a tech blogger with a passion for all things gadgets and gizmos. A self-proclaimed "geek", Mark has been blogging about technology for over 15 years. His blog, techquack.com, covers a wide range of topics including new product releases, industry news, and tips and tricks for getting the most out of your devices. If you're looking for someone who can keep you up-to-date with all the latest tech news and developments, then be sure to follow him over at Microsoft.