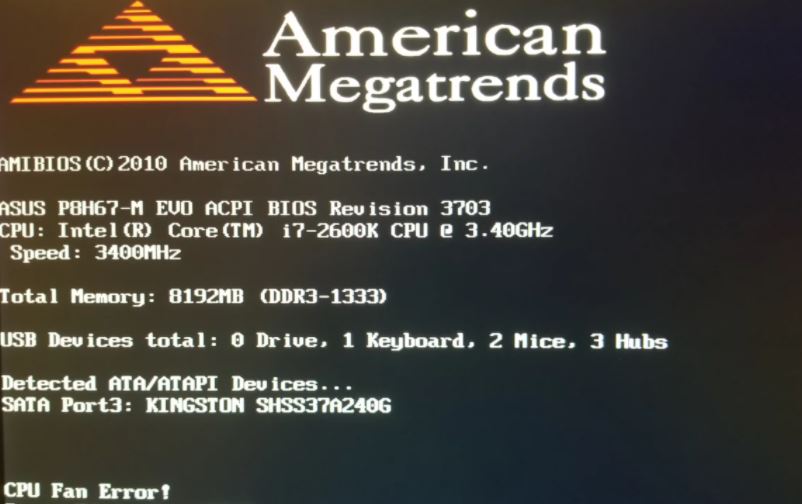
- CPU fan error is a common error message that can appear when you start up a Windows desktop or laptop computer.
- Usually, the warning is triggered after the computer shuts down due to overheating.
- This can occur when the fan(s) cannot cool the equipment properly.
- If the fans are not working properly and the computer continues to overheat, it can cause permanent damage to several hardware components.
- There are ways to determine the cause of overheating and the resulting error messages and correct them.
Keeping your computer’s CPU cool is essential for its optimal performance and longevity. However, encountering a CPU fan error in your BIOS can be quite frustrating. In this article, we will explore effective and swift solutions to rectify this issue, ensuring your processor stays cool and your system runs smoothly.
Understanding CPU Fan Errors
When encountering a CPU fan error, it’s important to take quick action to prevent potential damage to your computer. The CPU fan plays a crucial role in keeping your Central Processing Unit cool during operation. Ignoring this error can lead to overheating, which can result in system shutdowns or even permanent hardware damage.
To quickly fix a CPU fan error in the BIOS, follow these steps:
1. First, ensure that your computer is powered off and disconnected from the power source.
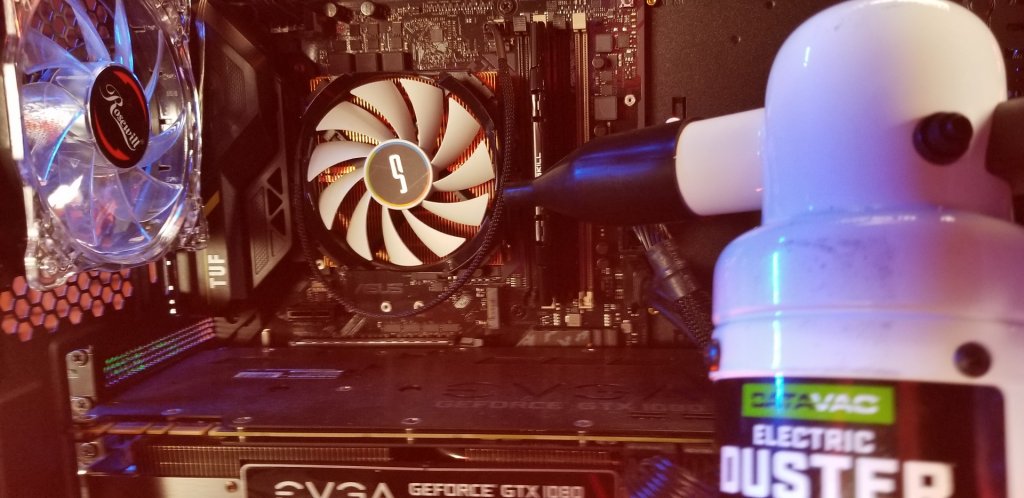
2. Open your computer’s casing and locate the CPU fan. Check for any visible damage or obstructions, such as dust or debris, that may be causing the error.
3. Carefully clean the fan and heatsink using compressed air or a soft brush to remove any dust buildup.
4. Check the fan’s connection to the motherboard. Ensure it is securely plugged in.
5. Restart your computer and enter the BIOS setup by pressing the designated key during the boot process (refer to your computer’s manual for the specific key).
6. In the BIOS setup, navigate to the “Hardware Monitoring” or similar section, where you can adjust fan speeds and settings.
7. Look for any options related to the CPU fan and ensure they are set correctly. Enable any safeguards or warnings that may prevent overheating.
8. Save your changes and exit the BIOS. Your computer should now boot without the CPU fan error message.
Remember, it’s crucial to address CPU fan errors promptly to avoid potential consequences. If the error persists or if you’re unsure about performing these fixes yourself, consult a professional for assistance.
Causes of CPU Fan Errors
CPU fan errors can occur for a variety of reasons and can result in consequences such as overheating and system shutdown. Here are some possible causes and fixes for CPU fan errors:
1. Incorrect fan speed settings: Access the BIOS by pressing DEL or F2 during startup and check the fan speed settings. Make sure they are set correctly.
2. Fan not detected: Ensure that the fan is properly connected to the motherboard. Check the fan cable for any damage or loose connections.
3. Faulty fan: If the fan is not spinning or making strange noises, it may be time to replace it with a new one.
4. Dust buildup: Clean the fan and heatsink to remove any dust or debris that may be hindering its performance.
5. Update BIOS: Visit the manufacturer’s website and download the latest BIOS version for your motherboard. Updating the BIOS can sometimes fix fan errors.
Remember to handle all hardware components with care and follow proper safety precautions. If you are unsure or uncomfortable performing any of these steps, it is recommended to seek professional assistance.
Troubleshooting CPU Fan Issues
If you’re encountering a CPU Fan Error in BIOS, don’t panic. Here are some quick steps to help you troubleshoot and fix the issue:
1. Check the physical connection: Ensure that the CPU fan is properly connected to the motherboard. Make sure it’s securely plugged in and the cables are not loose or damaged.
2. Clean the fan and heatsink: Over time, dust and debris can accumulate on the fan and heatsink, causing it to work less efficiently. Use compressed air or a soft brush to clean them gently.
3. Adjust fan speeds in BIOS: Access your computer’s BIOS settings by restarting your PC and pressing the designated key (usually F2 or Del) during startup. Navigate to the “Hardware Monitor” or similar section and look for “CPU Fan Speed Control.” Ensure it is set to “Auto” or adjust the fan speed manually if needed.
4. Update BIOS firmware: Visit the manufacturer’s website and download the latest BIOS firmware for your specific motherboard model. Follow the instructions provided to update the BIOS.
Remember to always exercise caution when working with hardware components. If you’re unsure or uncomfortable performing these steps, it’s best to seek professional assistance.
Checking Fan Connections
If you’re encountering a CPU fan error message during boot-up, it’s important to check your fan connections. This error message is usually displayed when the computer detects an issue with the fan, and it’s crucial to address it promptly to prevent overheating and potential damage to your system.
To fix this error, first, ensure that your computer is turned off and unplugged. Open the PC casing and locate the CPU fan. Check if the fan is securely connected to the motherboard. If not, gently reconnect it, making sure it is properly seated.
Next, inspect the fan’s power cable. Ensure that it is connected to the appropriate header on the motherboard. If it is loose or disconnected, reconnect it firmly.
After reconnecting the fan, close the PC casing and plug in your computer. Power it on and access the BIOS by pressing the Del or F2 key (depending on your system) during the boot process.
Navigate to the Hardware Monitor or a similar tab in the BIOS. Verify that the CPU fan is detected and functioning properly. If it is, save and exit the BIOS. If not, you may need to replace the fan or seek further assistance.
By checking your fan connections, you can quickly resolve the CPU fan error message and ensure that your system remains cool and protected during operation.
Troubleshooting Water-cooled Systems
If you encounter a CPU fan error message in your BIOS, there are a few steps you can take to quickly resolve the issue. First, ensure that the CPU fan is properly connected and functioning. Check for any loose cables or obstructions that may be preventing the fan from spinning.
If the fan is working correctly, you can try updating your BIOS to the latest version. Visit your motherboard manufacturer’s website for instructions on how to update the BIOS.
Additionally, check the BIOS settings to make sure the fan speed is properly configured. Adjust the settings if necessary to ensure optimal performance and cooling.
If you continue to experience issues, it’s possible that the fan itself may be faulty. Consider replacing the fan with a compatible model to resolve the error message.
Remember to always follow proper safety precautions when handling computer components.
Checking the BIOS for Errors
If you encounter a CPU Fan Error in your BIOS, follow these steps to quickly fix it.
1. Start by shutting down your computer and powering it off completely.
2. Open the case of your desktop computer or remove the bottom panel of your laptop to access the CPU fan.
3. Check if the fan is properly connected to the motherboard. Ensure that the fan cable is securely plugged into the appropriate header.
4. Inspect the fan for any physical damage or obstructions. Clean the fan blades if necessary to improve airflow.
5. Restart your computer and enter the BIOS setup. Press the DEL or F2 key (depending on your motherboard) repeatedly during the startup process.
6. Look for the hardware monitor or system health section in the BIOS. Locate the CPU fan speed monitoring option and make sure it is enabled.
7. Save your changes and exit the BIOS. Your computer should now boot up without the CPU Fan Error.
Remember, a functional CPU fan is crucial for cooling your CPU and preventing overheating issues. If the error persists or if you notice any abnormalities, it may be wise to consult a professional technician for further assistance.
Checking Other Fans for Issues
If you’re encountering a CPU Fan Error in your BIOS, it’s important to check your other fans for any issues. Faulty fans can lead to overheating, potentially causing damage to your central processing unit (CPU) and other PC components. Here’s what you need to do:
1. Open your desktop computer or laptop and locate the fans. These are usually found on the CPU, rear, or sides of the unit.
2. Inspect the fans for any physical damage or obstructions that may be preventing them from spinning properly. Remove any dust or debris that may have accumulated.
3. Ensure that the fans are securely connected to the motherboard or power supply.
4. Restart your computer and enter the BIOS by pressing the designated key (usually indicated during startup).
5. Look for any error messages related to the fans. If you see a CPU Fan Error or similar message, it means that there’s an issue with your CPU fan.
6. Check the BIOS settings and make sure the fan speed is set correctly. You may need to adjust the fan speed or enable any safeguards that are available in your BIOS.
By following these steps, you can quickly diagnose and resolve CPU Fan Error issues, ensuring that your computer stays cool and functions optimally.
Ensuring Proper Ventilation
If you’re encountering a CPU Fan Error in your BIOS, it’s important to address it quickly to prevent overheating and potential damage to your PC components. Here are a few steps to ensure proper ventilation:
1. Power off your computer completely.
2. Open your computer case and locate the CPU fan.
3. Check for any physical obstructions or dust buildup on the fan blades and surrounding areas. Clear any debris carefully.
4. Ensure that the CPU fan is securely connected to its designated header on the motherboard.
5. If the fan is connected properly but still not functioning, you may need to replace it with a new one.
6. Once everything is in order, close the case and power on your computer.
7. Enter the BIOS settings by pressing the specified key during startup (usually F2 or Del).
8. Look for the “Hardware Monitor” or similar section in the BIOS menu.
9. Locate the CPU fan speed setting and ensure it is set to “Enabled” or “Auto.”
10. Save the changes and exit the BIOS.
By following these steps, you can quickly fix the CPU Fan Error and ensure proper ventilation for your system.
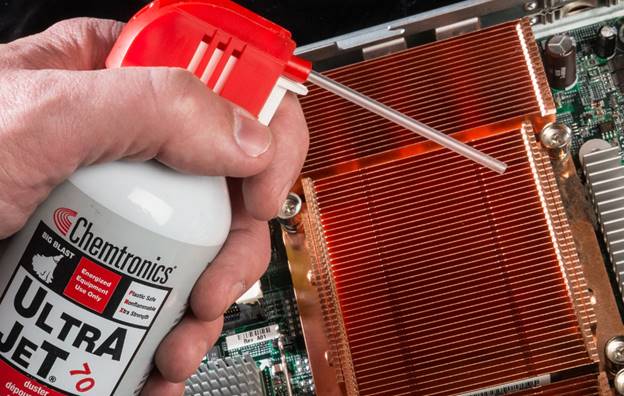
Cleaning Fans and Vents
- Prevent overheating: Regularly cleaning computer fans and vents is crucial to prevent overheating and maintain optimal performance.
- Power off and unplug: Before cleaning, make sure to power off your computer and unplug it from the electrical outlet for safety purposes.
- Remove the case: Open the computer case or panel to access the internal components.
- Locate the fans and vents: Identify the fan units and vents inside your computer that require cleaning. These are usually found near the CPU and GPU.
- Use compressed air: Take a can of compressed air and blow out the accumulated dust and debris from the fans and vents. Maintain a reasonable distance to avoid damaging the components.
- Avoid static discharge: To prevent any static electricity damage, it’s recommended to ground yourself by touching a metal object before working inside the computer.
- Remove stubborn dirt: If there is persistent dirt or dust, you can gently wipe the fan blades or surfaces using a lint-free cloth or cotton swab. Be careful not to apply excessive force.
- Reassemble and test: Once the cleaning is complete, carefully reassemble the computer case or panel. Plug it back in and power it on to ensure the fans are running smoothly without any errors.
- Maintain regular cleaning: Make a note to clean your computer fans and vents periodically to prevent future issues and maintain optimal airflow for cooling.
Dealing with the Consequences of a CPU Fan Failure
If you are dealing with the consequences of a CPU fan failure and need to quickly fix the CPU fan error in BIOS, follow these steps:
1. Start by powering off your computer.
2. Open the BIOS settings by pressing the designated key during startup (usually F2, F10, or Del).
3. Look for the “Hardware Monitor” or “PC Health” section in the BIOS menu.
4. Locate the CPU fan settings and make sure it is enabled.
5. Check the fan’s RPM (revolutions per minute) and make sure it is within the recommended range.
6. If the fan is not detected or not working properly, try reseating the fan connector on the motherboard.
7. Clean any dust or debris from the fan and the heatsink to ensure proper cooling.
8. If the issue persists, consider replacing the CPU fan with a compatible and functional one.
Remember, keeping your CPU cool is crucial for optimal performance and longevity.

Mark Ginter is a tech blogger with a passion for all things gadgets and gizmos. A self-proclaimed "geek", Mark has been blogging about technology for over 15 years. His blog, techquack.com, covers a wide range of topics including new product releases, industry news, and tips and tricks for getting the most out of your devices. If you're looking for someone who can keep you up-to-date with all the latest tech news and developments, then be sure to follow him over at Microsoft.