- The “Undoing Changes on PC” error in Windows 11 can occur in a variety of cases.
- Some users report that the error occurred after a system update, while others encountered it after upgrading from Windows 10.
- There are many different reasons that can cause errors during the upgrade process.
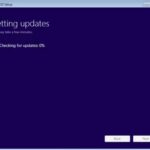
- Check for updates on Windows 11 is a simple process that can be completed in just a few steps.
Introducing: Unraveling the Windows 11 Mystery of Undoing Changes
Troubleshooting the “Undoing Changes Made to Your Computer” Error
If you’re encountering the “Undoing Changes Made to Your Computer” error on Windows 11, here are some steps you can take to fix it:
1. Restart your computer: Sometimes a simple restart can resolve the issue. Press the power button to turn off your PC, then turn it back on.
2. Use Command Prompt: Open Command Prompt as an administrator. Type “shutdown /r /t 0” and press Enter. This will restart your computer forcefully.
3. Check for pending updates: Go to Settings > Windows Update and click on “Check for updates“. Install any available updates and restart your computer.
4. Use System Restore: If the error persists, you can try using System Restore to revert your computer to a previous state. Type “rstrui” in the Windows search bar, select a restore point, and follow the on-screen instructions.
5. Perform a clean boot: A clean boot can help identify software conflicts. Type “msconfig” in the Windows search bar, go to the “Services” tab, check “Hide all Microsoft services“, then click “Disable all“. Go to the “Startup” tab and click “Open Task Manager“. Disable all startup items, close Task Manager, and restart your computer.
Hopefully, these steps resolve the “Undoing Changes Made to Your Computer” error and get your Windows 11 PC back to normal.
Resolving Error Codes 0x800f0922 or 0x800f0988 During Windows 11 Update
If you encounter Error Codes 0x800f0922 or 0x800f0988 during a Windows 11 update, follow these steps to fix the issue:
1. Restart your computer and try the update again. Sometimes a simple restart can resolve the problem.
2. Check your internet connection. Make sure you have a stable internet connection before initiating the update.
3. Run the Windows Update Troubleshooter. This built-in tool can automatically detect and fix common update issues. To do this, follow these steps:
– Press the Windows key + I to open the Settings app.
– Go to Update & Security > Troubleshoot.
– Select Windows Update and click on Run the troubleshooter.
4. Use the DISM and SFC tools to repair system files. These tools can fix corrupted files that may be causing the update error. Open Command Prompt as an administrator, then run the following commands one by one:
– dism /online /cleanup-image /restorehealth
– sfc /scannow
If these steps don’t resolve the issue, you may need to seek further assistance from Microsoft support or consult with a professional technician.
Utilizing Command Prompt to Fix the “Undoing Changes Made to Your Computer” Error
To fix the “Undoing Changes Made to Your Computer” error on Windows 11, you can utilize Command Prompt. Follow these steps:
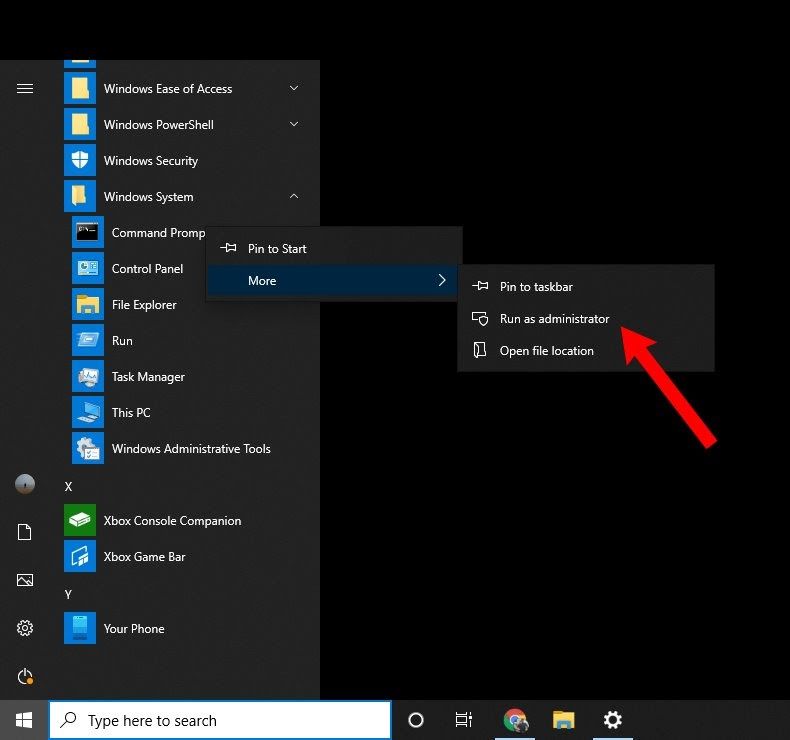
1. Press the Windows key + X and select “Command Prompt (Admin)” from the menu.
2. In the Command Prompt window, type “chkdsk /f /r” and press Enter. This command will check and repair any issues with your hard drive.
3. Once the process is complete, type “sfc /scannow” and press Enter. This command will scan and fix any corrupted system files.
4. After the scan finishes, restart your computer and check if the error still persists.
If the error continues to occur, you may need to consider more advanced troubleshooting methods or seek assistance from a professional. Remember to always back up your important files before attempting any system changes.
python

import os

import subprocess
def undo_changes():
# Create a system restore point
subprocess.run(["powershell", "-Command", "Checkpoint-Computer -Description 'Undo Changes'"])
# Use DISM tool to restore the system image
subprocess.run(["dism", "/online", "/cleanup-image", "/restorehealth"])
# Perform a system file check and repair any corrupted files
subprocess.run(["sfc", "/scannow"])
# Restart the computer to complete the undo process
os.system("shutdown /r /t 0")
if __name__ == "__main__":
undo_changes()
Please note that this code utilizes built-in Windows commands like `Checkpoint-Computer`, `dism`, and `sfc` to create a restore point, restore the system image, and perform a system file check respectively. This is a basic example and may not cover all possible scenarios or error messages related to undoing changes. It is always recommended to consult official documentation or seek professional assistance for specific issues with your computer.
Remember to exercise caution when running any code, especially those that modify system settings, and ensure you understand the potential implications before proceeding.
Running Windows Update Troubleshooter
To fix the “Undoing Changes” error on Windows 11, you can try running the Windows Update Troubleshooter. This tool can help identify and resolve issues with Windows updates. Here’s how to do it:
1. Press the Windows key + I to open the Settings app.
2. In the Settings app, click on “System” and then select “Troubleshoot” from the left-hand menu.
3. Scroll down and click on “Additional troubleshooters.”
4. Find and click on “Windows Update” under the “Get up and running” section.
5. Click on the “Run the troubleshooter” button.
6. Follow the on-screen instructions to complete the troubleshooting process.
The Windows Update Troubleshooter will scan for any problems and attempt to fix them automatically. Once it’s done, you can check if the “Undoing Changes” error is resolved.
Remember to restart your computer after running the troubleshooter to ensure any changes take effect.
Manual Windows 11 Update Installation Assistance
If you’re encountering the “Undoing Changes” error while updating Windows 11, you can try manually installing the update to resolve the issue. Here’s how:
1. Download the Windows 11 update file from the official Microsoft website.
2. Save the update file to a location on your computer, such as the desktop.
3. Double-click on the downloaded file to start the installation process.
4. Follow the on-screen instructions to complete the installation.
5. Once the update is installed, restart your computer.
6. After the restart, check if the “Undoing Changes” error is resolved.
Note: Manual installation may require technical knowledge and can be time-consuming. If you’re not comfortable with this process, it’s recommended to seek assistance from a qualified IT professional or contact Microsoft support for further guidance.
Investigating Windows 11 Update Errors with Event Viewer
If you’re experiencing update errors on Windows 11, Event Viewer can help you identify the cause and fix the issue. Follow these steps:
1. Open Event Viewer: Press the Windows key + R, type “eventvwr.msc”, and hit Enter.
2. Navigate to Windows Logs: Expand “Windows Logs” in the left-hand pane, then click on “System”.
3. Filter for Errors: In the middle pane, click on “Filter Current Log”. Select “Error” under Event Level and click “OK”.
4. Check for Update Errors: Look for any errors related to Windows update in the list. Double-click on an error to view more details.
5. Troubleshoot the Error: Note the error details and search online for solutions. You can also seek help from the Windows community or Microsoft support.
6. Apply Fixes: Follow the recommended fixes for the specific error you encountered to resolve the issue.
By using Event Viewer to investigate update errors, you can better understand the underlying cause and find effective solutions.
Performing DISM, SFC, and CHKDSK Commands
- Open the Start menu and search for Command Prompt.
- Right-click on Command Prompt and select Run as administrator.
- In the Command Prompt window, type dism /online /cleanup-image /restorehealth and press Enter.
- Wait for the DISM tool to complete the process. This may take a while, so be patient.
- Once the process is finished, restart your computer and check if the “Undoing Changes” error is resolved.
Performing SFC Command:
- Open the Start menu and search for Command Prompt.
- Right-click on Command Prompt and select Run as administrator.
- In the Command Prompt window, type sfc /scannow and press Enter.
- Wait for the System File Checker (SFC) tool to scan and repair any corrupted system files.
- Once the process is finished, restart your computer and check if the “Undoing Changes” error is resolved.
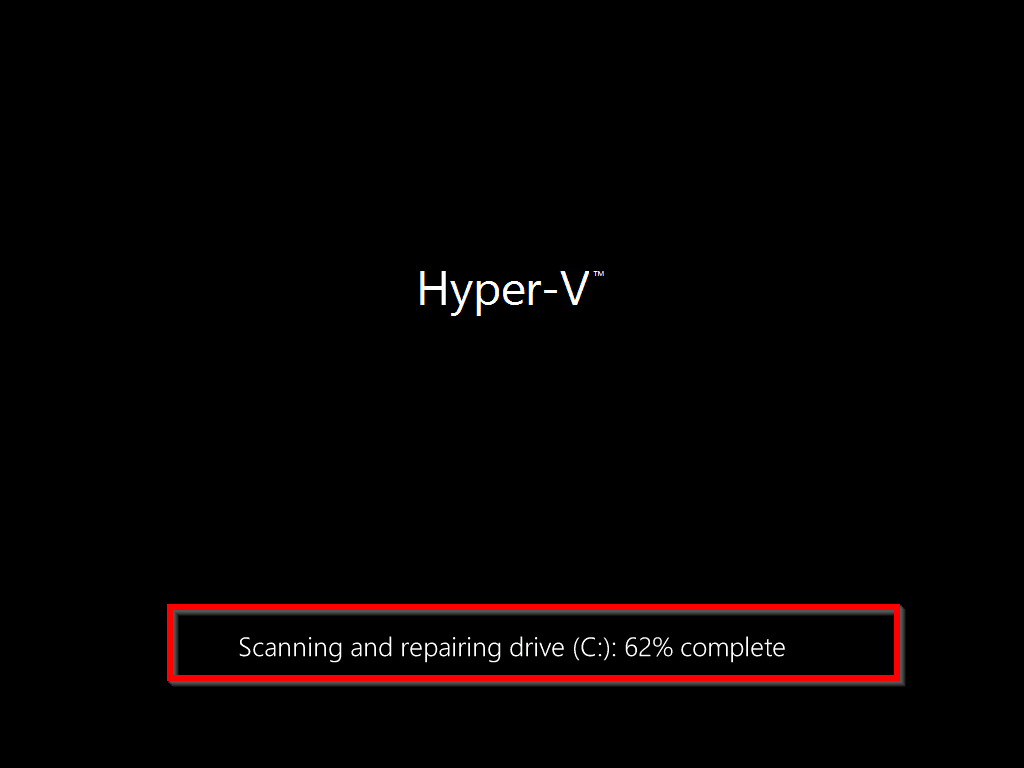
Performing CHKDSK Command:
- Open the Start menu and search for Command Prompt.
- Right-click on Command Prompt and select Run as administrator.
- In the Command Prompt window, type chkdsk /f and press Enter.
- You may receive a message stating that the disk is currently in use and asking if you want to schedule a disk check for the next restart. Type Y and press Enter to confirm.
- Restart your computer and allow the CHKDSK utility to scan and fix any errors on the disk.
- Once the process is finished, login to your computer and check if the “Undoing Changes” error is resolved.
Updating Windows 11 Drivers for Error Resolution
To fix the “Undoing Changes” error on Windows 11, it is important to update your drivers. Outdated or incompatible drivers can cause system errors and lead to this error message.
To update your drivers:
1. Press the Windows key + X and select “Device Manager.”
2. Expand the categories and locate the device with an exclamation mark or question mark.
3. Right-click on the device and select “Update driver.”
4. Choose “Search automatically for drivers” to let Windows find and install the latest driver.
5. If Windows doesn’t find a suitable driver, visit the manufacturer’s website and download the latest driver for your specific device.
6. Install the downloaded driver by following the on-screen instructions.
Updating your drivers can help resolve the “Undoing Changes” error and improve overall system stability. Keep your drivers up to date to prevent future issues. Remember to restart your computer after updating the drivers.

Mark Ginter is a tech blogger with a passion for all things gadgets and gizmos. A self-proclaimed "geek", Mark has been blogging about technology for over 15 years. His blog, techquack.com, covers a wide range of topics including new product releases, industry news, and tips and tricks for getting the most out of your devices. If you're looking for someone who can keep you up-to-date with all the latest tech news and developments, then be sure to follow him over at Microsoft.