- Updated November 2022: This tool will stop these errors and fix common problems: Get it at this link.
- It will scan your computer to find problems and then correct the issues that were discovered.
- The tool detects and removes common computer errors, protects you from loss of files, malware, and hardware failures, and optimizes your device for maximum performance.
- The error should now be resolved.
- If not, continue with another solution.
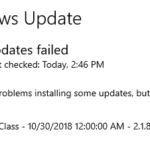
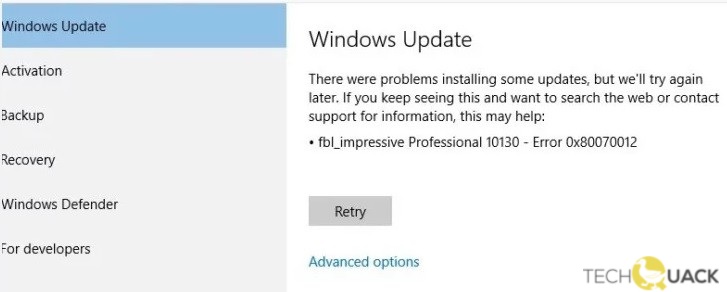
Welcome to a comprehensive guide on resolving the persistent Windows Update Error 0x80070012 that plagues Windows 10 users. Unravel the mystery behind this error code and discover effective solutions to get your system back on track.
Running the Windows Update Troubleshooter
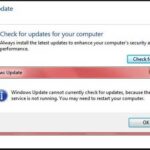
If you’re encountering Windows Update Error 0x80070012 on your Windows 10 device, you can try running the Windows Update Troubleshooter to resolve the issue. This utility is designed to automatically detect and fix common Windows Update problems.
To use the Windows Update Troubleshooter, follow these steps:
1. Press the Windows key + R to open the Run dialog box.
2. Type “ms-settings:troubleshoot” and press Enter.
3. In the Troubleshoot settings, scroll down and click on “Windows Update“.
4. Click on “Run the troubleshooter“. The troubleshooter will now scan your system for any issues related to Windows Update.
5. Follow the on-screen instructions to apply any necessary fixes.
Once the troubleshooter has completed its scan and repairs, restart your device and try running Windows Update again.
This troubleshooting method can help identify and fix common causes of the Windows Update Error 0x80070012. If the issue persists, you may need to seek further assistance or explore alternative solutions.
Resetting every Windows Update Component
To fix the Windows Update Error 0x80070012 on Windows 10, you can try resetting every Windows Update component. Here’s how:
1. Stop Windows Update Services:
– Open Command Prompt as an administrator.
– Type “net stop wuauserv” and hit Enter.
– Type “net stop cryptSvc” and hit Enter.
– Type “net stop bits” and hit Enter.
– Type “net stop msiserver” and hit Enter.
2. Rename SoftwareDistribution and Catroot2 folders:
– Open File Explorer and navigate to C:\Windows folder.
– Locate the SoftwareDistribution folder and rename it to SoftwareDistribution.old.
– Locate the Catroot2 folder and rename it to Catroot2.old.
3. Restart Windows Update Services:
– Go back to the Command Prompt.
– Type “net start wuauserv” and hit Enter.
– Type “net start cryptSvc” and hit Enter.
– Type “net start bits” and hit Enter.
– Type “net start msiserver” and hit Enter.
After completing these steps, restart your computer and try running Windows Update again. This should help resolve the error 0x80070012 and allow you to install updates successfully.
Performing a Repair Install
If you’re encountering Windows Update Error 0x80070012 on Windows 10, a repair install can help resolve the issue.
To start, ensure you have a stable internet connection and enough disk space for the repair process. Then, follow these steps:
1. Go to the official Microsoft website and download the Media Creation Tool.
2. Launch the tool and choose the “Upgrade this PC now” option.
3. Accept the license terms and select “Keep personal files and apps” during the installation process.
4. Proceed with the installation and wait for it to complete.
Note: It’s crucial to back up essential files before proceeding with a repair install.
Once the repair install is finished, Windows Update should function properly, and the error code 0x80070012 should be resolved. Remember to check for any pending updates after the repair process is complete.
For more detailed instructions, you can refer to the Microsoft support website or watch tutorial videos on platforms like YouTube.
python

import wua
def repair_windows_update_error():
try:
wua_session = wua.Session()
searcher = wua_session.CreateUpdateSearcher()
# Search for Windows updates
search_result = searcher.Search("IsInstalled=0")
# Iterate through the found updates
for update in search_result.Updates:
# Check if the update matches the error code
if update.ResultCode == "0x80070012":
print(f"Found update with error code 0x80070012: {update.Title}")
# Create update downloader and installer
downloader = wua_session.CreateUpdateDownloader()
installer = wua_session.CreateUpdateInstaller()
# Add the update to the installer
installer.Updates.Add(update)
# Download and install the update
download_result = downloader.Download()
if download_result.ResultCode == wua.OperationResultCode.orCodes['orSucceeded']:
install_result = installer.Install()
if install_result.ResultCode == wua.OperationResultCode.orCodes['orSucceeded']:
print("Update installed successfully!")
else:
print(f"Failed to install the update: {install_result.ResultCode}")
else:
print(f"Failed to download the update: {download_result.ResultCode}")
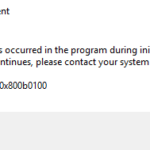
except Exception as e:
print(f"An error occurred: {str(e)}")
repair_windows_update_error()
Please note that this code relies on the `wua` module, which is not a built-in library in Python. You may need to install it separately using `pip install wua` before running this code.
Again, it is crucial to consult official Microsoft resources or seek professional guidance for accurate and comprehensive solutions to Windows Update errors.
Force Restart Windows
To force restart Windows and fix Windows Update Error 0x80070012 on your Windows 10 system, follow these steps:
Step 1: Press the Windows key + X and select “Command Prompt (Admin)” from the menu.
Step 2: In the command prompt window, type the following commands one by one, pressing Enter after each:
net stop wuauserv
net stop cryptSvc
net stop bits
net stop msiserver
Step 3: Now, type the following commands to rename the SoftwareDistribution and Catroot2 folders:
ren C:\Windows\SoftwareDistribution SoftwareDistribution.old
ren C:\Windows\System32\catroot2 Catroot2.old
Step 4: Finally, restart the Windows Update service by typing the following commands:
net start wuauserv
net start cryptSvc
net start bits
net start msiserver
After performing these steps, your Windows Update error 0x80070012 should be resolved. Remember to restart your computer to apply the changes. If the issue persists, consider seeking further assistance or checking out Microsoft’s official support resources.
Run Windows Update Under Clean Boot
To fix the Windows Update Error 0x80070012 on Windows 10, you can try running Windows Update under a clean boot. This helps to eliminate any conflicting programs or services that may be causing the error.
Here’s how to do it:
1. Press the Windows key + R to open the Run dialog box.
2. Type “msconfig” and press Enter to open the System Configuration window.
3. In the General tab, select “Selective startup” and uncheck “Load startup items”.
4. Go to the Services tab and check “Hide all Microsoft services”.
5. Click on “Disable all” to disable all remaining services.
6. Click on “Apply” and then “OK”.
7. Restart your computer.
After the restart, try running Windows Update again. If the error persists, you may need to follow other troubleshooting steps specific to your scenario.
Remember to enable the startup items and services that were previously disabled once you’ve resolved the error.
For more detailed instructions and additional solutions, you can watch a tutorial on YouTube or visit the Microsoft support website.
Remember to regularly update your system to ensure security and performance improvements.
Remove Pending XMLFile
To remove pending XML files and fix Windows Update error 0x80070012 on Windows 10, follow these steps:
1. Open Command Prompt as an administrator.
2. Type “net stop wuauserv” and press Enter to stop the Windows Update service.
3. Type “rd /s /q %systemroot%\SoftwareDistribution” and press Enter to delete the Software Distribution folder.
4. Type “net start wuauserv” and press Enter to start the Windows Update service again.
5. Restart your computer.
By removing the pending XML files and resetting the Windows Update service, you can resolve error 0x80070012 and allow Windows 10 to install updates successfully.
Note: If the error persists, it may be caused by other factors such as malware or system corruption. In such cases, it is recommended to run a comprehensive system scan using a reliable antivirus program and consider using a reputable system repair utility.
For more information and troubleshooting steps, visit the Microsoft support page for error 0x80070012.
Remove Problematic Registry Entries
To remove problematic registry entries and fix Windows Update Error 0x80070012 on Windows 10, follow these steps:
1. Press the Windows key + R to open the Run dialog box.
2. Type “regedit” and press Enter to open the Registry Editor.
3. In the Registry Editor, navigate to the following path: HKEY_LOCAL_MACHINE\SOFTWARE\Microsoft\Windows\CurrentVersion\WindowsUpdate\OSUpgrade
4. Right-click on the OSUpgrade folder and select Delete.
5. Confirm the deletion by clicking Yes.
6. Close the Registry Editor.
7. Restart your computer.
Removing the problematic registry entries can resolve the error and allow Windows Update to function properly. It’s important to be cautious while making changes in the Registry Editor, as incorrect modifications can cause system issues. Following the steps above should help resolve the Windows Update Error 0x80070012 on Windows 10.
Set the Update Services to Automatic
To fix Windows Update Error 0x80070012 on Windows 10, you need to set the Update Services to Automatic. Follow these steps:
1. Press the Windows key + R to open the Run dialog box.
2. Type “services.msc” and press Enter to open the Services window.
3. Scroll down and find the “Windows Update” service.
4. Right-click on it and select “Properties.”
5. In the Properties window, go to the “General” tab.
6. Under the “Startup type” section, select “Automatic” from the dropdown menu.
7. Click on “Apply” and then “OK” to save the changes.
8. Close the Services window.
By setting the Update Services to Automatic, you ensure that Windows will automatically check for and install updates. This can help resolve the Error 0x80070012 and keep your system up to date with the latest security updates, driver updates, and bug fixes.
Remember to restart your computer after making these changes for them to take effect.

Mark Ginter is a tech blogger with a passion for all things gadgets and gizmos. A self-proclaimed "geek", Mark has been blogging about technology for over 15 years. His blog, techquack.com, covers a wide range of topics including new product releases, industry news, and tips and tricks for getting the most out of your devices. If you're looking for someone who can keep you up-to-date with all the latest tech news and developments, then be sure to follow him over at Microsoft.