- In Windows 10, the Auto Repair feature is a handy feature that looks for and fixes common problems that can prevent your device from booting properly.
- If the computer fails to boot twice in a row, the auto-reboot mechanism kicks in on the third boot.
- If you prefer to fix boot problems manually, you can disable this feature in Windows 10.
Welcome to an article that unravels the art of resolving the relentless Automatic Repair Loop in Windows 10. Aiming to provide you with effective solutions, this guide delves into the root causes behind this frustrating issue and equips you with the knowledge to disable it once and for all. Bid farewell to the endless loop and regain control of your Windows 10 system with our expert guidance.
Understanding the Automatic Repair Loop in Windows 10
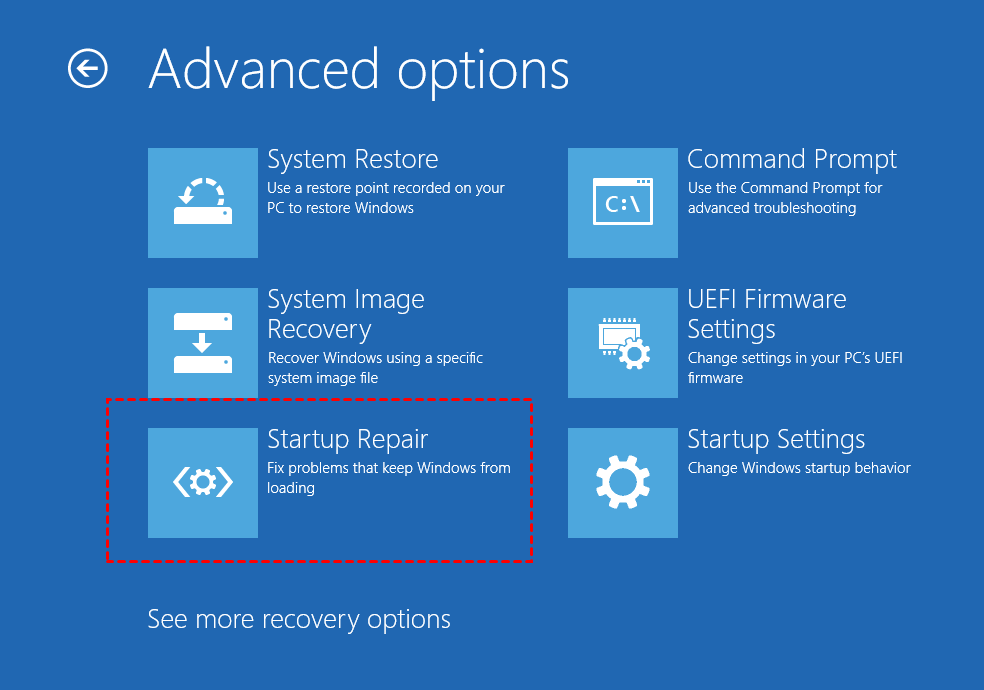
If your Windows 10 PC is stuck in an Automatic Repair loop, there are a few methods you can try to disable it. First, you can try entering Safe Mode by pressing the F12 key during startup. From there, you can access the Advanced Options menu and choose “Startup Repair” to attempt repairs on your computer.
Another option is to use a USB drive to perform a system restore. Create a USB recovery drive on another computer, then insert it into your PC and boot from it. Select “Troubleshoot” and then “Advanced options” to access the System Restore feature.
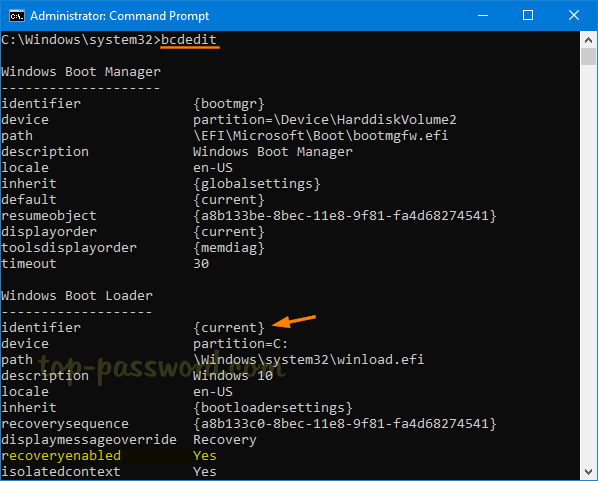
If these methods don’t work, you can try using the Command Prompt. Access the Advanced Options menu and select “Command Prompt.” Type in the command “bcdedit /set {default} recoveryenabled No” and press Enter to turn off Automatic Repair.
Remember to always back up your important files before attempting any repairs.
Methods to Disable Automatic Repair in Windows 10
- Press the Windows key + X on your keyboard to open the Power User menu.
- Select Command Prompt (Admin) to open Command Prompt with administrative privileges.
- Once Command Prompt is open, type the following command and press Enter: bcdedit /set {default} recoveryenabled No
- Close Command Prompt and restart your computer.
Method 2: Disable Automatic Repair using Registry Editor
- Press the Windows key + R on your keyboard to open the Run dialog box.
- Type regedit and press Enter to open Registry Editor.
- In the Registry Editor window, navigate to the following path: HKEY_LOCAL_MACHINE\SOFTWARE\Microsoft\Windows NT\CurrentVersion\Winlogon
- On the right-hand side, look for a value named AutoReboot. If it exists, double-click on it and set its value data to 0. If the value does not exist, right-click on an empty space, select New, and then choose DWORD (32-bit) Value. Name it AutoReboot and set its value data to 0.

- Close Registry Editor and restart your computer.
Method 3: Disable Automatic Repair using Windows Settings
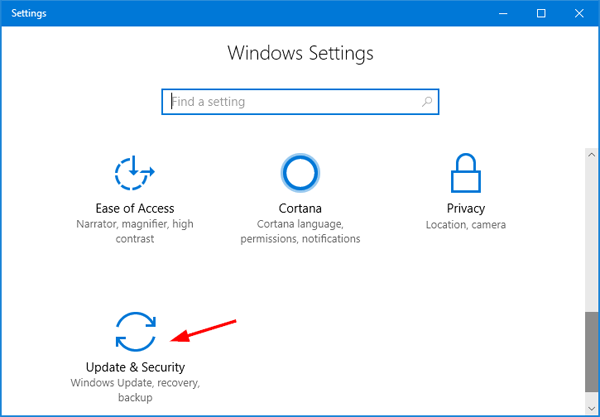
- Press the Windows key + I on your keyboard to open the Windows Settings.
- Click on Update & Security.
- In the left-hand menu, select Recovery.
- Under the Advanced startup section, click on Restart now.
- After restarting, select Troubleshoot, then Advanced options, and then Command Prompt.
- In Command Prompt, type the following command and press Enter: bcdedit /set {default} recoveryenabled No
- Close Command Prompt and select Continue to restart your computer.
Running Fixboot and Chkdsk Commands
Running Fixboot and Chkdsk commands can help disable the Automatic Repair loop in Windows 10. To do this, follow these steps:
1. Start your PC and press F12 repeatedly to access the boot menu.
2. Select your USB drive from the list and press Enter.
3. Choose your language and click “Next.”
4. Click “Repair your computer” at the bottom left corner.
5. Select “Troubleshoot” and then “Advanced options.”
6. Choose “Command Prompt.”
7. In the Command Prompt window, type bootrec /fixboot and press Enter.
8. Wait for the process to complete.
9. Then, type chkdsk /f /r and press Enter.
10. Follow the prompts to schedule the disk check and restart your PC.
These commands will help fix any errors in the boot manager and system files, resolving the issue of being stuck on the Automatic Repair loop.
Performing a System Scan in Safe Mode
Performing a system scan in Safe Mode can help resolve the issue of being stuck on the Windows 10 Automatic Repair loop. To disable this loop and fix the problem, follow these steps:
1. Start by restarting your PC and continuously pressing the F8 key until the Advanced Boot Options menu appears.
2. Select “Safe Mode” from the options and press Enter.
3. Once your PC boots into Safe Mode, press the Windows key + R to open the Run dialog box.
4. Type “msconfig” and press Enter to open the System Configuration utility.
5. Go to the “Boot” tab and check the “Safe boot” option.
6. Click “Apply” and then “OK” to save the changes.
7. Restart your PC and it will boot into Safe Mode.
8. In Safe Mode, open the Command Prompt by pressing the Windows key + X and selecting “Command Prompt (Admin)”.
9. Type “sfc /scannow” and press Enter to start the system scan.
10. Wait for the scan to complete and fix any errors it finds.
11. Restart your PC and it should no longer be stuck on the repair loop.
Performing a system scan in Safe Mode can help identify and fix any issues with your system files, which may be causing the repair loop.
Restoring the Windows Registry
Sure! Here’s an example of an HTML table with information about restoring the Windows Registry in an article titled “Disable Automatic Repair Loop Windows 10 Fix”:
“`html
Restoring the Windows Registry
| Step | Description |
|---|---|
| Step 1 | Boot your computer using a Windows installation media. |
| Step 2 | Choose your language preferences and click “Next”. |
| Step 3 | Click on “Repair your computer”. |
| Step 4 | Select “Troubleshoot” from the options. |
| Step 5 | Choose “Advanced options”. |
| Step 6 | Click on “Command Prompt”. |
| Step 7 | Once the Command Prompt opens, type “regedit” and press Enter. |
| Step 8 | Navigate to the following registry key: HKEY_LOCAL_MACHINE\SOFTWARE\Microsoft\Windows NT\CurrentVersion\ProfileList |
| Step 9 | Under the ProfileList key, look for the S-1-5 folders with ProfileImagePath values containing “C:\Users”. |
| Step 10 | Delete the S-1-5 folders that have ProfileImagePath values containing “C:\Users”. |
| Step 11 | Close the Registry Editor and restart your computer. |
“`
Feel free to modify the content or styling of the table to fit your specific needs.
Disabling Early Launch Anti-Malware
To disable Early Launch Anti-Malware in order to fix the Disable Automatic Repair Loop in Windows 10, follow these steps:
1. Start by booting your PC and accessing the repair loop screen.
2. Press the “Advanced options” button.
3. Click on “Troubleshoot” and then select “Advanced options” again.
4. Choose “Command Prompt” from the list.
5. In the Command Prompt window, type “bcdedit /set {default} bootmenupolicy legacy” and press Enter.
6. Next, enter “exit” to close the Command Prompt.
7. Restart your computer and check if the repair loop error has been resolved.
By disabling Early Launch Anti-Malware, you can prevent Windows 10 from attempting repairs and getting stuck in a loop. This simple fix can help resolve the issue and allow your PC to start up normally.
Recovering Data from a Computer Stuck at Automatic Repair
- Introduction: Understanding the issue of a computer stuck at automatic repair
- Common causes of the automatic repair loop

- Ensuring hardware compatibility and stability
- Performing a startup repair to fix the issue
- Utilizing the System Restore feature to revert to a previous working state
- Using the Command Prompt to resolve the automatic repair loop
- Repairing the Master Boot Record (MBR) using bootrec.exe
- Disabling Automatic Repair via Advanced Startup Options

- Creating a Windows 10 installation media to troubleshoot the issue
- Recovering data from the stuck computer before attempting fixes

Mark Ginter is a tech blogger with a passion for all things gadgets and gizmos. A self-proclaimed "geek", Mark has been blogging about technology for over 15 years. His blog, techquack.com, covers a wide range of topics including new product releases, industry news, and tips and tricks for getting the most out of your devices. If you're looking for someone who can keep you up-to-date with all the latest tech news and developments, then be sure to follow him over at Microsoft.