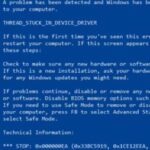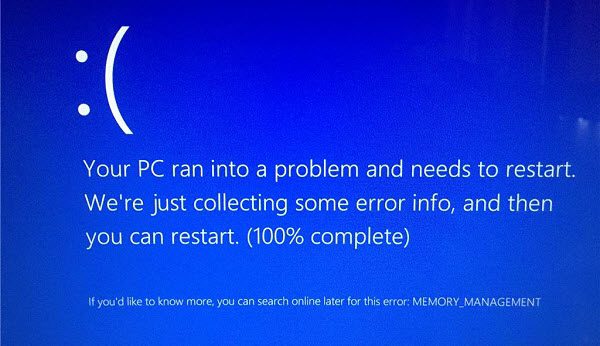
- Memory Management error is one of the useless phrases that Microsoft offers when a blue screen of death (BSOD) error occurs on Windows 10.
- Memory management is the process of managing the use of memory in a computer.
- It keeps track of every byte of memory and indicates whether it is free or in use.
- It also “frees” memory when you close a program, marking it as available for use by something else.
Unraveling the perplexing maze of Windows Memory Management BSOD Error
Understanding Windows Memory Management
Windows Memory Management is an important aspect of your computer’s functioning. When you encounter a Stop Code Memory Management error, it indicates a problem with the memory allocation and management processes in your system. This can lead to system crashes and the infamous Blue Screen of Death (BSOD).
To fix the Memory Management BSOD error in Windows 10, try these solutions:
1. Run the Windows Memory Diagnostic tool to check for any memory issues.
2. Update your video card driver to the latest version.
3. Check for any disk errors using the Windows built-in disk check utility.
4. Use the System File Checker tool to scan for and repair any corrupted system files.
5. Update your graphics card driver to the latest version.
Causes of the Memory Management Blue Screen Error
1. Faulty hardware or drivers: A common cause of the MEMORY_MANAGEMENT error is faulty hardware or outdated drivers. Check if all your computer components are functioning properly and update your drivers.
2. Memory issues: Problems with computer memory can lead to this error. Use the memory diagnostic tool provided by Windows to check for any memory problems.
3. Software conflicts: Conflicts between different software programs can also trigger the MEMORY_MANAGEMENT error. Try uninstalling recently installed programs or performing a clean boot to identify the culprit.
4. Disk errors: Disk errors can cause memory management issues. Use the built-in Windows disk checking tool to scan for and fix any disk errors.
Remember, it’s important to identify and address the root cause of the error to prevent its occurrence in the future.
Restarting Your Computer
Restarting your computer is a common and effective solution for many computer issues, including the Windows Memory Management BSOD Error. When you encounter this error, it indicates a problem with your computer’s memory management.
To restart your computer and potentially fix the error, follow these steps:
1. Save any important work you have open to prevent data loss.
2. Close all running programs and processes.
3. Click the “Start” button in the bottom left corner of your screen.
4. Select the “Power” option.
5. Choose “Restart” from the drop-down menu.
6. Wait for your computer to shut down and start up again.
7. Once your computer has restarted, check if the Memory Management error is resolved.
Remember, restarting your computer is just one possible solution for this error. If the issue persists, you may need to try other troubleshooting methods or consult with a technical expert for further assistance.
python

import ctypes
# Allocate memory
size = 1024 # Size in bytes
allocated_memory = ctypes.create_string_buffer(size)
# Access the allocated memory
allocated_memory[0] = 'A' # Example: Writing data to the memory
# Deallocate memory
ctypes.pointer(allocated_memory).free()
Please note that this example only demonstrates manual memory allocation and deallocation within Python, and it does not directly relate to fixing BSOD errors.
To troubleshoot and fix BSOD errors, it is recommended to analyze specific error codes, review system logs, update drivers, check for hardware issues, or seek assistance from Microsoft support or professional technicians with expertise in Windows troubleshooting.
Updating Windows 10
To fix the Memory Management BSOD error in Windows 10, follow these steps:
1. Update your video card driver: Go to the manufacturer’s website and download the latest driver for your video card. Install it and restart your computer.
2. Check for memory issues: Press Windows key + R, type “mdsched.exe” and hit Enter. Choose the option to restart now and check for problems. This will scan your computer’s memory for any issues.
3. Run a system file check: Press Windows key + X, then choose Command Prompt (Admin). Type “sfc /scannow” and hit Enter. Wait for the scan to complete and restart your computer.
4. Check for software conflicts: Uninstall any recently installed programs or drivers that may be causing conflicts. Use the Control Panel to uninstall these programs.
5. Check for hardware issues: If the problem persists, it may be a hardware issue. Check if all your hardware is properly connected and functioning correctly.
Running MemTest86
To run MemTest86, follow these steps:
1. Download the MemTest86 software from the official website.
2. Create a bootable USB or CD/DVD using the downloaded software.
3. Restart your computer and boot from the created bootable media.
4. MemTest86 will automatically start and begin testing your computer’s memory.
5. Let the test run for at least one full pass to get accurate results.
6. If any errors are detected, it means there is a problem with your computer’s memory.
7. Replace the faulty memory modules or contact a professional for assistance.
By running MemTest86, you can identify and fix memory-related issues that may be causing the Windows Memory Management BSOD error. This will help improve the stability and performance of your Windows system.
Updating Your Drivers
Updating your drivers can help fix the Windows Memory Management BSOD error. To do this, follow these steps:
1. Press the Windows key + X and select Device Manager.
2. Expand the categories and find the device driver you want to update.
3. Right-click on the driver and select Update driver.
4. Choose “Search automatically for updated driver software.”
5. Windows will search for the latest driver and install it if available.
6. If Windows doesn’t find an updated driver, you can visit the manufacturer’s website and download the latest driver manually.
7. Once downloaded, run the installer and follow the on-screen instructions.
8. Restart your computer for the changes to take effect.
Updating your drivers can resolve compatibility issues and improve system stability. Make sure to regularly check for driver updates to prevent future crashes and errors.
Updating Your GPU Drivers
To fix the Windows Memory Management BSOD error, one possible solution is to update your GPU drivers. Outdated drivers can cause system crashes and memory-related errors.
To update your GPU drivers, follow these steps:
1. Press the Windows key + X and select Device Manager.
2. Expand the Display adapters category.
3. Right-click on your GPU and select Update driver.
4. Choose the option to search automatically for updated driver software.
5. Windows will search online for the latest driver and install it if available.
Updating your GPU drivers can help resolve issues related to video memory and improve system stability. It’s important to keep your drivers up to date to prevent crashes and enhance performance.
Remember to restart your computer after the driver update to apply the changes.
Running CHKDSK
To fix the MEMORY MANAGEMENT BSOD error in Windows, you can try running the CHKDSK utility. CHKDSK scans your computer’s hard drive for errors and fixes them if possible. Here’s how to do it:
1. Press the Windows key + X and select “Command Prompt (Admin)”.
2. In the Command Prompt window, type “chkdsk /f” and press Enter.
3. You may be prompted to schedule the disk check for the next time you restart your computer. Type “Y” and press Enter.
4. Restart your computer and let CHKDSK scan and fix any errors on your hard drive.
Once the scan is complete, check if the MEMORY MANAGEMENT BSOD error still occurs. If it does, you may need to try other solutions such as updating your video driver or checking for memory leaks. Remember to save your work before running CHKDSK, as it may require a restart.
Running SFC
To fix the Windows Memory Management BSOD Error, you can try running the System File Checker (SFC) tool. SFC scans and repairs system files for any corruption or issues that may be causing the error. Here’s how to run SFC:
1. Press the Windows key and type “Command Prompt” in the search bar.
2. Right-click on Command Prompt and select “Run as administrator”.
3. In the Command Prompt window, type “sfc /scannow” and press Enter.
4. Wait for the scan to complete. This may take some time.
5. If SFC finds any corrupted files, it will attempt to repair them automatically.
6. Once the scan is finished, restart your computer and check if the Memory Management BSOD Error is resolved.
Remember to run SFC as an administrator to ensure it has the necessary permissions to make changes.
Reseating Your System Hardware
If you’re experiencing the “Stop Code Memory Management” error message, reseating your system hardware may help resolve the issue. This error often occurs due to problems with your computer’s memory or memory management.
To reseat your system hardware, follow these steps:
1. Turn off your computer and unplug it from the power source.
2. Open your computer case to access the internal components.
3. Carefully remove and then reinsert the RAM modules, ensuring they are securely seated in their slots.
4. If you have other hardware components such as graphics cards or storage drives, remove and reinsert them as well.
5. Close the computer case and plug it back into the power source.
6. Turn on your computer and check if the Memory Management error persists.
Reseating your system hardware can help resolve any loose connections or faulty installations that may be causing the error. If the error still occurs, you may need to consider other fixes such as updating your video driver or checking for memory leaks.
Resetting Windows 10 as a Last Resort
If you’re encountering the MEMORY MANAGEMENT error message and have exhausted other troubleshooting options, resetting Windows 10 can be a last resort. This process will remove all your personal files, apps, and settings, so make sure to back up any important data beforehand.
To reset Windows 10, follow these steps:
1. Press the Windows key + I to open the Settings app.
2. Click on “Update & Security” and then select “Recovery” from the left sidebar.
3. Under the “Reset this PC” section, click on “Get started.”
4. Choose the “Remove everything” option to perform a complete reset.
5. You’ll have the option to either “Just remove my files” or “Remove files and clean the drive” – choose the one that suits your needs.
6. Follow the on-screen instructions to complete the reset process.
After the reset is complete, you’ll need to set up Windows 10 again, so ensure you have any necessary installation media or product keys on hand.
Fix 1: Updating the Video Card Driver
If you’re experiencing the MEMORY MANAGEMENT BSOD error on your Windows computer, one possible solution is to update your video card driver. Outdated or incompatible video card drivers can cause memory-related issues, resulting in the Blue Screen of Death (BSOD) error.
To update your video card driver:
1. Press the Windows key + X and select Device Manager.
2. Expand the Display adapters category.
3. Right-click on your video card and select Update driver.
4. Choose the option to search automatically for updated driver software.
5. Follow the on-screen instructions to complete the driver update.
Updating your video card driver can help resolve memory management issues by ensuring that your video card is functioning properly with the latest driver. If this fix doesn’t solve the problem, you can try other troubleshooting steps or seek further assistance from Microsoft support or the Windows community.
Fix 2: Running a Disk Check
If you encounter the MEMORY MANAGEMENT error message on your Windows computer, running a disk check can help resolve the issue.
To run a disk check, follow these steps:
1. Press the Windows key + X and select “Command Prompt (Admin)” from the menu.
2. In the command prompt window, type “chkdsk /f” and press Enter.
3. You may be prompted to schedule the disk check for the next time you restart your computer. Type “Y” and press Enter to confirm.
4. Restart your computer and allow the disk check to run. This may take some time.
5. Once the disk check is complete, restart your computer again.
Running a disk check can help identify and fix any issues with your computer’s hard drive, which may be causing the MEMORY MANAGEMENT error. If the issue persists, further troubleshooting may be required.
Fix 3: Running Windows Memory Diagnostic Test
To fix the Windows Memory Management BSOD error, you can run the Windows Memory Diagnostic Test. This test helps identify any issues with your computer’s memory. Here’s how to do it:
1. Press the Windows key and type “Windows Memory Diagnostic” in the search bar.
2. Select “Windows Memory Diagnostic” from the search results.
3. In the pop-up window, choose either “Restart now and check for problems” or “Check for problems the next time I start my computer.”
4. Your computer will restart and the memory test will begin.
5. Wait for the test to complete. It may take some time.
6. After the test finishes, your computer will restart again.
7. If any issues are found, you will see a notification.
8. Follow any recommended actions to resolve the memory issues.
Remember to save your work before running the test as it will restart your computer. This test can help fix the Memory Management stop code BSOD error and prevent future crashes.

Mark Ginter is a tech blogger with a passion for all things gadgets and gizmos. A self-proclaimed "geek", Mark has been blogging about technology for over 15 years. His blog, techquack.com, covers a wide range of topics including new product releases, industry news, and tips and tricks for getting the most out of your devices. If you're looking for someone who can keep you up-to-date with all the latest tech news and developments, then be sure to follow him over at Microsoft.