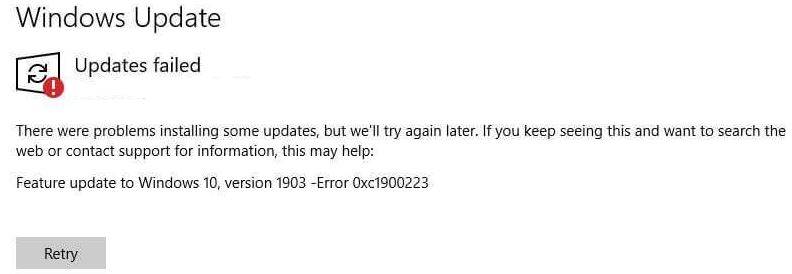
- Some Windows 10 users encounter error 0xc1900223 when trying to install Windows Update the traditional way.
- In most documented cases, the problem occurs when a user tries to install update 1903, and usually, the error appears when the update reaches 97%.
- Sometimes the error continues to show up no matter how many breaks you take.
- Problems include malware, malware, VPN, problems with Windows Update services and components.
Unlock the smooth upgrade path to Windows 10 21H2 as we unravel the solution to the perplexing Windows Update Error 0xc1900223.
Run Windows Update Troubleshooter
To fix Windows Update Error 0xc1900223 in Windows 10 21H2, you can try running the Windows Update Troubleshooter. This utility is designed to diagnose and resolve common Windows Update issues.
Here’s how to run the Windows Update Troubleshooter:
1. Press the Windows key + I to open the Settings app.
2. Click on “Update & Security,” then select “Troubleshoot” from the left sidebar.
3. Scroll down and click on “Windows Update” under the “Get up and running” section.
4. Click on “Run the troubleshooter” and follow the on-screen instructions.
The troubleshooter will automatically detect and fix any issues it finds with Windows Update. After running the troubleshooter, restart your PC and check if the error has been resolved.
If the error persists, you can explore other solutions or seek further assistance from Microsoft’s support team.
Use Media Creation Tool
To fix Windows Update Error 0xc1900223 in Windows 10 21H2, you can use the Media Creation Tool. This tool allows you to create a bootable USB or download an ISO file to install or upgrade Windows 10. Here’s how to use it:
1. Go to the Microsoft website and search for “Media Creation Tool.”
2. Download and run the tool on your PC.
3. Select “Create installation media (USB flash drive, DVD, or ISO file) for another PC” and click “Next.”
4. Choose the language, edition, and architecture that matches your current Windows version.
5. Select the “ISO file” option and click “Next.”
6. Choose a location to save the ISO file and click “Save.”
7. Once the download is complete, open the ISO file and run the setup.exe file to start the installation or upgrade process.
Using the Media Creation Tool can help resolve the 0xc1900223 error and ensure a smooth installation or upgrade of Windows 10 21H2.
Disable Pi-Hole or other network-wide adblocker
To fix Windows Update Error 0xc1900223 in Windows 10 21H2, you may need to disable your network-wide adblocker, such as Pi-Hole. This can help resolve any conflicts that may be preventing the update from installing correctly.
To disable Pi-Hole or another adblocker, follow these steps:
1. Open your Pi-Hole or adblocker settings.
2. Look for an option to disable or pause the adblocker.
3. Disable the adblocker temporarily.
4. Retry the Windows Update process.
By disabling the adblocker, you allow the necessary connections and downloads to occur, which can help resolve the error. Once the update is successfully installed, you can re-enable the adblocker to continue enjoying its benefits.
Remember to check for any other potential issues or conflicting software that may be causing the error. If you continue to experience difficulties, consider seeking further assistance from the Windows support team or referring to their official troubleshooting guide.
python

import subprocess
def run_windows_update():
try:
# Run Windows update command
subprocess.run(['wusa', '/uninstall', '/kb:
print("Windows update completed successfully.")
except subprocess.CalledProcessError as e:
print(f"Windows update failed with error code: {e.returncode}")
print("Error output:", e.output.decode())
# Call the function to execute the Windows update
run_windows_update()
Please replace `
Flush DNS cache
To flush the DNS cache and potentially fix the Windows Update Error 0xc1900223 in Windows 10 21H2, follow these steps:
1. Press the Windows key + R to open the Run dialog box.
2. Type cmd and press Enter to open Command Prompt.
3. In Command Prompt, type ipconfig /flushdns and press Enter.
4. Wait for the process to complete and then close Command Prompt.
5. Restart your computer.
6. After restarting, try installing the Windows 10 21H2 Feature Update again.
Flushing the DNS cache can help resolve issues related to DNS resolution, which may be causing the error. If the error persists, you can try other solutions such as running the Windows Updates Troubleshooter, checking for system file corruption, or using the Windows Update Catalog to manually install the update.
Note: It’s always a good idea to back up your files and create a restore point before installing any updates to avoid potential issues. If you’re not confident in performing these steps, it may be best to seek assistance from a knowledgeable user or contact Microsoft support.
Perform DISM and SFC scans
Performing DISM and SFC scans can help fix Windows Update Error 0xc1900223 in Windows 10 21H2. These scans can detect and repair any corrupted system files that may be causing the issue.
To perform a DISM scan, follow these steps:
1. Press Windows key + X and select “Command Prompt (Admin)”.
2. In the Command Prompt window, type “DISM /Online /Cleanup-Image /RestoreHealth” and press Enter.
3. Wait for the scan to complete and then restart your computer.
To perform an SFC scan, follow these steps:
1. Press Windows key + X and select “Command Prompt (Admin)”.
2. In the Command Prompt window, type “sfc /scannow” and press Enter.
3. Wait for the scan to complete and then restart your computer.
After performing these scans, try installing the Windows 10 21H2 update again. If the error persists, you may need to consider other troubleshooting methods or seek further assistance.
Reset Windows Update component
To fix Windows Update Error 0xc1900223 in Windows 10 21H2, you can try resetting the Windows Update component. This method can help resolve any issues or errors that may be preventing the update from installing.
Here’s how to reset the Windows Update component:
1. Press the Windows key + R to open the Run dialog box.
2. Type “cmd” and press Enter to open the Command Prompt.
3. In the Command Prompt, type the following commands, pressing Enter after each one:
– net stop wuauserv
– net stop cryptSvc
– net stop bits
– net stop msiserver
4. Next, type the following commands to rename the SoftwareDistribution and Catroot2 folders:
– ren C:\Windows\SoftwareDistribution SoftwareDistribution.old
– ren C:\Windows\System32\catroot2 Catroot2.old
5. Finally, restart the Windows Update services by typing the following commands, pressing Enter after each one:
– net start wuauserv
– net start cryptSvc
– net start bits
– net start msiserver
After completing these steps, try to install the Windows 10 21H2 update again. This should help resolve the error and allow the update to proceed smoothly.
Rename SoftwareDistribution and Catroot2 folders
To fix Windows Update Error 0xc1900223 in Windows 10 21H2, you can try renaming the SoftwareDistribution and Catroot2 folders. These folders sometimes get corrupted, causing the error message to appear.
1. First, close any open programs and save your work.
2. Press the Windows key + R to open the Run dialog box.
3. Type “services.msc” and press Enter to open the Services window.
4. Scroll down and locate the “Windows Update” service.
5. Right-click on it and select “Stop”.
6. Now, open File Explorer and navigate to the C:\Windows folder.
7. Locate the “SoftwareDistribution” folder and rename it to “SoftwareDistribution.old”.
8. Next, navigate to the C:\Windows\System32 folder.
9. Locate the “Catroot2” folder and rename it to “Catroot2.old”.
10. Close File Explorer and go back to the Services window.
11. Right-click on the “Windows Update” service and select “Start”.
By renaming these folders, you are essentially resetting the Windows Update components. This method has been proven to resolve the 0xc1900223 error for many users.

Mark Ginter is a tech blogger with a passion for all things gadgets and gizmos. A self-proclaimed "geek", Mark has been blogging about technology for over 15 years. His blog, techquack.com, covers a wide range of topics including new product releases, industry news, and tips and tricks for getting the most out of your devices. If you're looking for someone who can keep you up-to-date with all the latest tech news and developments, then be sure to follow him over at Microsoft.