- Some Windows 10 users are complaining about a similar problem on their end.
- The problem can occur when the Windows search service is disabled.
- If you’ve tried all of the above instructions, you can try rebuilding the index database to fix Windows 10 search problems.
- Some users have solved the problem by restarting the Windows SearchUI.exe process, which controls the search item.
- The indexing function can also cause problems that can prevent search results from returning to your device.
Are you tired of struggling with a non-functional search feature in Windows 10 File Explorer? Look no further! In this article, we will guide you through easy and effective solutions to fix the Windows 10 File Explorer search problem. So, let’s dive in and explore how to get your search feature up and running smoothly again.
Restart File Explorer
To restart File Explorer in Windows 10 when the File Explorer search is not working, follow these simple steps:
1. Press Ctrl + Shift + Esc to open the Task Manager.
2. In the Task Manager, click on the “Processes” tab.
3. Scroll down and find “Windows Explorer” in the list of processes.
4. Right-click on “Windows Explorer” and select “Restart” from the context menu.
5. File Explorer will close and then restart automatically.
By restarting File Explorer, you can often resolve issues with the search function not working properly. This method can be particularly effective if the search box is not showing any results, or if File Explorer is not opening or responding.
Remember to save any important files or data before restarting File Explorer, as this action will close any open File Explorer windows.
For more ways to fix File Explorer search issues, you can refer to the article “Windows 10 File Explorer Search Not Working – How to Fix” by Matthew Adams on the Fortect website.
Make Sure Windows Search Service Is Enabled
To fix the issue of Windows 10 File Explorer search not working, you need to ensure that the Windows Search service is enabled. Here’s how:
1. Press the Windows key + R to open the Run dialog box.
2. Type “services.msc” and press Enter to open the Services window.
3. Scroll down and locate the “Windows Search” service.
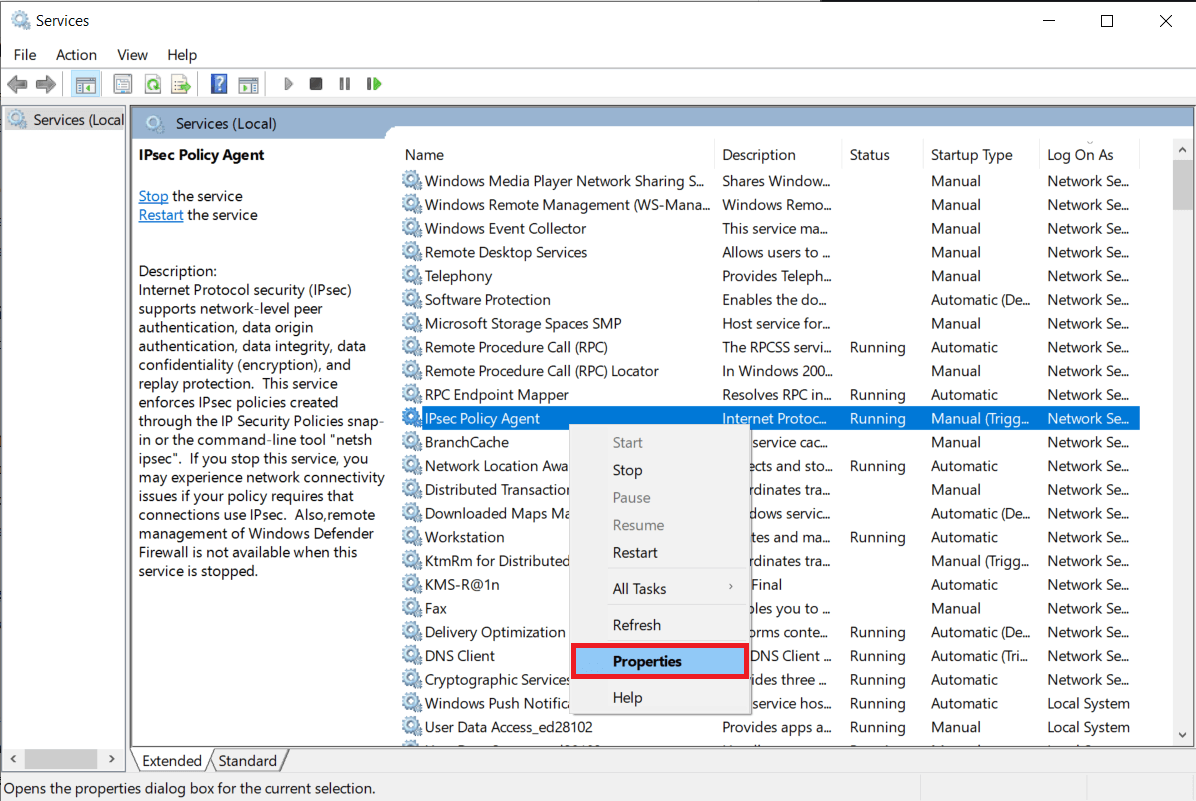
4. Right-click on it and select “Properties” from the context menu.
5. In the Properties window, make sure the “Startup type” is set to “Automatic”.
6. If the service is not running, click on the “Start” button to start it.
7. Click “Apply” and then “OK” to save the changes.
Enabling the Windows Search service should resolve the issue with File Explorer search not working. If the problem persists, you can try other methods mentioned in the article to troubleshoot the issue.
Change the Search Options
- Open the Run dialog box by pressing Windows Key + R.
- Type services.msc in the Run dialog box and press Enter.
- In the Services window, locate and right-click on Windows Search to open its properties.
- In the properties window, click on the Stop button to stop the service.
- Change the Startup type to Automatic and click on Apply.
- Click on the Start button to restart the service.
- Click OK to save the changes and close the properties window.
- Restart your computer and check if the search functionality is working again.
Method 2: Rebuild the Search Index
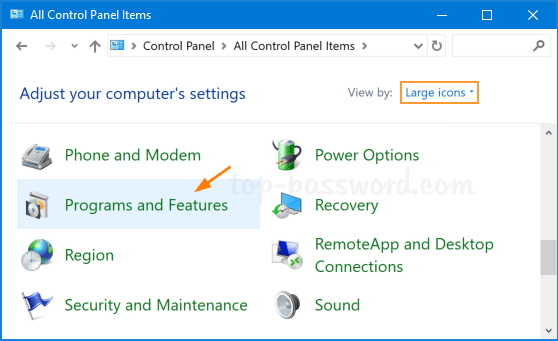
- Open the Control Panel by pressing Windows Key + X and selecting Control Panel.
- In the Control Panel, set the View by option to Small icons or Large icons.
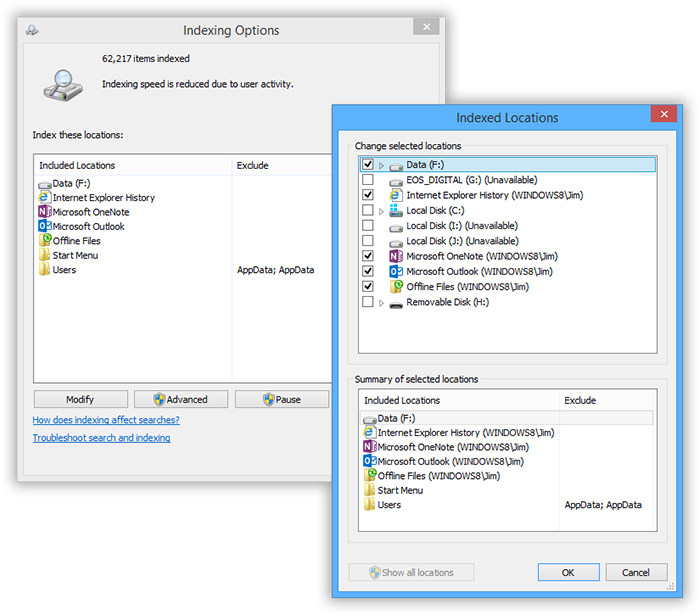
- Click on Indexing Options to open the Indexing Options window.
- In the Indexing Options window, click on the Advanced button.

- In the Advanced Options window, click on the Rebuild button.
- Click OK to confirm the rebuild process.
- Wait for the indexing to complete (this may take some time depending on the size of your files).
- Once the rebuild is finished, click OK to close the windows.
- Check if the search functionality is now working properly.
Method 3: Disable Third-Party Search Providers
- Open the Control Panel by pressing Windows Key + X and selecting Control Panel.
- In the Control Panel, set the View by option to Small icons or Large icons.
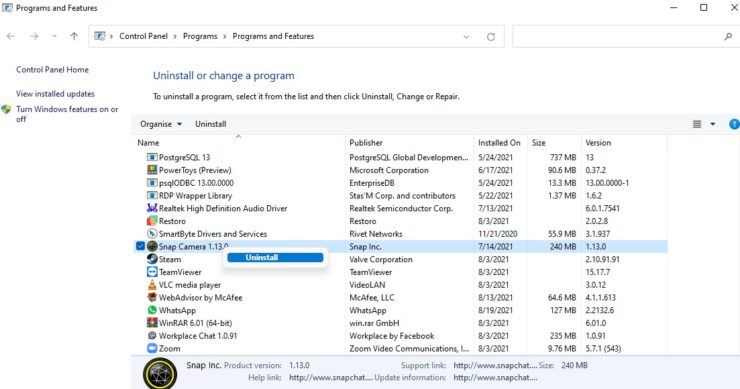
- Click on Programs and Features to open the Programs and Features window.
- In the Programs and Features window, locate any third-party search providers (e.g., Google Desktop Search) and select them.
- Click on the Uninstall button to remove the selected search providers.
- Follow the on-screen instructions to complete the uninstallation process.
- Restart your computer and check if the search functionality has been restored.
python

import os
def search_files(directory, search_term):
matches = []
for root, dirs, files in os.walk(directory):
for file in files:
if search_term.lower() in file.lower():
matches.append(os.path.join(root, file))
return matches
# Example usage
directory = 'C:\\Users\\Username\\Documents' # Replace with the desired directory
search_term = 'example' # Replace with the desired search term
results = search_files(directory, search_term)
if results:
print(f"Found {len(results)} file(s) matching the search term:")
for file_path in results:
print(file_path)
else:
print("No files found matching the search term.")
This code defines a function `search_files` that searches for files containing a given search term within a specified directory and its subdirectories. It uses the `os.walk` method to traverse through the directory and checks if the search term is present in each file name. The matches are stored in a list, which is then returned by the function.
To use the code, you need to replace the `directory` variable with the path of the directory you want to search in, and the `search_term` variable with the term you want to search for.
Note that this is a basic example and may not cover all scenarios or edge cases. You can further enhance the functionality according to your specific requirements.
Rebuild Search Index
To rebuild the search index in Windows 10 File Explorer when the search function is not working, follow these steps:
1. Open Windows File Explorer.
2. In the search box at the top right corner of the window, type “Indexing Options” and select the corresponding result.
3. In the Indexing Options window, click on the “Advanced” button.
4. In the Advanced Options window, under the “Index Settings” tab, click on the “Rebuild” button.
5. A warning message will appear, click “OK” to confirm.
6. Wait for the rebuild process to complete. This may take some time depending on the size of your index and the speed of your computer.
7. Once the rebuild is finished, click “Close” to exit the Indexing Options window.
Rebuilding the search index can help resolve issues with the search function in Windows 10 File Explorer. By following these steps, you can ensure that your search results are accurate and up-to-date.
Run Search and Indexing Troubleshooter
If you’re experiencing issues with the Windows 10 File Explorer search function, running the Search and Indexing Troubleshooter can help resolve the problem. Here’s how to fix it:
1. Press the Windows key + R to open the Run dialog box.
2. Type “msdt.exe /id SearchDiagnostic” and hit Enter.
3. The Troubleshooter will open. Follow the on-screen instructions to detect and fix any issues with the search and indexing capabilities of your Windows OS.
4. Once the troubleshooter has completed its scan, restart your PC and check if the search function is now working as expected.
By running the Search and Indexing Troubleshooter, you can quickly identify and resolve any errors that may be causing the search function in File Explorer to malfunction. This tool is designed to streamline the troubleshooting process and provide a hassle-free solution to your search-related concerns.
Add System Permission to A File/Folder
To add system permission to a file or folder in Windows 10 File Explorer, follow these steps:
1. Right-click on the file or folder you want to modify and select “Properties” from the context menu.
2. In the Properties window, click on the “Security” tab.
3. Click on the “Edit” button to change permissions.
4. In the Permissions window, click on the “Add” button to add a new user or group.
5. Type “SYSTEM” in the text box and click “Check Names” to verify the entry.
6. Click “OK” to add the SYSTEM user/group.
7. Select the newly added entry and check the “Full control” checkbox under the “Allow” column.
8. Click “Apply” and then “OK” to save the changes.
By following these steps, you can grant system permission to a file or folder in Windows 10 File Explorer.
Restart and Re-register Your Cortana
Restarting and re-registering Cortana can help resolve issues with Windows 10 File Explorer search not working. Follow these steps to fix the problem:
1. Close any open File Explorer windows.
2. Press the Windows key + R to open the Run dialog box.
3. Type “taskmgr” and press Enter to open Task Manager.
4. In the Processes tab, find “SearchUI.exe” and select it.
5. Click on the “End task” button to close SearchUI.exe.
6. Press the Windows key + X and select “Windows PowerShell (Admin)” from the menu.
7. In the PowerShell window, type “Get-AppXPackage -AllUsers | Foreach {Add-AppxPackage -DisableDevelopmentMode -Register “$($_.InstallLocation)\AppXManifest.xml”}” and press Enter.
8. Wait for the process to complete, then close the PowerShell window.
9. Restart your computer.
This should fix the File Explorer search issue. If the problem persists, you may need to try other methods or seek further assistance.
Repair Corrupted System Files
Repairing corrupted system files can help resolve issues with the Windows 10 File Explorer search function. To fix this problem, follow these steps:
Fix 1: Run the System File Checker (SFC) tool.
1. Press the Windows key + X and select “Command Prompt (Admin)”.
2. Type “sfc /scannow” and press Enter.
3. Wait for the scan to complete and restart your PC.
If the SFC tool doesn’t fix the issue, try the following:
Fix 2: Run the Deployment Image Servicing and Management (DISM) tool.
1. Open Command Prompt as an administrator.
2. Type “dism /online /cleanup-image /restorehealth” and press Enter.
3. Wait for the process to finish and restart your PC.
These steps should help resolve the Windows 10 File Explorer search not working issue. If the problem persists, it may be necessary to seek further assistance from a professional or contact Microsoft Support. Remember to always keep your system files in good health to avoid future PC issues.
Create A New Administrator User Account
To create a new administrator user account in Windows 10, follow these steps:
1. Press the Windows key + R to open the Run dialog box.
2. Type “netplwiz” and press Enter to open the User Accounts window.
3. Click on “Add…” to create a new user account.
4. Enter the necessary details for the new administrator account, such as username and password.
5. Make sure to select the option “Administrator” in the “Group” section.
6. Click “OK” to save the changes and exit the User Accounts window.
Once you have created the new administrator user account, you can use it to troubleshoot issues with Windows File Explorer search not working. Remember to log in to the new account before attempting any fixes.
An Alternate Method of File Explorer Search
Fix 1: Reset File Explorer Search Settings
If your Windows 10 File Explorer search is not working, you can try resetting the search settings to fix the issue.
1. Open File Explorer by pressing the Windows key + E.
2. Click on the “View” tab at the top.
3. In the “Options” group, click on “Options” and a new window will open.
4. In the “View” tab of the new window, click on the “Reset Folders” button.
5. Click on “Apply” and then “OK” to save the changes.
This should reset the File Explorer search settings and resolve any issues you were facing. If the problem persists, you can try other fixes mentioned in this article.
Remember to restart your computer after applying any changes to ensure they take effect.
Fix 2: Use a Third-Party Search Utility
If the built-in File Explorer search is still not working, you can use a third-party search utility like “Everything” or “Agent Ransack” to search for files and folders on your Windows 10 PC. These utilities provide a faster and more comprehensive search experience, allowing you to find files based on their names, contents, and other attributes.
To use a third-party search utility:
1. Download and install the search utility of your choice.
2. Launch the utility and enter your search query in the provided search bar.
3. The utility will display a list of matching files and folders based on your search criteria.
4. Double-click on a file or folder to open it.
Using a third-party search utility can help you overcome any limitations or errors you may be experiencing with the built-in File Explorer search.
Remember to regularly update the search utility software to ensure optimal performance.

Mark Ginter is a tech blogger with a passion for all things gadgets and gizmos. A self-proclaimed "geek", Mark has been blogging about technology for over 15 years. His blog, techquack.com, covers a wide range of topics including new product releases, industry news, and tips and tricks for getting the most out of your devices. If you're looking for someone who can keep you up-to-date with all the latest tech news and developments, then be sure to follow him over at Microsoft.