- Microsoft Windows 10 Creators Update includes a feature called Run From USB.
- You can use it to run programs directly from a USB stick.
- Microsoft’s KB45059 update is available now available now via Windows Update.
- Users who have not yet applied the update may not be able to use it immediately.
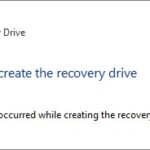
Introducing the Troubleshooting Guide: Resolving Media Creation Tool Error 0xA001B and Similar Glitches
Run Windows Media Creation Tool as an Administrator
To fix Media Creation Tool Error 0xA001B and related issues, you can run the Windows Media Creation Tool as an administrator. This simple step can often resolve the problem and allow you to continue with the installation process.
To run the tool as an administrator, follow these steps:
1. Close the Media Creation Tool if it’s already open.
2. Right-click on the MediaCreationTool.exe file and select “Run as administrator.”
3. If prompted, click “Yes” to confirm.
4. The tool will now launch with administrative privileges, which can help overcome any permission-related issues.
By running the Windows Media Creation Tool as an administrator, you give it the necessary permissions to perform tasks like formatting USB drives and creating bootable media. This can help resolve errors and ensure a smooth installation of Windows.
Remember, it’s always a good idea to run important tools as an administrator to avoid any potential issues.
Manually Format USB
- Step 1: Insert the USB drive into your computer’s USB port.
- Step 2: Open File Explorer by pressing the Windows key + E on your keyboard.
- Step 3: Locate the USB drive in the list of available drives.
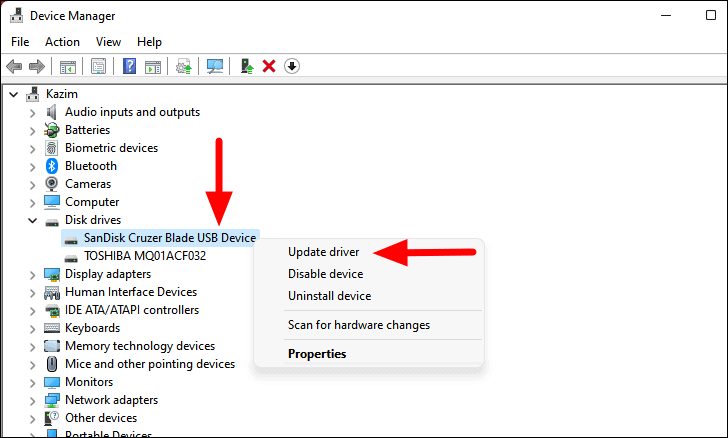
- Step 4: Right-click on the USB drive and select “Format” from the context menu.
- Step 5: In the Format window, choose the desired file system (e.g., FAT32, exFAT, NTFS).
- Step 6: Optionally, provide a new volume label for the USB drive.
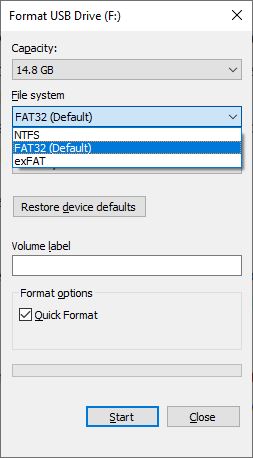
- Step 7: Ensure the “Quick Format” option is checked if you wish to perform a quick format.
- Step 8: Click on the “Start” button to initiate the formatting process.
- Step 9: Confirm the formatting action by clicking “OK” on the warning prompt.
- Step 10: Wait for the formatting process to complete, which may take a few moments.
- Step 11: Once the USB drive is formatted, you can safely remove it from the computer.
Re-Partition USB Drive with DiskPart
Re-Partition USB Drive with DiskPart
DiskPart is a command-line utility in Windows that allows you to manage disks, partitions, and volumes. If you’re encountering the Media Creation Tool Error 0xA001B or related issues while creating a bootable USB drive, you can try re-partitioning the USB drive using DiskPart. Here are the steps:
| Step | Description |
|---|---|
| 1 | Connect the USB drive to your computer. |
| 2 | Open the Command Prompt as an administrator. Press Win + X and select “Command Prompt (Admin)” from the menu. |
| 3 | Type diskpart and press Enter to open the DiskPart utility. |
| 4 | Type list disk to view a list of available disks. Identify the disk number corresponding to your USB drive. |
| 5 | Type select disk [disk number] (replace [disk number] with the actual disk number of your USB drive) and press Enter. |
| 6 | Type clean and press Enter to remove all partitions from the USB drive. |
| 7 | Type create partition primary and press Enter to create a new primary partition on the USB drive. |
| 8 | Type format fs=ntfs quick (or format fs=fat32 quick if you prefer FAT32 format) and press Enter to format the partition with the desired file system. |
| 9 | Type active and press Enter to mark the partition as active. |
| 10 | Type exit to exit the DiskPart utility. |
| 11 | Now, you can proceed with using the Media Creation Tool or any other tool to create a bootable USB drive. |
Re-partitioning the USB drive using DiskPart can often resolve issues related to the Media Creation Tool Error 0xA001B. Make sure to double-check the disk number before performing any operations to avoid accidentally modifying the wrong disk.
Install KB4505903 Update
To fix the Media Creation Tool Error 0xA001B and related issues, follow these steps:
1. Download the KB4505903 update from the Microsoft website.
2. Once the update is downloaded, **run** it on your PC.
3. Follow the on-screen instructions to complete the installation.
4. If the error persists, try formatting your USB flash drive before running the Media Creation Tool. To format the USB drive, right-click on it in File Explorer and select **Format**.
5. If you encounter an error code such as 0x80042405, 0x80070003, or 0x80004005 during the copying phase of the installation, try these solutions:
– Make sure your USB flash drive has enough space and is not write-protected.
– Disconnect any external devices connected to your PC.
– Temporarily disable any antivirus or firewall software.
– Run the Media Creation Tool with administrative privileges.
6. If you’re still experiencing issues, it may be helpful to consult an expert guide or contact Microsoft support for further assistance.
Remember, technology can be complex, but with the right skills and resources, you can overcome any problem and enjoy the rewards it brings.

Mark Ginter is a tech blogger with a passion for all things gadgets and gizmos. A self-proclaimed "geek", Mark has been blogging about technology for over 15 years. His blog, techquack.com, covers a wide range of topics including new product releases, industry news, and tips and tricks for getting the most out of your devices. If you're looking for someone who can keep you up-to-date with all the latest tech news and developments, then be sure to follow him over at Microsoft.