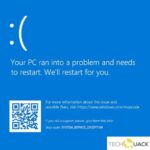
- The “system_thread_exception_not_handled” error indicates that the system thread on your computer threw an exception for an error that was not handled by the handler.
- Because the error was not caught and handled, a blue screen appeared, forcing the computer to try to gather information about the error.
Unraveling the Mysteries: Resolving System Thread Exception Not Handled in Windows 10
Booting Into Safe Mode
Booting into Safe Mode in Windows 10 can help resolve the System Thread Exception Not Handled error. To do this, follow these steps:
1. Start your computer and repeatedly press the F8 key until the Advanced Boot Options screen appears.
2. Use the arrow keys to select Safe Mode and press Enter.
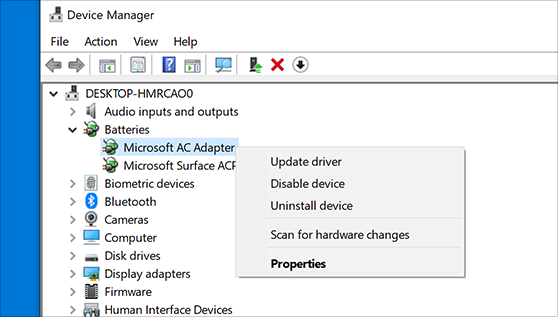
3. Once in Safe Mode, go to the Start menu and type Device Manager in the search bar. Open the Device Manager.
4. Expand the Display adapters category and right-click on your graphics driver. Select Uninstall and follow the on-screen instructions to remove the driver.
5. Restart your computer and it will automatically install a generic graphics driver.
6. Now, go to the manufacturer’s website and download the latest driver for your graphics card.
7. Install the downloaded driver and restart your computer again.
By booting into Safe Mode and reinstalling the graphics driver, you can fix the System Thread Exception Not Handled error in Windows 10.
Identifying the Responsible Driver
- Update drivers: Ensure all drivers on your Windows 10 system are up to date, especially the ones related to hardware components like graphics cards, network adapters, and audio devices.
- Check for conflicting drivers: Identify and resolve any conflicts caused by incompatible or outdated drivers that may be triggering the System Thread Exception Not Handled error.
- Scan for malware: Perform a thorough scan of your system using reliable antivirus software to eliminate the possibility of malware or viruses causing the error.
- Disable problematic software: Temporarily disable or uninstall any recently installed software or programs that might be conflicting with your system’s drivers or causing the error.
- Perform a clean boot: Start your Windows 10 system with only essential services and startup programs to determine if a third-party application is responsible for the error.
- Run Windows Memory Diagnostic: Utilize the built-in Windows Memory Diagnostic tool to check for any memory-related issues that could be triggering the System Thread Exception Not Handled error.
- Check your hardware: Inspect hardware components such as RAM, hard drives, and graphics cards for any physical damage or loose connections that could be causing the error.
- Restore system settings: Use the System Restore feature to revert your Windows 10 system to a previous state when the error was not occurring.
- Seek professional technical support: If all else fails, contact Microsoft support or consult a qualified technician for further assistance in resolving the System Thread Exception Not Handled error.
Updating or Rolling Back Drivers
To update or roll back drivers in Windows 10 to fix the “System Thread Exception Not Handled” error, follow these steps:
1. Press the Windows key + X and select “Device Manager” from the menu.
2. In the Device Manager window, expand the categories and locate the driver you want to update or roll back.
3. Right-click on the driver and select “Update driver” or “Roll back driver” from the context menu.
4. Follow the on-screen instructions to complete the update or rollback process.
5. Restart your computer for the changes to take effect.
6. If the issue persists, try updating or rolling back other drivers that may be causing the problem.
Note: It’s important to keep your drivers up to date to ensure optimal performance and stability. If you encounter difficulties or the error persists, you may need to seek further assistance from Microsoft support or a qualified technician.
cpp

#include

#include
// Exception handler function
LONG WINAPI ExceptionHandler(EXCEPTION_POINTERS* exceptionInfo)
{
std::cout << "System thread exception not handled!" << std::endl;
// Additional error handling or logging can be performed here
// Terminate the process
TerminateProcess(GetCurrentProcess(), EXIT_FAILURE);
// Return exception handling completed
return EXCEPTION_EXECUTE_HANDLER;
}
int main()
{
// Set the exception handler
SetUnhandledExceptionFilter(ExceptionHandler);
// Simulate an unhandled exception
int* ptr = nullptr;
*ptr = 42; // This will cause an access violation exception
return 0;
}
In this example, we define an exception handler function `ExceptionHandler` that will be called when an exception is not handled by any other part of the program. The function prints a message indicating the "system thread exception not handled" error and performs any additional error handling or logging you may require.
In the `main` function, we set the exception handler using `SetUnhandledExceptionFilter` to capture any unhandled exceptions. Then we simulate an unhandled exception by dereferencing a null pointer, causing an access violation exception. The exception will trigger the `ExceptionHandler` function, and the program will terminate gracefully.
It's important to note that proper error handling and exception management may vary depending on the specific scenario and requirements of your application.
Renaming the Faulty File
To fix the "System Thread Exception Not Handled" error in Windows 10, one possible solution is to rename the faulty file causing the issue. Follow these steps:
1. Start by identifying the problematic file. This can be done by checking the blue screen error message or using the Event Viewer.
2. Once you've found the file, open File Explorer and navigate to its location.
3. Right-click on the file and select "Rename."
4. Add ".old" at the end of the file name to rename it. For example, if the file is "faultyfile.sys," rename it to "faultyfile.sys.old."
5. Press Enter to save the changes.
6. Restart your computer to see if the issue is resolved.
Renaming the faulty file can help resolve the "System Thread Exception Not Handled" error in Windows 10. Remember to be cautious when renaming files and ensure you're renaming the correct one.
Repairing System Files with SFC and DISM
To repair system files and fix the "System Thread Exception Not Handled" error in Windows 10, you can use the SFC (System File Checker) and DISM (Deployment Image Servicing and Management) tools. Here's how:
1. Open the Command Prompt as an administrator. Press the Windows key, type "Command Prompt," right-click on it, and select "Run as administrator."
2. Run the following command to scan and repair corrupted system files with SFC: sfc /scannow. This process may take some time.
3. After SFC completes, run the DISM tool to restore the system image: dism /online /cleanup-image /restorehealth. Be patient, as this may also take a while.
4. Once DISM finishes, restart your computer and check if the "System Thread Exception Not Handled" error is resolved.
These steps can help resolve various system errors and improve the stability of your Windows 10 system. If you continue to experience difficulties, consider seeking additional troubleshooting methods or seeking assistance from Microsoft support.
Restoring Your PC with System Restore
If you are experiencing the "System Thread Exception Not Handled" error in Windows 10, you can use System Restore to fix the issue. Here are the steps to follow:
1. Press the Windows key + R to open the Run dialog box.
2. Type "rstrui" and press Enter to open System Restore.
3. Click "Next" on the System Restore window.
4. Select a restore point before the error occurred and click "Next".
5. Review the restore point details and click "Finish" to start the restoration process.
6. Your PC will restart and the restore process will begin. This may take some time.
7. Once the restoration is complete, your PC will restart again.
8. Check if the "System Thread Exception Not Handled" error is resolved.
By using System Restore, you can revert your PC back to a previous state and potentially fix the error. Remember to create a restore point before making any changes to your system to have a fallback option in case anything goes wrong.
Understanding Blue Screen Errors
To fix this error, you can try the following methods:
1. Update drivers: Outdated or incompatible drivers can cause this error. Update your drivers to the latest version to resolve the issue.
2. Check for Windows updates: Make sure your Windows operating system is up to date. Windows updates often include bug fixes and patches that can resolve blue screen errors.
3. Run a system file check: Use the built-in System File Checker tool to scan and repair any corrupted system files that may be causing the error.
4. Check hardware connections: Ensure that all hardware components are properly connected to your system. Faulty connections can result in blue screen errors.
Remember to restart your system after applying any changes. If the issue persists, it may be helpful to seek further assistance or consult online forums for additional troubleshooting steps.
Resolving the "SYSTEM_THREAD_EXCEPTION_NOT_HANDLED" Error
When encountering the "SYSTEM_THREAD_EXCEPTION_NOT_HANDLED" error in Windows 10, users may experience a blue screen of death (BSOD) and their system may crash. To fix this issue, there are several steps you can take:
1. Update Windows: Ensure that your Windows operating system is up to date. This can be done by going to Settings > Update & Security > Windows Update and clicking on "Check for updates."
2. Check for faulty drivers: Faulty or outdated drivers can cause the "SYSTEM_THREAD_EXCEPTION_NOT_HANDLED" error. Use the Device Manager to update or reinstall any problematic drivers.
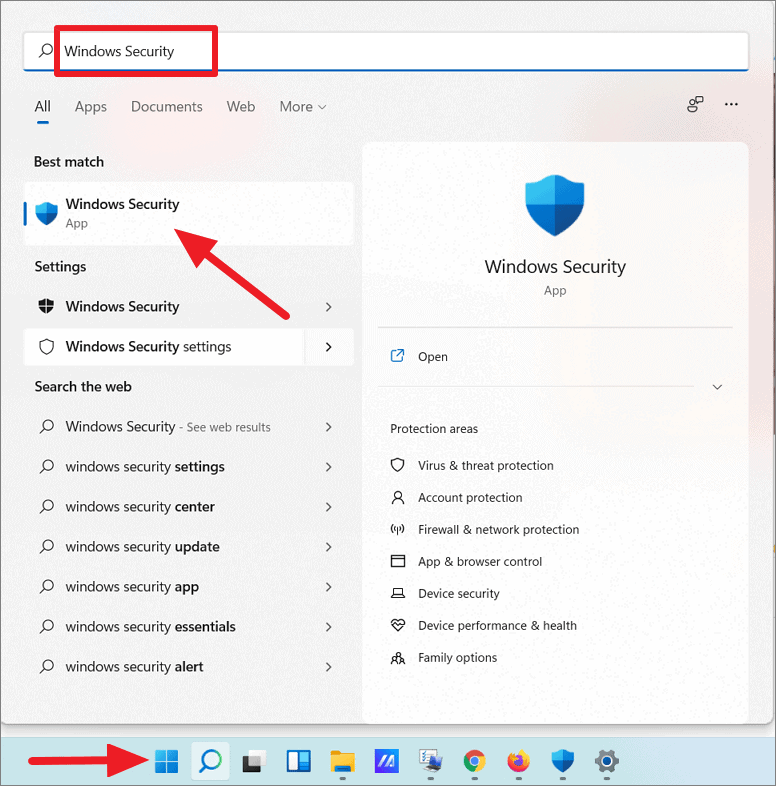
3. Run a memory check: Faulty RAM can also lead to this error. To run a memory check, type "Windows Memory Diagnostic" in the search bar, and select the "Windows Memory Diagnostic" app. Follow the on-screen instructions to complete the memory check.
4. Scan for malware: Malware infections can also trigger this error. Use a reliable antivirus program to scan your system and remove any malware.
By following these steps, you can resolve the "SYSTEM_THREAD_EXCEPTION_NOT_HANDLED" error and prevent future occurrences.
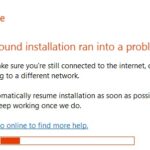
Resetting or Reinstalling Windows
If you're experiencing the "System Thread Exception Not Handled" error in Windows 10, you may need to reset or reinstall Windows to fix the issue. Here are a few ways to do it:
Reset Windows:
1. Press the Windows key + I to open the Settings app.
2. Go to Update & Security and click on Recovery.
3. Under Reset this PC, click on Get started.
4. Choose whether you want to keep your files or remove everything and follow the on-screen instructions.
Reinstall Windows:
1. Create a Windows 10 installation media using a USB drive or DVD.
2. Boot your computer from the installation media.
3. Select your language preferences and click Next.
4. Click Install now and follow the instructions to reinstall Windows.
Remember to back up your important files before resetting or reinstalling Windows.
Additional Methods for Fixing the Error
- Open Device Manager by pressing Windows key + X and selecting Device Manager from the list.
- Expand the category related to the device driver causing the error.
- Right-click on the device driver and select Update driver. Choose either Search automatically for updated driver software or Browse my computer for driver software depending on your preference.
- If updating the driver doesn't solve the issue, right-click on the device driver again and select Uninstall device.
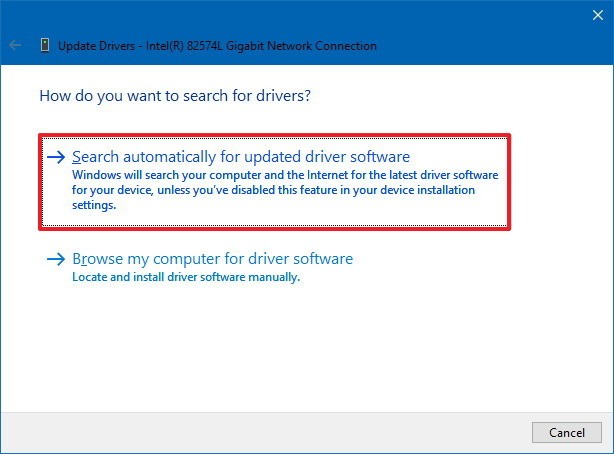
- Restart your computer and let Windows automatically reinstall the device driver.
Method 2: Run System File Checker (SFC) Scan
- Open Command Prompt as an administrator by pressing Windows key + X and selecting Command Prompt (Admin).
- Type sfc /scannow and press Enter.

- Wait for the scan to complete. It may take some time.
- If any corrupted system files are found, the tool will attempt to fix them automatically.
- Restart your computer after the scan is finished.
Method 3: Disable or Update Antivirus Software
- Open your antivirus software by clicking on its icon in the system tray or searching for it in the Start menu.
- Look for options related to real-time scanning or behavior monitoring.
- Temporarily disable these features or pause the antivirus software altogether.
- If disabling the antivirus software resolves the issue, consider updating it to the latest version or contacting the software's support for further assistance.
- Remember to re-enable your antivirus software after troubleshooting.
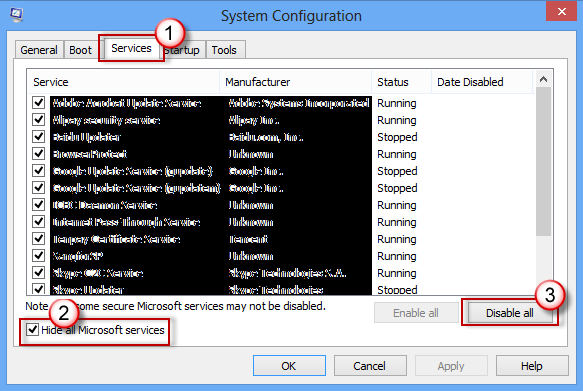
Method 4: Perform a Clean Boot
- Press Windows key + R to open the Run dialog box.
- Type msconfig and press Enter.
- In the General tab, select Selective startup and uncheck the box next to Load startup items.
- Go to the Services tab and check the box next to Hide all Microsoft services.
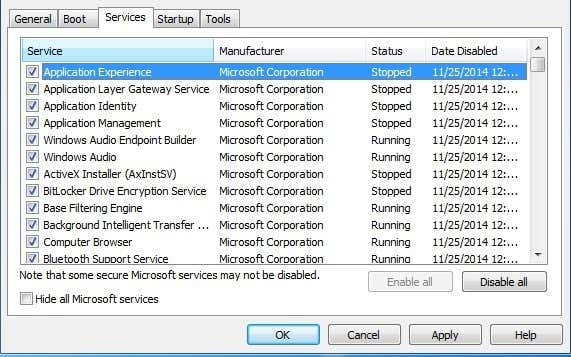
- Click on Disable all to disable all non-Microsoft services.
- Go to the Startup tab and click on Open Task Manager.
- In the Startup tab of the Task Manager, disable all startup items by right-clicking on each item and selecting Disable.
- Close the Task Manager and go back to the System Configuration window.
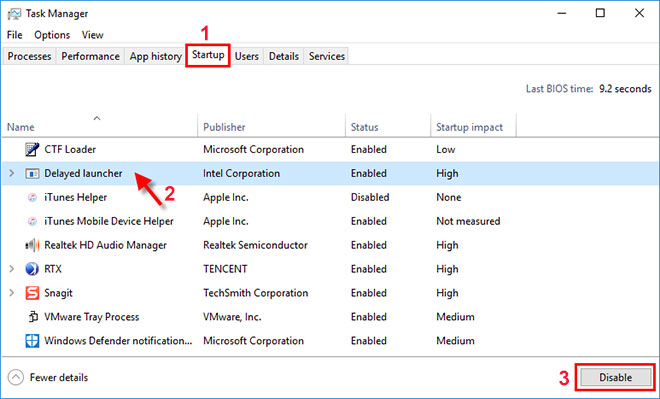
- Click on OK and restart your computer.
Further Resources and Conclusion
If you're still experiencing the "System Thread Exception Not Handled" error in Windows 10, here are some additional resources and steps to help you fix the issue.
1. Check for Windows updates: Make sure your operating system is up to date. Go to Settings > Update & Security > Windows Update to check for any available updates.
2. Update device drivers: Outdated or incompatible drivers can cause this error. Use Device Manager to check for driver updates or visit the manufacturer's website for the latest drivers.
3. Run a system file check: Open Command Prompt as an administrator and type "sfc /scannow" to scan and repair corrupted system files.
4. Use the Windows Event Viewer: The Event Viewer can provide more information about the error. Search for "Event Viewer" in the Start menu and navigate to Windows Logs > System to find any related events.
Remember to always back up your important files before making any changes to your system. If you're unsure or need further assistance, consult the Microsoft support forums or reach out to their customer support for additional guidance.
In conclusion, the "System Thread Exception Not Handled" error can be frustrating, but with these resources and steps, you should be able to resolve the issue and get your Windows 10 system running smoothly again.

Mark Ginter is a tech blogger with a passion for all things gadgets and gizmos. A self-proclaimed "geek", Mark has been blogging about technology for over 15 years. His blog, techquack.com, covers a wide range of topics including new product releases, industry news, and tips and tricks for getting the most out of your devices. If you're looking for someone who can keep you up-to-date with all the latest tech news and developments, then be sure to follow him over at Microsoft.