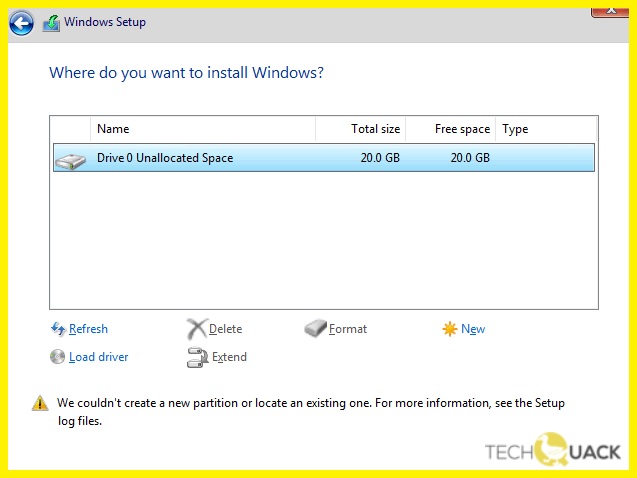
- Windows 10 users have reported a “Failed to create new partition” error when creating a new partition during Windows 10 installation.
- This error is preventing them from installing Windows 10.
- Sometimes the error can be caused by an incorrectly created Windows bootable device.
- Sometimes this causes Windows to confuse the USB drive or CD-ROM with the hard disk, resulting in the error.
Disconnect External and Internal Storage Devices
To fix the “We Couldn’t Create a New Partition” error in Windows, one of the recommended steps is to disconnect any external and internal storage devices. This can help resolve any conflicts or issues that may be causing the error.
To disconnect the storage devices:
1. Open the Command Prompt by pressing the Windows key + R, then typing “cmd” and pressing Enter.
2. In the Command Prompt window, type “diskpart” and press Enter.
3. Type “list disk” and press Enter to see a list of available disks.
4. Identify the disk number of the external or internal storage device you want to disconnect.
5. Type “select disk [disk number]” and press Enter, replacing [disk number] with the actual disk number.
6. Type “offline disk” and press Enter to disconnect the selected disk.
Use Diskpart to Create a New Partition
- Open Command Prompt as an administrator.
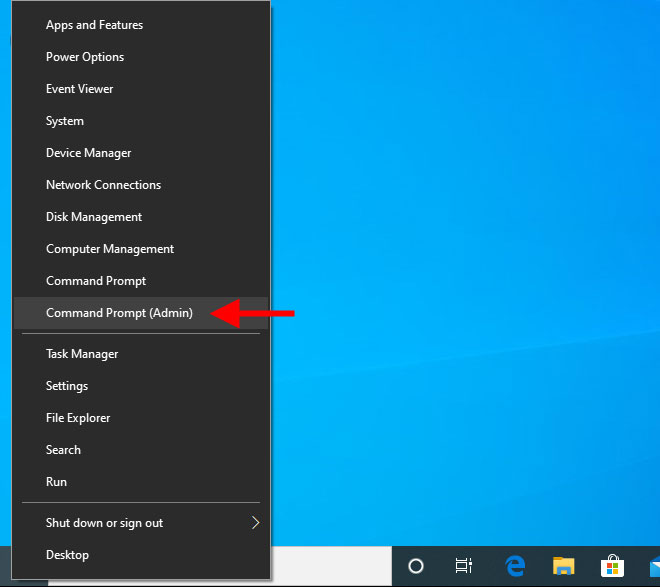
- Press Windows key + X and select Command Prompt (Admin) or Windows PowerShell (Admin).
- Type diskpart and press Enter to open the Diskpart utility.
- Type list disk and press Enter to view the available disks.
- Identify the disk number of the hard drive or SSD where you want to create a new partition.
- Type select disk X (replace X with the disk number) and press Enter to select the desired disk.
- Type clean and press Enter to remove all existing partitions and data on the selected disk.
- Be careful as this step will erase all data on the selected disk.
- Type create partition primary and press Enter to create a new primary partition.
- Type format fs=ntfs quick and press Enter to quickly format the newly created partition with the NTFS file system.
- You can replace “ntfs” with “fat32” if you prefer the FAT32 file system.
- Type assign letter=X (replace X with the desired drive letter) and press Enter to assign a drive letter to the new partition.
- Type exit and press Enter to exit the Diskpart utility.
- Close the Command Prompt.
Convert the Partition to the GPT Format
To convert the partition to the GPT format and fix the “We Couldn’t Create a New Partition” error in Windows, follow these steps:
1. Run Diskpart by pressing Windows key + X and selecting “Command Prompt (Admin)”.
2. In the command prompt, type “diskpart” and press Enter.
3. Type “list disk” to see a list of available disks.
4. Identify the disk you want to convert to GPT (e.g., Disk 0).
5. Type “select disk [disk number]” (e.g., select disk 0) and press Enter.
6. Type “clean” to remove all partitions on the disk.
7. Type “convert gpt” to convert the disk to GPT format.
8. After the conversion is complete, you can proceed with installing Windows or creating new partitions.
Make the Partition Active
To make the partition active and resolve the “We Couldn’t Create a New Partition” error in Windows, follow these steps:
1. Open the Command Prompt by pressing the Windows key + R, typing “cmd”, and pressing Enter.
2. In the Command Prompt window, type “diskpart” and press Enter to launch the DiskPart tool.
3. Type “list disk” and press Enter to see a list of available disks.
4. Identify the disk that contains the partition you want to make active.
5. Type “select disk [disk number]” and press Enter, replacing [disk number] with the disk number from the previous step.
6. Type “list partition” and press Enter to see a list of partitions on the selected disk.
7. Identify the partition you want to make active.
8. Type “select partition [partition number]” and press Enter, replacing [partition number] with the partition number from the previous step.
9. Type “active” and press Enter to make the selected partition active.
10. Close the Command Prompt window and restart your computer.
This should resolve the “We Couldn’t Create a New Partition” error and make the partition active, allowing you to proceed with the Windows installation or other tasks.
Use Third-Party Software to Create a Bootable Device
To fix the “We Couldn’t Create a New Partition” error in Windows, you can use third-party software to create a bootable device. Here’s how:
1. Connect a USB drive to your computer.
2. Download and install a third-party software tool like Rufus or WinToUSB.
3. Run the software and select the USB drive as the target device.
4. Choose the ISO file of the Windows OS you want to install.
5. Configure the settings according to your preferences, such as partition scheme and file system.
6. Click “Start” to create the bootable device.
7. Once the process is complete, restart your computer and boot from the USB drive.
8. Follow the on-screen prompts to install Windows on your computer.
Using third-party software to create a bootable device can help resolve the “We Couldn’t Create a New Partition” error and allow you to successfully install Windows.
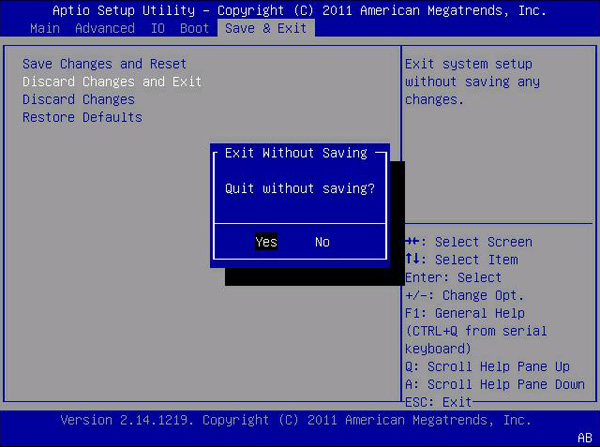
Set the Hard Drive as the First Boot Device
- Access the BIOS settings – Restart your computer and enter the BIOS by pressing the designated key (like F2 or Del) during startup.
- Navigate to the Boot menu – Look for the Boot or Boot Order section in the BIOS menu.

- Locate the Hard Drive option – Find the option that refers to the hard drive or storage devices.
- Set the Hard Drive as the first boot device – Select the Hard Drive option and move it to the top of the boot order.
- Save changes and exit – Save the changes you made in the BIOS and exit the menu.
- Restart your computer – Allow the computer to restart and boot from the hard drive as the primary device.
Fix the New Partition Error Message
Fixing the New Partition Error Message in Windows
If you encounter the “We Couldn’t Create a New Partition” error message while trying to create a new partition on your Windows OS, follow these steps to resolve the issue:
1. Start by running Diskpart to manage your partitions effectively.
2. Once Diskpart is open, locate the drive on which you want to create the partition. Use the list disk command to view all available drives.
3. Select the desired drive by using the select disk [disk number] command.
4. Use the clean command to remove any existing partitions on the selected drive.
5. Next, create a new partition by running the create partition primary command.
6. Format the newly created partition using the format fs=ntfs quick command.
7. Finally, assign a drive letter to the partition with the assign letter=[letter] command.
Fix the New Partition Error during Windows 10 Installation
If you encounter the “We Couldn’t Create a New Partition” error during Windows 10 installation, follow these steps to resolve the issue.
1. Press the Shift + F10 keys to open a command prompt window.
2. Type “diskpart” and press Enter to launch the DiskPart utility.
3. Type “list disk” to view the available disks.
4. Identify the disk you want to install Windows on and remember its number.
5. Type “select disk [disk number]” to select the disk.
6. Type “clean” to remove all existing partitions on the disk.
7. Type “convert gpt” to convert the disk to the GPT partition style.
8. Type “create partition primary” to create a new primary partition.
9. Type “format fs=ntfs quick” to format the partition with the NTFS file system.
10. Type “exit” twice to close the command prompt and resume the Windows installation.
Fix the New Partition Error for Windows 10 SSD
To fix the “We Couldn’t Create a New Partition” error in Windows 10 on an SSD, follow these steps:
1. Press the Windows key and type “Diskpart” to open the Diskpart utility.
2. Run the command “list disk” to view all the available disks.
3. Identify your SSD by its size and note its disk number.
4. Run the command “select disk [disk number]” to select your SSD.
5. Run the command “clean” to remove any existing partitions on the SSD.
6. Run the command “create partition primary” to create a new primary partition.
7. Run the command “format fs=ntfs quick” to quickly format the partition.
8. Run the command “assign” to assign a drive letter to the partition.
9. Close the Diskpart utility and continue with the Windows installation process.
By following these steps, you should be able to fix the “We Couldn’t Create a New Partition” error and proceed with installing Windows 10 on your SSD.

Mark Ginter is a tech blogger with a passion for all things gadgets and gizmos. A self-proclaimed "geek", Mark has been blogging about technology for over 15 years. His blog, techquack.com, covers a wide range of topics including new product releases, industry news, and tips and tricks for getting the most out of your devices. If you're looking for someone who can keep you up-to-date with all the latest tech news and developments, then be sure to follow him over at Microsoft.
Related posts:
 How to Troubleshoot ‘Device is Not Ready’ Issue on Windows Computers
How to Solve ‘Failed to Enumerate Objects in the Container – Access is Denied’ Issue on Windows 10
How to Fix ‘We Couldn’t Create a New Partition or Locate’ Error Message
How to Troubleshoot ‘Device is Not Ready’ Issue on Windows Computers
How to Solve ‘Failed to Enumerate Objects in the Container – Access is Denied’ Issue on Windows 10
How to Fix ‘We Couldn’t Create a New Partition or Locate’ Error Message
 Correcting the ‘You Must Enable System Protection on This Drive’