- Some users have reported encountering the “Check Browser Before Access” error when opening a website.
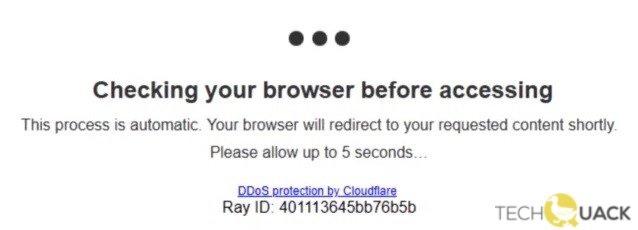
- The error message always looks like this: Check your browser before accessing it.
- Your browser will soon redirect you to the right content.
- Please allow up to 5 seconds.
- The process happens automatically.
- The message is basically displayed when the site owner is under a DDoS attack and has enabled “Attack Mode” setting when visitors visit your site.
Unleash the Power of Browsing: Resolving the “Checking Your Browser Before Accessing” Challenge
Reasons for Browser Checking by Cloudflare
1. Enhanced Security: Cloudflare’s browser checking feature helps protect websites from potential security threats and attacks, such as DDoS attacks. By checking your browser before accessing a website, Cloudflare ensures that you are a legitimate user and not a malicious bot.
2. Prevents Unwanted Actions: The browser checking process helps prevent unauthorized access and blocks suspicious activities on websites. It ensures that only genuine users with valid browser configurations can access the site, enhancing overall security and blocking potential threats.
3. Error Troubleshooting: The browser checking feature also helps troubleshoot and fix common browser errors that may prevent you from accessing a website. By identifying and addressing these errors, Cloudflare ensures a smooth browsing experience for users.
4. Customizable Protection: Cloudflare allows website owners to customize the browser checking process according to their specific security needs. This gives site owners more control over who can access their site and helps them protect their web resources effectively.
By incorporating browser checking, Cloudflare takes the necessary steps to provide a secure browsing experience, ensuring the safety of both website owners and users.
Troubleshooting Cloudflare Browser Check Loop
If you’re experiencing a Cloudflare Browser Check Loop, here are a few steps you can take to troubleshoot and fix the issue:
1. Clear your browser cookies and cache: Clearing your cookies and cache can help resolve any conflicts or errors that may be causing the loop.
2. Disable browser extensions: Some browser extensions can interfere with Cloudflare’s browser check. Disable any extensions that you suspect may be causing the issue and try accessing the website again.
3. Check your system settings: Make sure that your system settings are properly configured and not blocking any necessary resources for the browser check.
4. Try a different browser: If the issue persists, try accessing the website using a different browser. This can help determine if the problem is specific to a certain browser.
If none of these steps resolve the issue, it’s recommended to contact the site owner or seek assistance from Cloudflare experts for further troubleshooting.
javascript

// Function to check the browser version

function checkBrowserVersion() {

var userAgent = navigator.userAgent,

temp,

browserName,

browserVersion;
// Check for Internet Explorer
if ((temp = userAgent.indexOf('MSIE')) !== -1) {
browserName = 'Internet Explorer';
browserVersion = userAgent.substring(temp + 5, userAgent.indexOf(';', temp));
}
// Check for Microsoft Edge
else if ((temp = userAgent.indexOf('Edge')) !== -1) {
browserName = 'Microsoft Edge';
browserVersion = userAgent.substring(temp + 5, userAgent.indexOf(' ', temp));
}
// Check for Chrome
else if ((temp = userAgent.indexOf('Chrome')) !== -1) {
browserName = 'Google Chrome';
browserVersion = userAgent.substring(temp + 7, userAgent.indexOf(' ', temp));
}
// Check for Firefox
else if ((temp = userAgent.indexOf('Firefox')) !== -1) {
browserName = 'Mozilla Firefox';
browserVersion = userAgent.substring(temp + 8, userAgent.indexOf(' ', temp));
}
// Check for Safari
else if ((temp = userAgent.indexOf('Safari')) !== -1) {
browserName = 'Safari';
browserVersion = userAgent.substring(temp + 7, userAgent.indexOf(' ', temp));
}
// If no match found, assume it is another browser
else {
browserName = 'Unknown';
browserVersion = 'N/A';
}
// Output the browser name and version
console.log('Browser: ' + browserName);
console.log('Version: ' + browserVersion);
}
// Call the function to check the browser version
checkBrowserVersion();
Please note that this code snippet uses JavaScript and can be executed within a web browser’s console. It extracts the browser name and version from the `navigator.userAgent` property and prints the results in the console. This can be helpful for troubleshooting issues related to specific browser versions on a Windows PC.
Bypassing the Browser Check
If you’re encountering the “Checking Your Browser Before Accessing” issue, there are a few ways to bypass the browser check and access the desired content.
One option is to disable JavaScript in your browser settings. By doing this, you can prevent the browser check from loading and proceed directly to the content you want to access.
Another option is to use a VPN (Virtual Private Network). A VPN can help you bypass the browser check by changing your IP address and making it appear as if you’re accessing the content from a different location.
You can also try clearing your browser cache and cookies. This can help resolve any temporary issues that may be causing the browser check error.
If none of these methods work, you can contact the site owner or the experts at Cloudflare, the security service that often implements browser checks. They may be able to provide a solution or further assistance.
Remember, bypassing browser checks may have security implications, so proceed with caution and only use these methods if you are confident in the safety of the content you’re accessing.
Set Date and Time Automatically
To troubleshoot and fix the “Checking Your Browser Before Accessing” issue, you can set the date and time on your device to update automatically. This ensures that your browser’s security features, such as Cloudflare, work properly.
To do this on Windows:
1. Right-click on the date and time in the bottom right corner of your screen.
2. Select “Adjust date/time.”
3. Toggle the “Set time automatically” and “Set time zone automatically” options to ON.
4. Click “Sync now” to update the date and time.
On Mac:
1. Click on the Apple menu and select “System Preferences.”
2. Click on “Date & Time.”
3. Enable the “Set date and time automatically” option.
4. Close the preferences window to save the changes.
By setting the date and time to update automatically, you can ensure that your browser’s security solutions, like Cloudflare, function correctly and protect you from potential threats.
Disabling Extensions that Block Ads and Fingerprinting
If you’re experiencing issues with checking your browser before accessing certain websites, it may be due to extensions that block ads and fingerprinting. To troubleshoot and fix this issue, follow these steps:
1. Disable extensions: Open your browser’s settings and navigate to the Extensions or Add-ons section. Look for any extensions that block ads or fingerprinting and disable them.
2. Clear cache and cookies: Clearing your browser’s cache and cookies can help resolve any conflicts caused by these extensions. Go to your browser’s settings and find the option to clear browsing data. Select the cache and cookies options, and click on the “Clear” or “Delete” button.
3. Restart your browser: After disabling the extensions and clearing cache and cookies, restart your browser to apply the changes.
Scanning PC for Browser Hijacking
If you suspect your browser may be hijacked, follow these steps to scan your PC and fix the issue:
1. Download and install a reliable security solution, such as Microsoft Defender or a trusted antivirus program.
2. Open the security software and navigate to the scanning options.
3. Select a full system scan to thoroughly check your PC for any malicious software or browser hijackers.
4. Follow the on-screen instructions to start the scan and allow the software to complete the process.
5. Once the scan is complete, review the scan results and take appropriate actions to remove any threats detected.
6. Restart your PC to ensure any changes take effect.
7. After restarting, launch your browser and check if the hijacking issue persists.
Clearing Browser Data and Using Incognito Mode
If you’re experiencing issues with checking your browser before accessing certain web resources, there are a couple of steps you can take to troubleshoot and fix the problem.
Firstly, try clearing your browser data. This can help resolve any conflicts or errors that may be causing the issue. To do this, follow these steps:
1. Open your browser’s settings or preferences.
2. Look for the option to clear browsing data or history.
3. Select the appropriate time range (e.g., last hour, last day, all time).
4. Check the boxes for the types of data you want to clear (e.g., cookies, cache, browsing history).
5. Click on the “Clear” or “Delete” button to remove the selected data.
Additionally, using incognito mode can also be helpful in troubleshooting browser issues. Incognito mode allows you to browse the internet without storing any browsing history, cookies, or cache. To open an incognito window:
1. Open your browser.
2. Look for the option to open a new incognito window or tab.
3. Click on it to start browsing privately.
By following these steps, you can clear browser data and use incognito mode to troubleshoot and fix the checking your browser before accessing issue.

Mark Ginter is a tech blogger with a passion for all things gadgets and gizmos. A self-proclaimed "geek", Mark has been blogging about technology for over 15 years. His blog, techquack.com, covers a wide range of topics including new product releases, industry news, and tips and tricks for getting the most out of your devices. If you're looking for someone who can keep you up-to-date with all the latest tech news and developments, then be sure to follow him over at Microsoft.