- Google Chrome is the most popular browser available today on various platforms.
- It is preferred by many people because of its speed and minimalistic design.
- While it is a robust and stable browser, there are times when you will have some issues.
- In this final part of our troubleshooting series, we will look at the “Google Chrome is out of memory” error.
Unlock the door to seamless browsing as we unveil the ultimate guide to resolving those pesky out of memory errors in Google Chrome.
Troubleshooting
If you’re experiencing out of memory errors with Google Chrome, there are a few steps you can take to resolve the issue.
First, try closing any unnecessary tabs or programs running in the background to free up memory. You can also try restarting your computer to clear any temporary memory issues.
If that doesn’t work, you can increase Chrome’s memory limit by following these steps:
1. Type “chrome://flags” in the address bar and press Enter.
2. Search for “Enable memory reclaimer” and click the dropdown menu to enable it.
3. Restart Chrome for the changes to take effect.
Another solution is to disable any unnecessary extensions that may be using up memory. To do this, go to the menu in the top-right corner of Chrome, select “More tools,” then “Extensions.” Disable any extensions that you don’t need.
If the issue persists, consider updating to the latest version of Chrome or trying a different browser to see if the problem is specific to Chrome.
Update to 64-bit Version of Chrome
Update to the 64-bit version of Chrome to fix out of memory errors. This can help improve performance and stability. To update, follow these steps:
1. Open Chrome and go to the menu in the top right corner (three dots).
2. Select “Settings” from the drop-down menu.
3. Scroll down and click on “About Chrome” in the left sidebar.
4. Chrome will automatically check for updates and install them if available.
5. Once the update is complete, restart Chrome.
Note: Make sure you have a stable internet connection during the update process.
Updating to the 64-bit version of Chrome can help address memory issues, as it allows Chrome to utilize more RAM. This can prevent crashes and improve overall browsing experience.
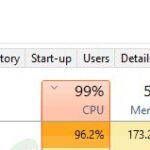
Using Task Manager
If you’re experiencing out of memory errors while using Google Chrome, Task Manager can help you identify and fix the issue. Here’s how:
1. Press Shift + Esc to open Task Manager.
2. Look for the Processes tab and find the Chrome process with the highest memory usage.
3. Select the process and click on End Process to close it.
4. Restart Chrome and check if the memory issue persists.
If the problem continues, you can try the following solutions:
– Clear your browsing history and cache.
– Disable unnecessary extensions.
– Update Chrome to the latest version.
– Check your internet connection.
By using Task Manager, you can easily identify and fix memory issues in Google Chrome, ensuring a smoother browsing experience.
Clear Cache and Cookies
Clearing your cache and cookies can help fix Google Chrome out of memory errors. Follow these steps to clear your cache and cookies:
1. Open Google Chrome and click on the three-dot menu at the top right corner.
2. Select “Settings” from the drop-down menu.
3. Scroll down and click on “Advanced” to expand the advanced settings.
4. Under the “Privacy and security” section, click on “Clear browsing data”.
5. In the pop-up window, select “Cached images and files” and “Cookies and other site data”.
6. Choose the time range for which you want to clear the data. If you want to clear everything, select “All time”.
7. Click on the “Clear data” button to clear your cache and cookies.
Clearing your cache and cookies can help resolve memory issues and improve the performance of your Chrome browser. Give it a try if you’re encountering out of memory errors.
Disable Extensions
If you’re experiencing out of memory errors while using Google Chrome, one solution is to disable extensions. Extensions can consume a lot of memory, causing the browser to crash or run slowly. To disable extensions:
1. Open Google Chrome and click on the three-dot menu in the top-right corner.
2. Select “More tools” and then “Extensions” from the dropdown menu.
3. You’ll see a list of all your installed extensions. Toggle off the switch next to each extension to disable it.
4. Restart Google Chrome and see if the memory issue is resolved.
By disabling extensions, you can free up RAM and reduce memory usage, improving the performance of your browser. Remember that you can always re-enable extensions later if needed. If the issue persists, you may want to consider other solutions such as clearing your cache or updating your browser.
Creating New User Profile
Creating a New User Profile in Google Chrome
If you’re experiencing out of memory errors in Google Chrome, creating a new user profile can help resolve the issue. Follow these steps:
1. Open Google Chrome and click on the three-dot menu in the top-right corner.
2. Select Settings from the dropdown menu.
3. Scroll down and click on Advanced.
4. Under the “People” section, click on Add to create a new user profile.
5. Enter a name for the new profile and click on Add.
6. A new browser window will open with the new profile.
7. Test if the out of memory errors still occur in the new profile.
Creating a new user profile can help isolate the issue to a specific user profile and prevent the memory errors from affecting your browsing experience. Remember to transfer any important bookmarks or settings from the old profile to the new one.
Restart Your PC
If you’re experiencing out of memory errors on Google Chrome, a simple restart of your PC can help resolve the issue.
To do this, follow these steps:
1. Close all programs and save any important work you have open.
2. Click on the “Start” button in the bottom left corner of your screen.
3. Select “Restart” from the power options menu.
4. Wait for your PC to shut down and restart.
Note: Restarting your PC can help clear out any temporary files or processes that may be causing the memory errors in Google Chrome.
After the restart, open Google Chrome again and see if the out of memory errors persist. If they do, you may need to explore other troubleshooting methods or seek further assistance.
Remember, restarting your PC is a simple and effective solution that can help resolve various issues, including out of memory errors in Google Chrome.
Check Your Internet Connection
If you’re experiencing out of memory errors in Google Chrome, it’s important to first check your internet connection. A poor or unstable internet connection can often lead to these types of errors. To check your internet connection, follow these steps:
1. Open Google Chrome and go to any website or page.
2. Ensure that you have a stable internet connection by checking if the website loads quickly and without any interruptions.
3. If your internet connection is unstable or slow, try restarting your modem or router. This can often resolve connectivity issues.
4. If your internet connection is stable but you’re still experiencing out of memory errors, try closing any unnecessary tabs or applications that might be using up too much memory.
5. You can also try opening Chrome in Incognito mode, which disables extensions and other customizations that could be causing memory issues.
6. If the errors persist, you may need to free up memory on your system by closing other programs or restarting your computer.
By checking your internet connection and taking these steps, you can troubleshoot and resolve out of memory errors in Google Chrome.
Try Incognito Mode
Try using Incognito Mode when encountering Google Chrome Out of Memory Errors. This feature allows you to browse the internet without saving your browsing history or tracking cookies, which can help improve performance and reduce memory usage. To enable Incognito Mode, simply open Google Chrome and press Ctrl+Shift+N on your keyboard.
Additionally, closing any unnecessary tabs and extensions can help free up memory and prevent crashes. If you’re experiencing poor internet connectivity, consider restarting your router or contacting your service provider.
If the issue persists, you can try clearing your browser cache and cookies by pressing Ctrl+Shift+Delete.
Remember, Incognito Mode is not a permanent solution and should be used on a case-by-case basis. It’s always a good idea to regularly update your browser and check for any available patches or fixes.

Mark Ginter is a tech blogger with a passion for all things gadgets and gizmos. A self-proclaimed "geek", Mark has been blogging about technology for over 15 years. His blog, techquack.com, covers a wide range of topics including new product releases, industry news, and tips and tricks for getting the most out of your devices. If you're looking for someone who can keep you up-to-date with all the latest tech news and developments, then be sure to follow him over at Microsoft.