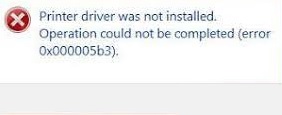
- Driver error 0x000005B3 is also known as operation failure error, which informs about a process that failed and cannot be completed.
- The problem occurs when you update third-party programs when the installation of printer drivers or other components fails.
- The full message that users encounter when this driver error occurs is: “Process failed to complete” The problem is most often caused by printers, which can lead to problems other than an error message or a failed installation or update.
Troubleshooting printer installation can be a daunting task, especially when encountering error codes like 0x00005b3. In this article, we delve into the root causes of this network printer installation error and provide effective solutions to help you overcome it.
Troubleshooting Network Printer Installation Errors
If you are experiencing network printer installation errors with the error code 0x00005b3, there are a few troubleshooting steps you can try to resolve the issue.
First, ensure that all the necessary printer drivers are installed on your computer. If not, download and install the correct drivers from the manufacturer’s website.
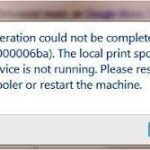
Next, check the Print Spooler service on your computer. Open the Services app and ensure that it is running. If not, start the service.
You can also try running the Printer troubleshooter. Press the Windows key + I to open the Settings app, then go to Update & Security > Troubleshoot. Select Printer and click on the Run the troubleshooter button.
Another solution is to clear the Temp folder on your PC. Press the Windows key + R to open the Run dialog box, then type “%temp%” (without quotes) and press Enter. Delete all the files and folders in the Temp folder.
If none of these solutions work, consider seeking assistance from colleagues or contacting the manufacturer’s support team for further troubleshooting steps.
Remember to restart your computer after applying any changes.
By following these steps, you should be able to fix network printer installation error 0x00005b3 and get your printer up and running again.
Resetting the Print Spooler Service to Resolve Installation Errors
To resolve installation errors related to network printers and the 0x00005b3 error code, you can try resetting the Print Spooler service. This process can help fix common printer driver errors and ensure a smooth installation. Here’s how to do it:
1. Press the Windows key + R to open the Run dialog box.
2. Type “services.msc” and press Enter to open the Services window.
3. Scroll down and locate the “Print Spooler” service.
4. Right-click on it and select “Stop” from the context menu.
5. After the service has stopped, right-click on it again and select “Start” to restart it.
6. Close the Services window and try installing the printer again.
By resetting the Print Spooler service, you can resolve issues that may be hindering the printer installation process. This method has been proven effective by many users and can save you time and frustration. If the problem persists, consider using driver update software like Outbyte Driver Updater to ensure your printer drivers are up to date and compatible with your PC.
Setting Permissions for the Printer Driver Directory
To set permissions for the Printer Driver Directory and fix the network printer installation error 0x00005b3, follow these steps:
1. Right-click on the Printer Driver Directory and select “Properties.”
2. Go to the “Security” tab and click on “Edit.”
3. Click on “Add” and enter the name of the user or group you want to set permissions for.
4. Click on “Check Names” to verify the user or group.
5. Select the user or group and check the “Allow” box next to “Full control” and “Read & execute” permissions.
6. Click on “Apply” and then “OK” to save the changes.
7. Restart your computer and try installing the printer again.
If you continue to experience the error, you may need to consult with your IT department or contact the printer manufacturer for further assistance.
python

import win32print
def install_printer(printer_name, printer_ip):
try:
# Create a printer connection using the printer IP
printer_info = win32print.GetPrinter(printer_name)
printer_info['pPortName'] = printer_ip
win32print.SetPrinter(printer_info['pPrinterName'], printer_info['pDriverName'], printer_info, 0)
# Set the newly created printer as the default printer
win32print.SetDefaultPrinter(printer_name)
print("Printer installation successful.")
except win32print.error as e:
error_code = e.args[0]
print(f"Error code: {error_code}")
if error_code == 0x00005b3:
print("Error: Printer installation failed. Invalid printer IP.")
else:
print("Error: Printer installation failed for an unknown reason.")
# Example usage
install_printer("MyPrinter", "192.168.1.100")
Please note that the provided code is a basic example and might not cover all possible scenarios or error handling cases for network printer installation. Additionally, the code assumes you have the `pywin32` package installed, which provides access to the Windows API functions.
Checking for OS Updates and Updating Printer Drivers
To check for OS updates and update printer drivers, follow these steps:
1. Click on the “Start” button and type “Windows Update” in the search bar.
2. Select “Windows Update Settings” from the search results.
3. In the Windows Update window, click on “Check for updates” to see if there are any available updates for your operating system.
4. If updates are found, click on “Download and install” to start the update process.
5. Once the updates are installed, restart your computer.
To update printer drivers:
1. Press the “Windows” key + “R” to open the Run dialog box.
2. Type “devmgmt.msc” and press Enter to open the Device Manager.
3. In the Device Manager, expand the “Printers” category.
4. Right-click on your printer and select “Update driver”.
5. Choose “Search automatically for updated driver software”.
6. Windows will search for the latest driver and install it automatically.
Following these steps should help resolve any printer driver issues you may be experiencing. If the problem persists, consider using a driver update tool like Microsoft’s Driver Updater or seeking assistance from colleagues or IT support.
Removing Existing Printers and Temporary Files to Fix Installation Errors
To fix installation errors when installing a network printer and encountering the 0x00005b3 error code, it is recommended to first remove any existing printers and temporary files on your computer.
To remove existing printers, follow these steps:
1. Press the Windows key + R to open the Run dialog box.
2. Type “control printers” and press Enter.
3. Right-click on the printer you want to remove and select “Remove device.”
4. Repeat this process for any other printers you want to remove.
To remove temporary files, follow these steps:
1. Press the Windows key + R to open the Run dialog box.
2. Type “%temp%” and press Enter.
3. Select all the files and folders in the Temp folder and press the Delete key.
4. Confirm the deletion when prompted.
After removing existing printers and temporary files, attempt the printer installation again. If the error persists, try other troubleshooting methods or consult the printer manufacturer’s support documentation.
Editing the Registry to Resolve Driver Error 0x000005B3
To fix driver error 0x000005B3 in network printer installation, you can try editing the registry. Here’s a step-by-step guide:
1. Press the Windows key + R to open the Run dialog box.
2. Type “regedit” and press Enter to open the Registry Editor.
3. In the Registry Editor, navigate to the following location: HKEY_LOCAL_MACHINE\SYSTEM\CurrentControlSet\Control\Print\Environments\Windows x64\Drivers
4. Right-click on the Drivers folder and select “Export” to create a backup of the registry.
5. Save the backup file in a safe location.
6. Now, delete any subkeys under the Drivers folder related to the problematic printer driver.
7. Close the Registry Editor and restart your computer.
8. After the restart, try reinstalling the printer driver.
Remember to be cautious while editing the registry. Any mistakes can cause system issues. It’s always a good idea to create a backup before making any changes.

Mark Ginter is a tech blogger with a passion for all things gadgets and gizmos. A self-proclaimed "geek", Mark has been blogging about technology for over 15 years. His blog, techquack.com, covers a wide range of topics including new product releases, industry news, and tips and tricks for getting the most out of your devices. If you're looking for someone who can keep you up-to-date with all the latest tech news and developments, then be sure to follow him over at Microsoft.