- Microsoft has published a new KB4526424 support article detailing the problem and two suggestions for fixing it.
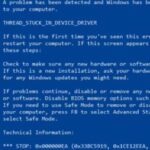
- Microsoft notes that the memory integrity security feature may prevent drivers from being properly installed on Windows 10 devices.
- The company recommends that administrators try to find an updated driver that doesn’t have the problem.
- Microsoft has a permanent solution to this problem, but it is still recommended that you use secure device drivers for your own safety.
Unveiling the Ultimate Solution: Troubleshooting the ‘Driver Cannot Load on This Device’ Error
Update Driver to Fix Loading Issue
To fix the loading issue caused by a driver error on your device, you need to update the driver. Here’s how:
1. Open Device Manager by right-clicking on the Start button and selecting “Device Manager.”
2. Locate the device with the error in the Device Manager window. It will have a yellow exclamation mark next to it.
3. Right-click on the device and select “Update driver.”
4. Choose the option to automatically search for updated driver software. Windows will search for the latest driver version online.
5. If Windows finds a new driver, it will download and install it. Follow the on-screen instructions to complete the process.
Updating your driver can resolve compatibility issues and improve the performance of your device. It’s always recommended to keep your drivers up to date for optimal functionality.
For more information and assistance, visit the Microsoft website or contact our support team.
Roll Back to Previous Driver Version
Rolling back to a previous driver version can help resolve the “A Driver Cannot Load on This Device” error. Here’s how to do it:
1. Press Windows Key + X and select Device Manager.
2. Locate the device with the driver issue and right-click on it.
3. Select Properties and go to the Driver tab.
4. Click on Roll Back Driver and follow the on-screen instructions.
5. Restart your computer to apply the changes.
Rolling back the driver can resolve compatibility issues and restore functionality to your device. However, if the error persists, consider updating your drivers using a reliable tool like Driver Updater from trusted partners like Microsoft.
Remember to regularly update your drivers to ensure optimal performance and security for your devices.
Disable Memory Integrity to Resolve Loading Problem
disable memory integrity to resolve the loading problem.
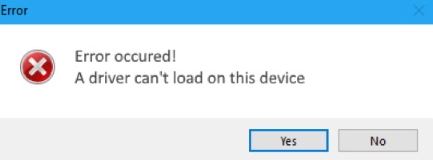
If you’re encountering a “A driver cannot load on this device” error message, disabling memory integrity may help resolve the issue. Here’s how to do it:
1. Press the Windows key + I to open the Settings app.
2. Click on “Windows Security” and then select “Device security”.
3. Under “Core isolation”, click on “Memory integrity”.
4. Toggle the switch to “Off” to disable memory integrity.
Disabling memory integrity can sometimes resolve loading problems caused by incompatible driver versions or conflicts with certain software. However, keep in mind that this may affect the security of your device, so proceed with caution.
If you continue to experience issues, consider updating your drivers using a reliable driver updater tool like Driver Updater. This can help ensure that you have the latest compatible drivers for your device, minimizing the likelihood of encountering errors.
Remember to restart your computer after making any changes to apply the settings.
Remove UpperFilters and LowerFilters Registry Values to Fix Loading Error
- Open the Registry Editor by pressing Windows Key + R to open the Run dialog box, then type regedit and press Enter.
- In the left pane of the Registry Editor, navigate to the following location: HKEY_LOCAL_MACHINE\SYSTEM\CurrentControlSet\Control\Class\{4D36E965-E325-11CE-BFC1-08002BE10318}.
- In the right pane, locate and delete the UpperFilters and LowerFilters values. To do so, right-click on each value and select Delete.
- Confirm the deletion of the values when prompted by clicking Yes.
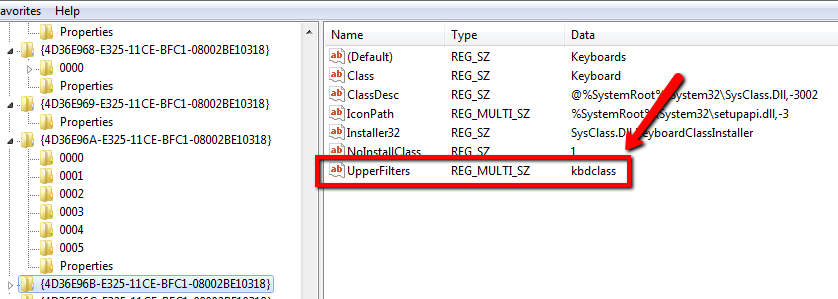
- Close the Registry Editor and restart your computer for the changes to take effect.
Perform System Restore for Resolving Loading Issue
Perform System Restore to Resolve Loading Issue
If you’re experiencing a “A Driver Cannot Load on This Device” error message, performing a system restore can help resolve the issue. Here’s how:
1. Click on the Start menu and search for “System Restore.”
2. Open the System Restore tool and select “Choose a different restore point.”
3. Choose a restore point that was created before the error occurred. If you’re unsure, select the most recent restore point.
4. Follow the on-screen instructions to complete the system restore process. This will revert your computer’s settings and drivers to a previous working state.
5. After the system restore is complete, restart your computer.
Performing a system restore can often fix driver-related loading issues, allowing your device to function properly again. Remember to regularly update your drivers to avoid future errors.
For more troubleshooting tips and helpful articles, visit our website.

Mark Ginter is a tech blogger with a passion for all things gadgets and gizmos. A self-proclaimed "geek", Mark has been blogging about technology for over 15 years. His blog, techquack.com, covers a wide range of topics including new product releases, industry news, and tips and tricks for getting the most out of your devices. If you're looking for someone who can keep you up-to-date with all the latest tech news and developments, then be sure to follow him over at Microsoft.